Build your first agent for Superhuman Go
This tutorial builds an agent with the Packs SDK and installs it in Go. You'll set up a project, write the code, and try the result.
Goal
Build a while-writing agent that watches the page for package tracking numbers and shows a status card for each one.
You need a Superhuman account with:
- A Pro plan or higher, to install and use the agent in Go.
- Doc Maker access in your Docs workspace, to create the Pack.
- A Go client installed (Chrome or Edge extension, or the Mac or Windows desktop app).
There are two options for how to build the agent in this tutorial, with a tab for each:
- CLI - Work locally with the
packscommand line tool. - Pack Studio - Work entirely in the browser, with nothing to install.
Set up the project
Building with the CLI requires node, npm, and git.
-
Create a directory for the agent and initialize the project.
mkdir package-tracker
cd package-tracker
npm init --yes
npm install --save @superhuman/plugins-sdk
The SDK bundles the
packsCLI along with the libraries used to build a Pack. -
Scaffold the files for a new Pack.
npx packs init --agent --name "Package Tracker"This creates a
pack.tswith some starter code, which you'll replace in the next section. -
Register an API token, which the CLI uses to talk to the platform.
npx packs registerYou'll be prompted to generate a token in your browser. Name the token, copy it, and paste it back into the terminal. The token is saved to
.coda.json, and only needs to be done once per directory. -
Create the empty Pack that will hold the agent.
npx packs create pack.ts --name "Package Tracker"This prints the Pack Studio URL and writes the new Pack's ID to
.coda-pack.json.
The Pack Studio is the code editor built into Superhuman Docs, and there's nothing to install.
-
Open https://pack.new to create a new Pack.
-
Choose to start from scratch rather than from one of the examples.
-
Click the Pack name Untitled Pack in the upper left and change it to "Package Tracker".
Write the code
Now let's add some code to the Pack. If you're using the CLI replace the contents of pack.ts, and in the Pack Studio replace the contents of the editor.
Start by importing the SDK and creating the agent definition.import * as sdk from "@superhuman/plugins-sdk";
export const agent = sdk.newAgent();
Set the instructions the agent should follow with This agent's instructions tell it to find tracking numbers on the page and what to put on each card.setInstructions(). They are passed to the LLM when the agent is run.import * as sdk from "@superhuman/plugins-sdk";
export const agent = sdk.newAgent();
agent.setInstructions(`
Find each unique package tracking number on screen.
1. Look up its status with the right connector.
2. Show a card next to it with:
- Carrier
- Current status
- Estimated delivery date, if available
- Latest location and update time, if available
If a number is invalid or the lookup fails, show
a card saying why. One card per number.
`);
Set what tools the agent can access with This agent uses the FedEx and UPS connectors to look up a tracking number. Anything left out of setTools(). Connectors are referenced by connectorId.setTools() is off, so the agent can only call the connectors you list.import * as sdk from "@superhuman/plugins-sdk";
export const agent = sdk.newAgent();
agent.setInstructions(`
...
`);
agent.setTools({
connectors: [
// FedEx
{ connectorId: 1070 },
// UPS
{ connectorId: 1071 },
],
});
Add a while-writing routine with The addDefaultRoutine(). The agent runs automatically as the user types.condition limits the routine to running only when a tracking number is in the writing, and blockedDomains keeps it from running on the carriers' own tracking pages.import * as sdk from "@superhuman/plugins-sdk";
export const agent = sdk.newAgent();
agent.setInstructions(`
...
`);
agent.setTools({
// ...
});
agent.addDefaultRoutine({
name: "Find tracking numbers",
trigger: {
kind: sdk.DefaultTriggerKind.WhileWriting,
condition: "Includes a package tracking number.",
blockedDomains: ["fedex.com", "ups.com"],
},
});
View the full code
import * as sdk from "@superhuman/plugins-sdk";
export const agent = sdk.newAgent();
agent.setInstructions(`
Find each unique package tracking number on screen.
1. Look up its status with the right connector.
2. Show a card next to it with:
- Carrier
- Current status
- Estimated delivery date, if available
- Latest location and update time, if available
If a number is invalid or the lookup fails, show
a card saying why. One card per number.
`);
agent.setTools({
connectors: [
// FedEx
{ connectorId: 1070 },
// UPS
{ connectorId: 1071 },
],
});
agent.addDefaultRoutine({
name: "Find tracking numbers",
trigger: {
kind: sdk.DefaultTriggerKind.WhileWriting,
condition: "Includes a package tracking number.",
blockedDomains: ["fedex.com", "ups.com"],
},
});
Upload & install
The code needs to be uploaded to Superhuman's servers and then the agent can be installed.
-
Upload the code.
npx packs upload pack.ts -
Install the agent into your account.
npx packs agent install pack.ts -
Open the agent's settings URL, as output by the command above.
Certain changes require reinstall
When you install an agent the routines are copied to your instance. If you change your routines code you'll need to reinstall the agent to test it. After uploading the new Pack version, run npx packs agent install pack.ts --reinstall.
-
Click the Build button.
This checks your code for errors and creates a new version. It can take a few seconds to complete.
-
When the build finishes, click Install in Go.
-
Click Install agent.
Finish agent setup
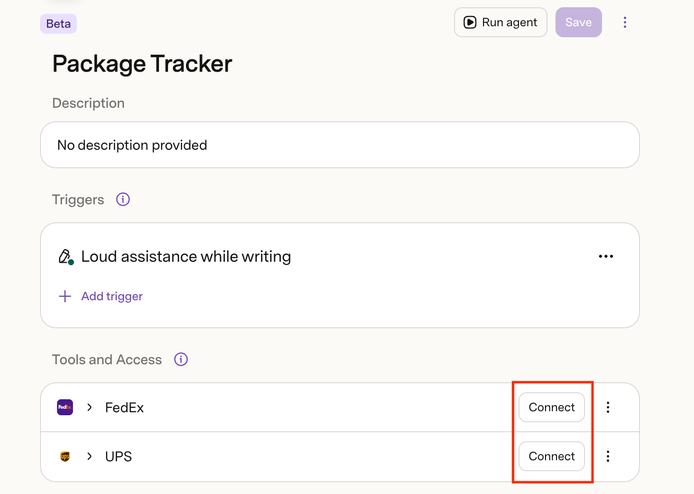
On the agent's settings screen, click Connect next to the FedEx and UPS connectors.
These connectors don't require credentials, so they connect immediately. Other connectors may require credentials. Clicking Connect starts the sign-in flow.
Try it in Go
The agent is installed, so it's time to try it on a page and see the tracking card.
Open textarea.org (a simple text editor, useful for testing agents) and paste in the following text:I sent the packages today, and the tracking numbers
are 1ZAF99490399806464 and 495933499081.
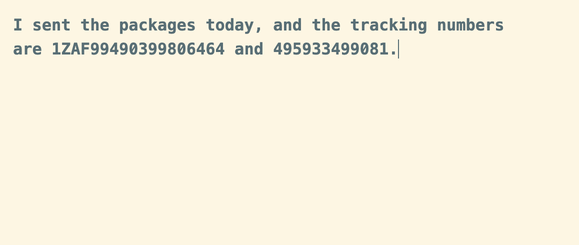
Wait a few moments. The tracking numbers should be underlined, and hovering one should show a shipping card.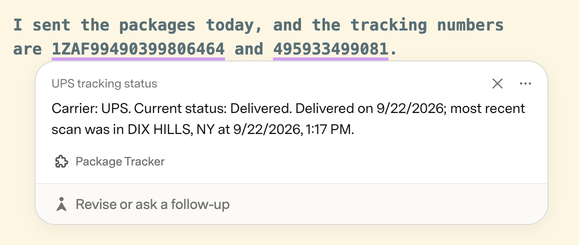
Troubleshooting
If you've waited for a while and no underlines appear, try running the agent manually. Open the writing suggestions panel. Find the Package Tracker agent in the list, open its menu, and click Recheck.
If the card says the tracking number is invalid, check whether the account has data loss prevention enabled. That feature rewrites sensitive-looking text before the agent sees it, which can change a tracking number.
Next steps
Now that you have an agent running, here are some more resources you can explore:
- Examples - See more examples of working agents.
- Routines and triggers - Set up your agent to run automatically as the user works.
- Screen annotations - Add comments or rewrites to the screen to inform the user.