Skip to content
Any aluminum face over 96” will be built in sections and then bolted together on site.A ⅛” router bit is the minimum size used for aluminum faces.90 degree corners will be slightly rounded by the ⅛” router bit.Keep any copy or graphics minimum 2 ½” from the outside cabinet edge to allow space for the internal structure around the perimeter.
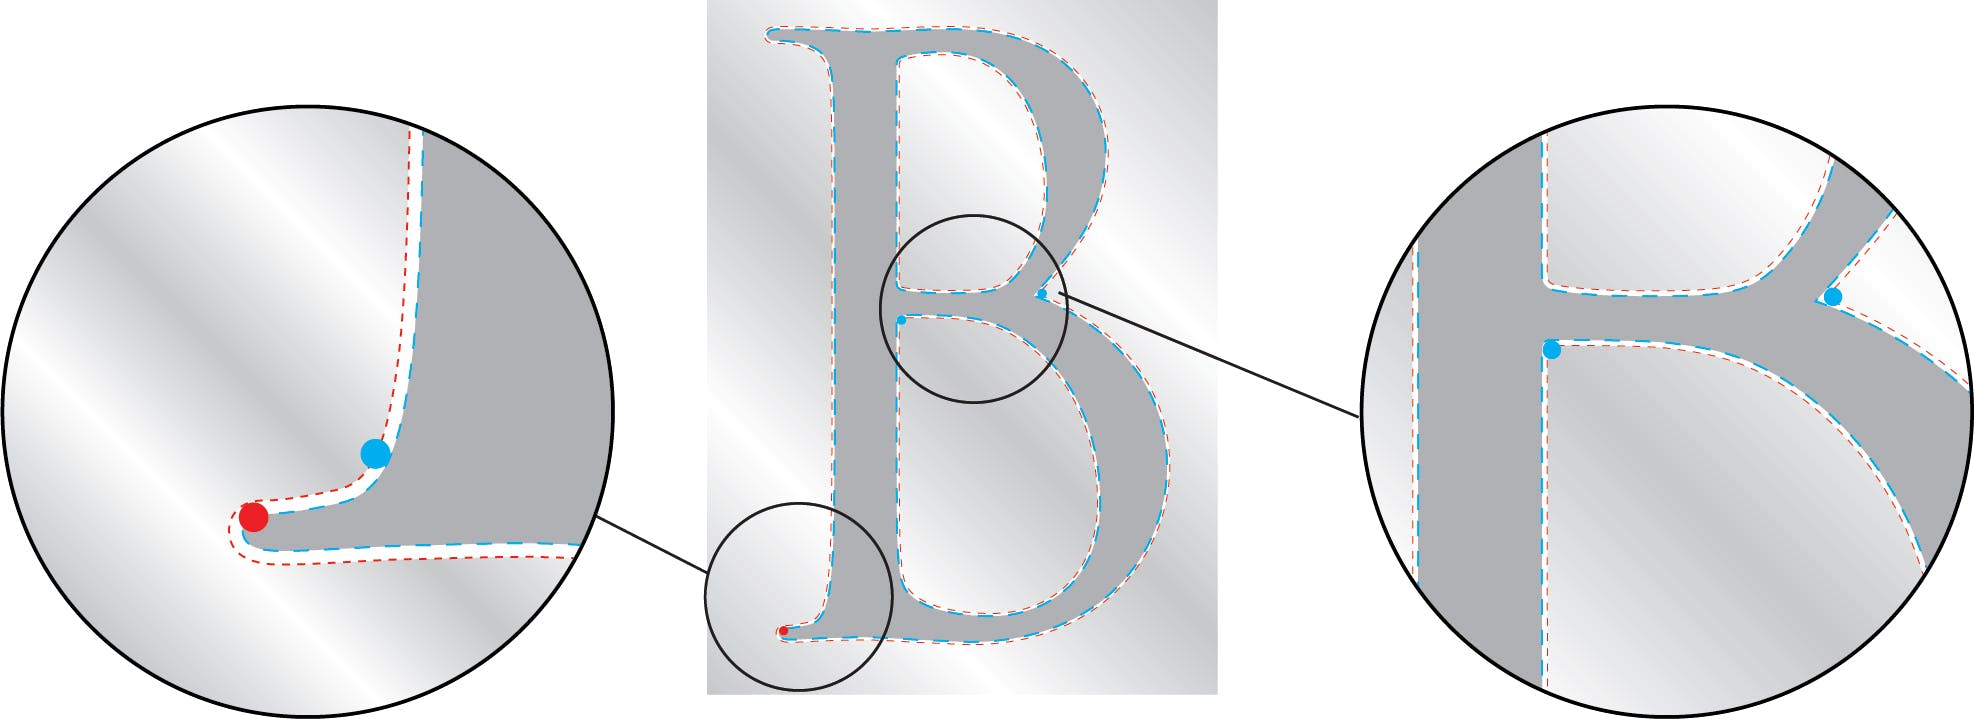
The red and blue circles in the image below represent the size of the ⅛” router bit.Notice how the inside corners will be rounded off, as the router bit is larger than the corner. (Refer to the blue circles in the enlargement detail to the right).Due to the thin stroke of this serifed letter style, the original outline of the letters becomes the cut path of the acrylic. (Refer to the blue dashed line).The cut path for the aluminum is offset ¹⁄₁₆” outside of the original path (refer to the red dashed line). This is required so that the path for both the acrylic and aluminum is possible.
With bolder letter styles, the cut path of the aluminum and acrylic can be set up differently (this is the preferred method). See image below.(1) Routed acrylic letter inset ¹⁄₁₆” from original path of letter.(2) The original letter outline path becomes the cut path of the aluminum face background.(3) Aluminum sheet.
Design Toolkit
- Pages
Share
Explore
 Push Through & Routed Face Details
Last edited 1075 days ago by Adam Doll.
Routed & push through / routed & backed copy:
Details of a routed & push through letter

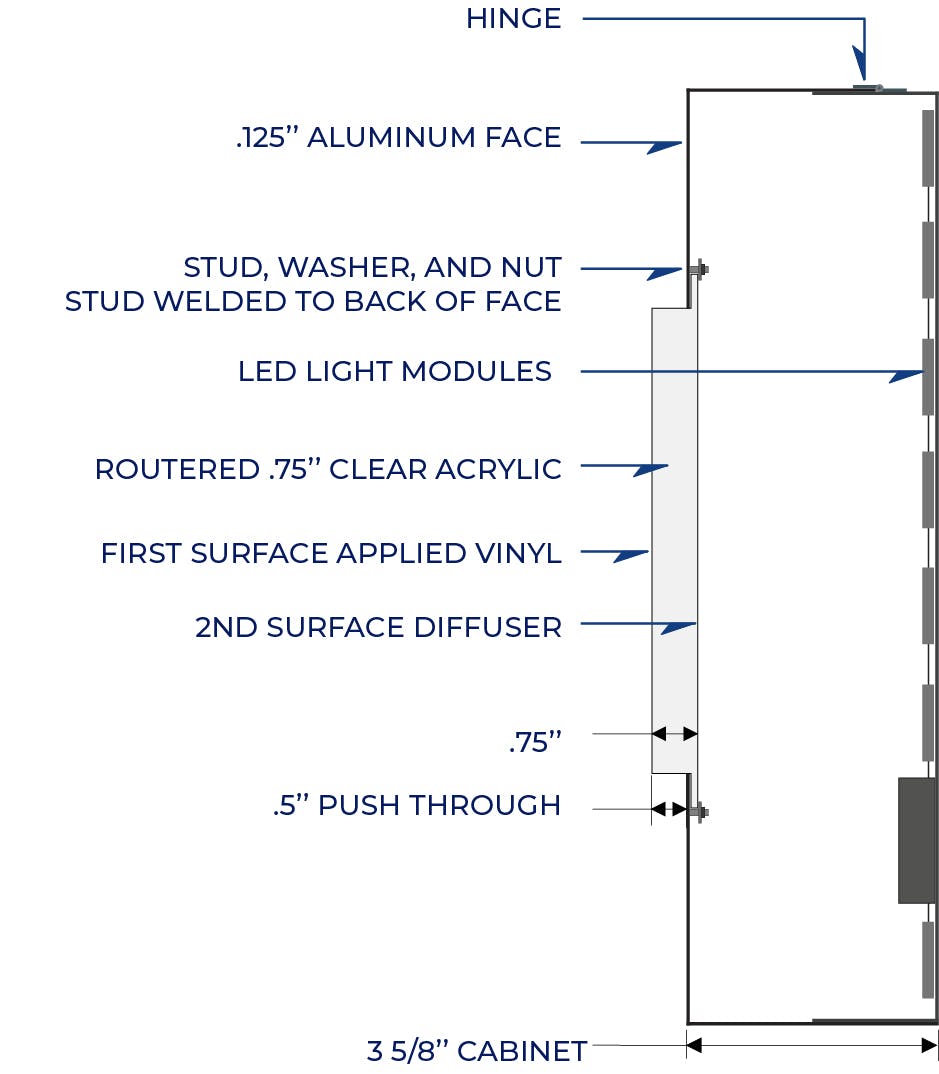
Routed & push through lettering - Box & pan cabinet side section

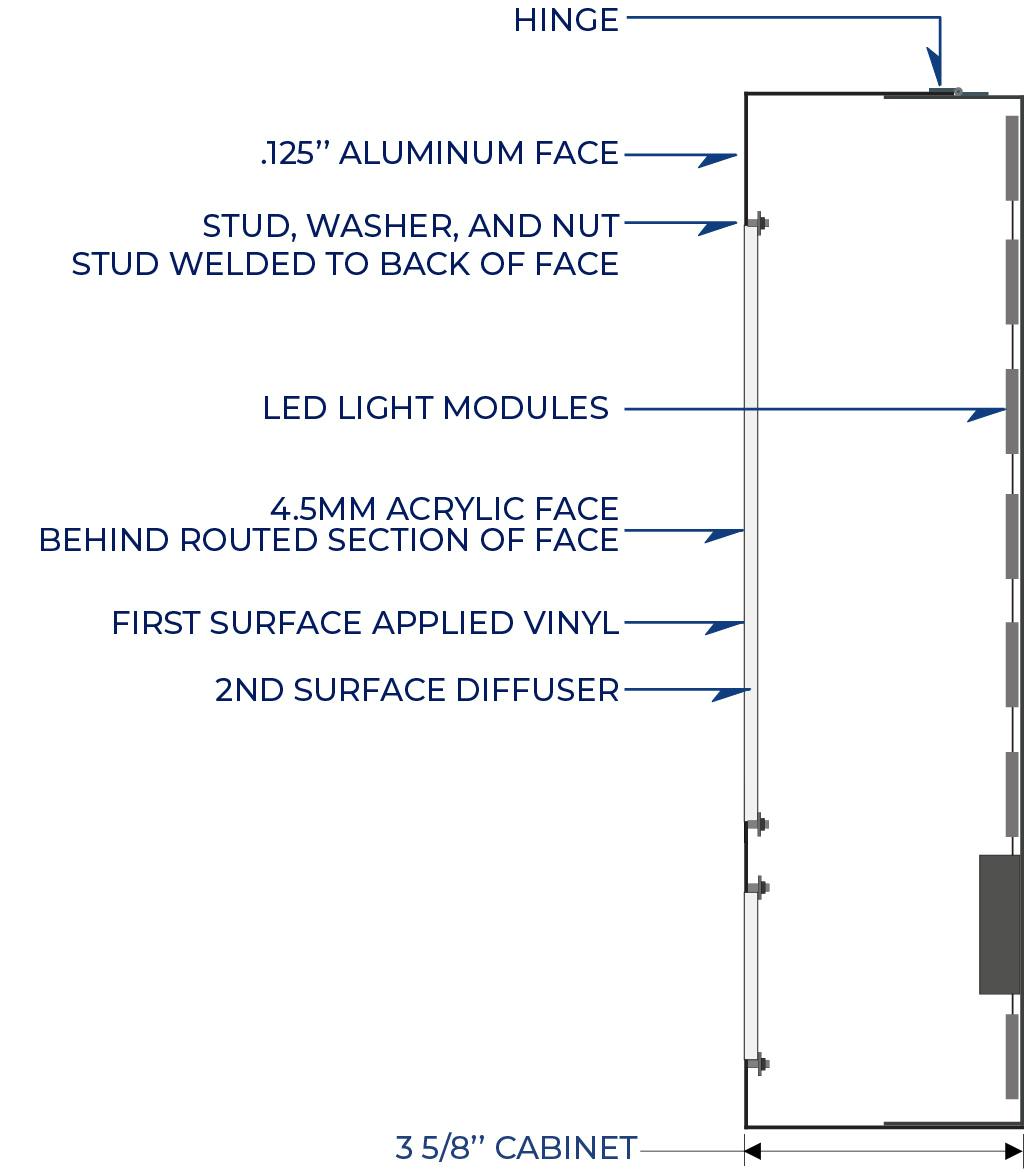
Routed & backed lettering side section

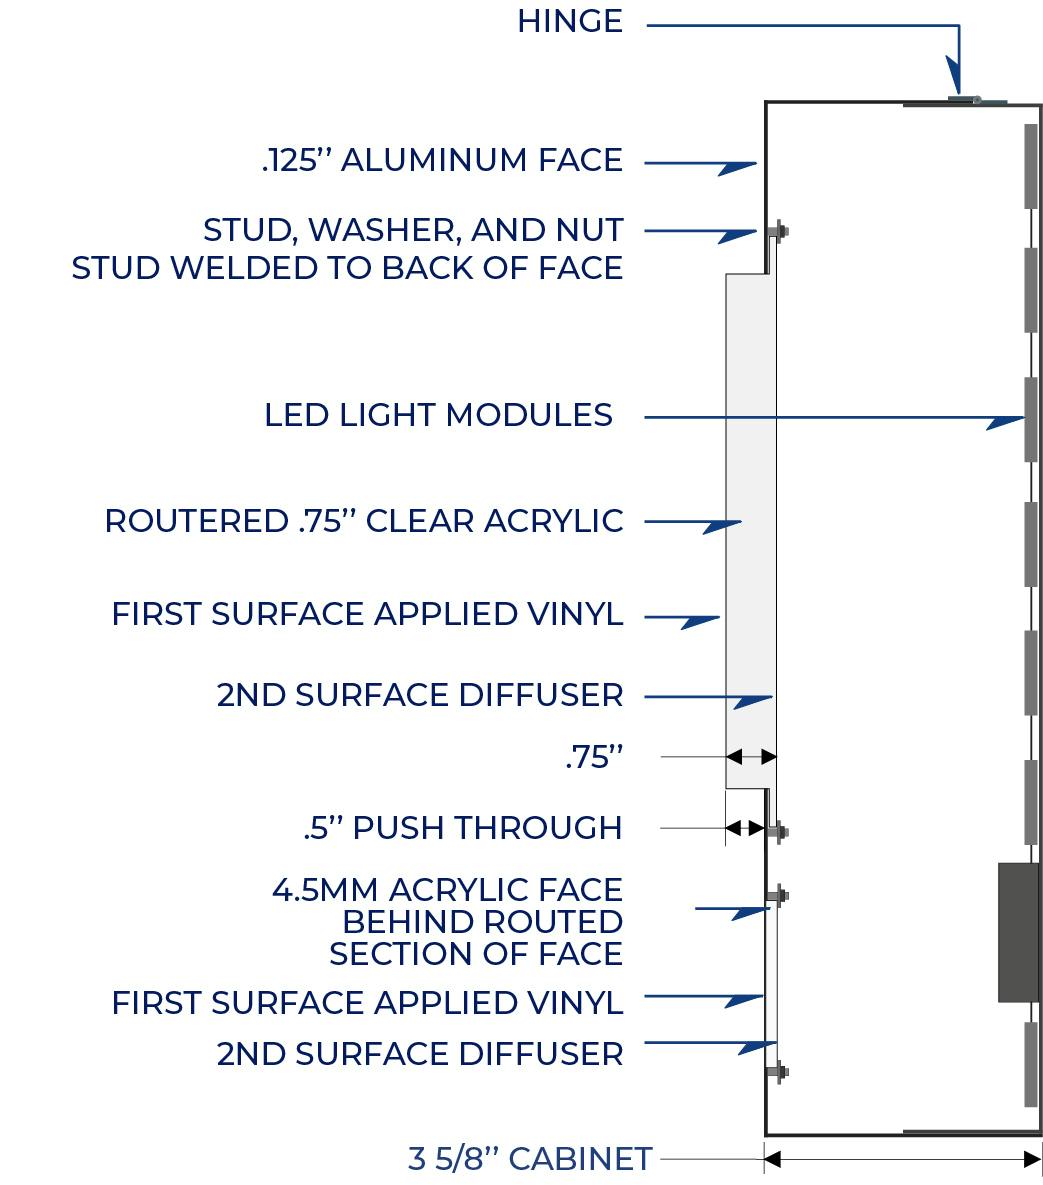
Pushed through plus routed and backed side section

Want to print your doc?
This is not the way.
This is not the way.

Try clicking the ··· in the right corner or using a keyboard shortcut (
CtrlP
) instead.