Learn to authenticate with an API using OAuth2
Before a Pack can use an API to fetch private data, it must first be given access by the user. The most popular technology for granting that authorization is OAuth2. In this tutorial you'll create a formula that access a user's data from an API that implements OAuth2.
Goal
Build a Tasks formula that retrieves the user's open tasks in Todoist.
Before starting this tutorial, make sure you have completed:
- One of the Get started tutorials, either In your browser or On your local machine.
- The Call an API tutorial, which covers how to make an HTTP request.
What is OAuth2?
OAuth is a standard way for a user to connect one application to another, without needing to share their password. OAuth2 is the most recent version of the protocol, and has been widely adopted across the industry.
To learn about why OAuth was created an how it works at a high level, we recommend watching one of the following videos:
Read the API docs
Although OAuth2 is a standard, there is a lot of variation in how APIs choose to implement it. When working with a new API, first consult their OAuth2 documentation carefully to determine the specific requirements.
Todoist describes their OAuth2 support in their developer docs. There are a few key pieces of information you need to obtain from their documentation:
To start the OAuth2 flow, the user is directed to the website of the API provider to sign in and/or grant access to the application. The URL to open in the user's browser is called the authorization URL. For Todoist this URL is The
https://todoist.com/oauth/authorize
client_id, scope, and state parameters mentioned in the documentation will be added automatically by the Pack.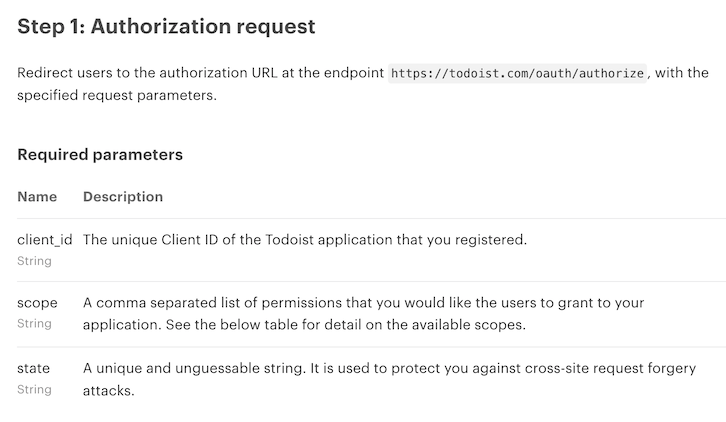
After the user approves the access request, the Pack is given a temporary code that can be exchanged for an access token. To perform that exchange the Pack makes a request to the API's token URL. For Todoist this URL is The
https://todoist.com/oauth/access_token
client_id, client_secret, and code parameters mentioned in the documentation will be added automatically by the Pack.
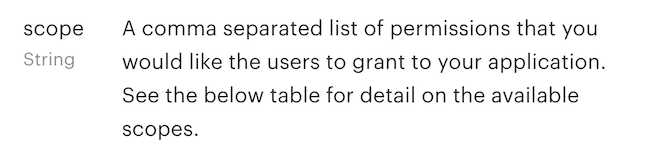
Many APIs allow the application to request access to only a limited set of permissions, which are shown to the user when approving access. A scope is an identifier that corresponds to a given permission or set of permissions in the API. The Todoist API supports a few different scopes. When building a Pack it's usually best to request the most narrow scope that allows your Pack to function. Our Pack only requires reading the user's tasks, so the
data:read scope is sufficient.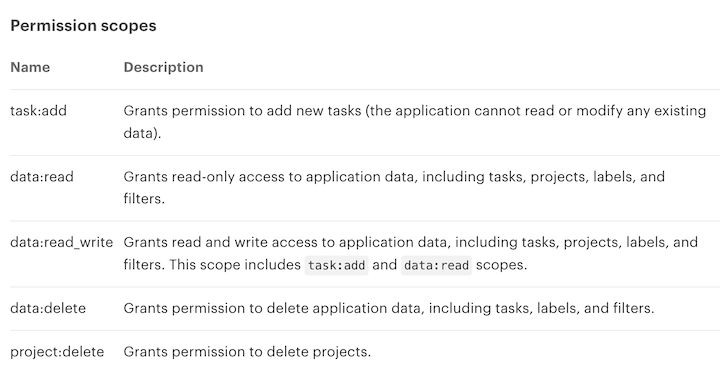
While the OAuth2 standard provides a common foundation, many providers add their own unique requirements that need to be accounted for. Learning to spot these can be difficult, especially if you are new to OAuth2 and don't know what "normal" OAuth2 entails. The Todoist API deviates from the standard by requiring that scopes be comma-separated, instead of the default space-separated. Although we currently only plan to use one scope, this is important to note if our Pack later requires additional permissions.
Register your application
Every application needs to identify itself during the OAuth2 flow, so that the user knows who they are granting access to. This is done using a client ID and secret, which are provided when you register your application with the API provider.
Most API providers host a developer console for creating and managing applications, and you should consult the API documentation to determine the exact steps required.
Open the Todoist App Management Console and sign in with your Todoist account. Click the Create a new app button to start the process of registering an application.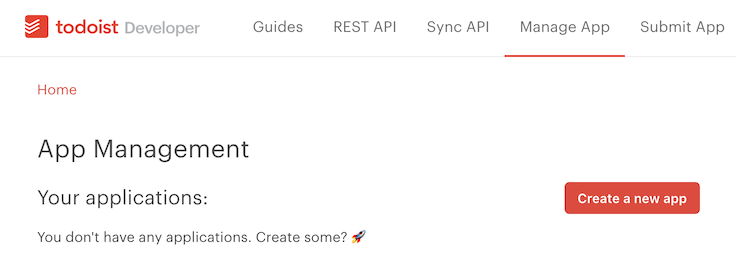
Enter a name for your application in the App name field. This will be shown later to the user when they are approving access. For the App service URL enter Click the Create app button.https://coda.io for now. Once your Pack is complete, change it to the URL of the listing page for your Pack.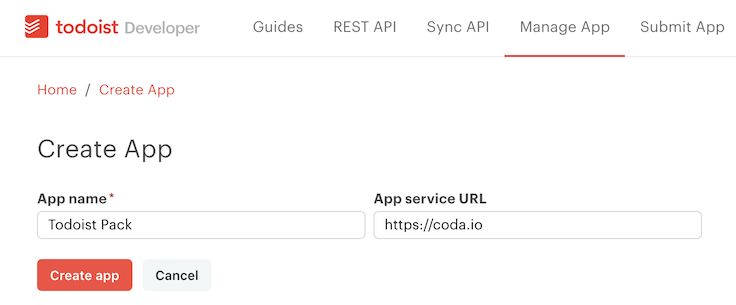
Hold tight
There is a bit more configuration needed to complete the application setup, but we'll get to that in a later step. Keep this tab open as you'll need to refer back to it later.
Design the formula
You're just about ready to start writing code, but before diving in let's design the formula behavior.
The Todoist API documentation provides an endpoint for listing tasks, which doesn't require any parameters. The API returns a bunch of metadata for each task, but for simplicity let's just return the text of the task itself.
Tasks() ==> ["Pick up milk", "Walk the dog", "Clean the bathroom"]
Write the code
Now that we've got the OAuth2 URLs, scopes, client ID and secret we're ready to start coding the Pack.
Add the standard Pack boilerplate and declare the network domain. Define a formula called For the result type use Tasks which doesn't take any parameters.Array since we will be returning a list of tasks, specifying in the items field that each item in the array will be a String.import * as coda from "@codahq/packs-sdk";
export const pack = coda.newPack();
pack.addNetworkDomain("todoist.com");
pack.addFormula({
name: "Tasks",
description: "A list of your current tasks.",
parameters: [],
resultType: coda.ValueType.Array,
items: { type: coda.ValueType.String },
execute: async function ([], context) {
// TODO
return [];
},
});
Make a GET request to the Tasks endpoint to retrieve the user's active tasks. This returns an array of task objects in the response body. For each task object, extract the task's text content from the content field and return that array as the formula result.import * as coda from "@codahq/packs-sdk";
export const pack = coda.newPack();
pack.addNetworkDomain("todoist.com");
pack.addFormula({
// ..
execute: async function ([], context) {
let response = await context.fetcher.fetch({
method: "GET",
url: "https://api.todoist.com/rest/v2/tasks",
});
let tasks = response.body;
let results = [];
for (let task of tasks) {
results.push(task.content)
}
return results;
},
});
Coda handles all of the OAuth logic for Packs, all you need to do is define some settings. This starts by adding an authorization configuration to the Pack. Use setUserAuthentication here, since we want each user to sign in with their own Todoist account. Then specify the type of authentication to use as OAuth2.import * as coda from "@codahq/packs-sdk";
export const pack = coda.newPack();
pack.setUserAuthentication({
type: coda.AuthenticationType.OAuth2,
});
pack.addFormula({
// ...
});
To handle the OAuth flow, Coda needs to know the URLs the provider has for granting authorization and generating tokens. Set the authorizationURL and tokenUrl fields using the values found in the Todoist API documentation.import * as coda from "@codahq/packs-sdk";
export const pack = coda.newPack();
pack.setUserAuthentication({
type: coda.AuthenticationType.OAuth2,
authorizationUrl: "https://todoist.com/oauth/authorize",
tokenUrl: "https://todoist.com/oauth/access_token",
});
pack.addFormula({
// ...
});
You must also specify which scopes to request, if any. The We also learned from the API documentation that Todoist uses a non-standard scope separator. Luckily the Pack SDK supports this variation, and it can be configured using the scopes field accepts an array of scope strings, although in this case we only need a single scope.scopeDelimiter field.import * as coda from "@codahq/packs-sdk";
export const pack = coda.newPack();
pack.setUserAuthentication({
type: coda.AuthenticationType.OAuth2,
authorizationUrl: "https://todoist.com/oauth/authorize",
tokenUrl: "https://todoist.com/oauth/access_token",
scopes: ["data:read"],
scopeDelimiter: ",",
});
pack.addFormula({
// ...
});
Build the Pack
All the code is written, but we're not ready to start using the Pack just yet. Build a new version of the Pack before moving on to the next step.
View the full code
import * as coda from "@codahq/packs-sdk";
export const pack = coda.newPack();

pack.addNetworkDomain("todoist.com");

pack.setUserAuthentication({
  type: coda.AuthenticationType.OAuth2,
  authorizationUrl: "https://todoist.com/oauth/authorize",
  tokenUrl: "https://todoist.com/oauth/access_token",
  scopes: ["data:read"],
  scopeDelimiter: ",",
});

pack.addFormula({
  name: "Tasks",
  description: "A list of your current tasks.",
  parameters: [],
  resultType: coda.ValueType.Array,
  items: { type: coda.ValueType.String },
  execute: async function ([], context) {
    let response = await context.fetcher.fetch({
      method: "GET",
      url: "https://api.todoist.com/rest/v2/tasks",
    });
    let tasks = response.body;
    let results = [];
    for (let task of tasks) {
      results.push(task.content)
    }
    return results;
  },
});
Add credentials
In the software world it's a best practice to keep your credentials separate from your code. This makes it easier to share your code with others, and allows you to update credentials quickly in they are compromised and need to be reset.
The code we've written so far includes only public information about the OAuth flow, but the last step is to enter the private credentials (client ID and secret) associated with your Todoist application.
Click on the Settings tab on the left side of the Pack Studio to bring up the settings for your Pack. Click the Add OAuth Credentials button. If you don't see this button, make sure you have built a new version of your Pack that includes the OAuth configuration code.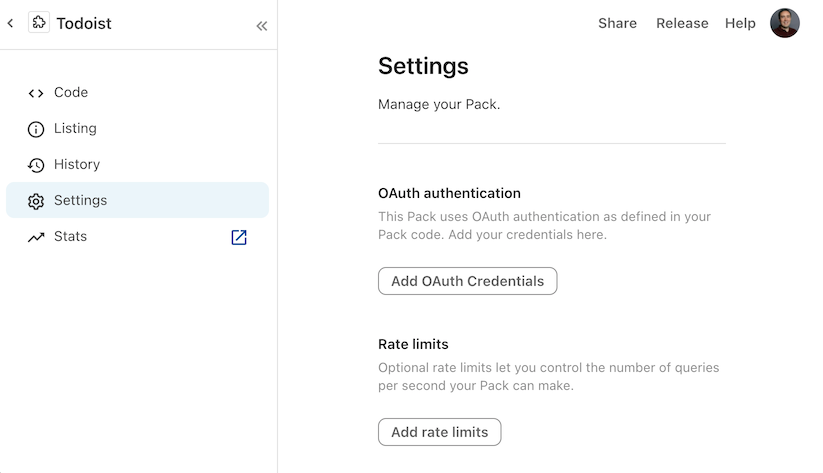
The field Redirect URL shows the redirect URL for your Pack. This is the URL that Todoist should send users back to after they have approved access to their account. Click the copy icon () next to the redirect URL to copy it to your clipboard.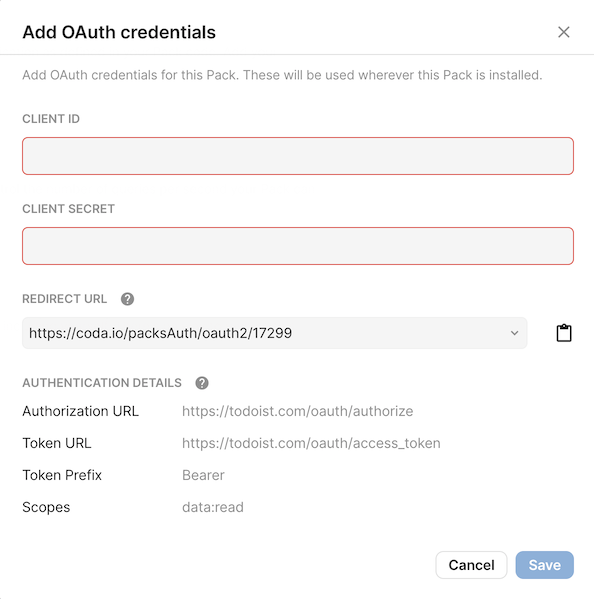
Go back to your application settings in the Todoist App Management Console. Set the OAuth redirect URL field to the value you copied above and click the Save settings button. Todoist will use this to verify that no other applications use this set of credentials. Next copy the Client ID and Client secret shown on that screen. We need to provide this to your Pack so Coda can properly identify it during the OAuth flow.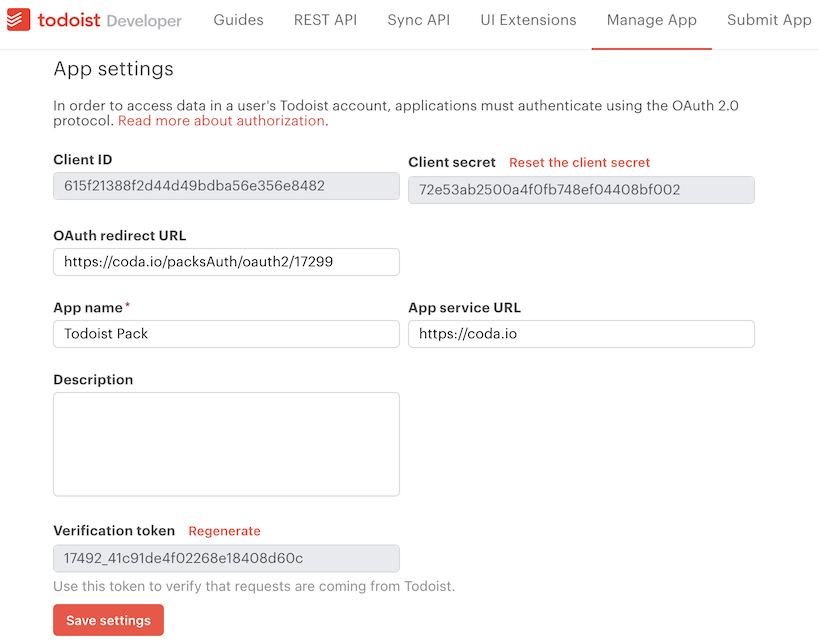
Back in the Add OAuth credentials dialog open in the Pack Studio, enter the client ID and secret you copied. Click the Save button.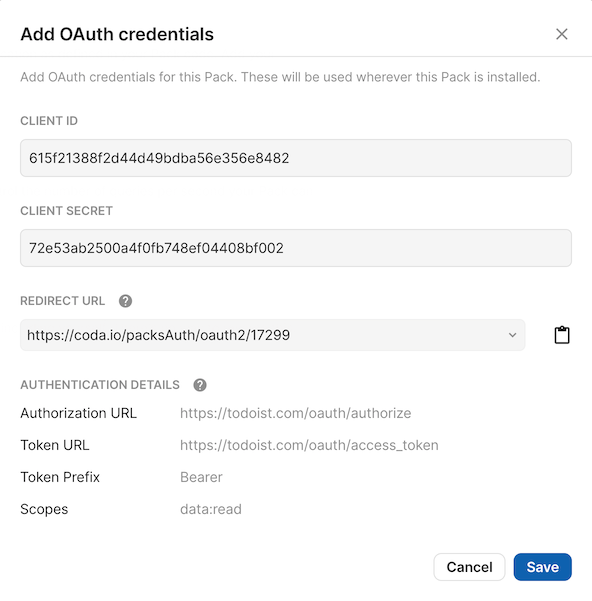
Sign in
Now that the Pack is built and the credentials set, we're finally ready to sign in and try it in a doc.
Create a new doc, install the Pack, and then drag the The formula requires an account to work, so it will prompt you to connect one. Click the Connect to Todoist button.Tasks() formula into the doc.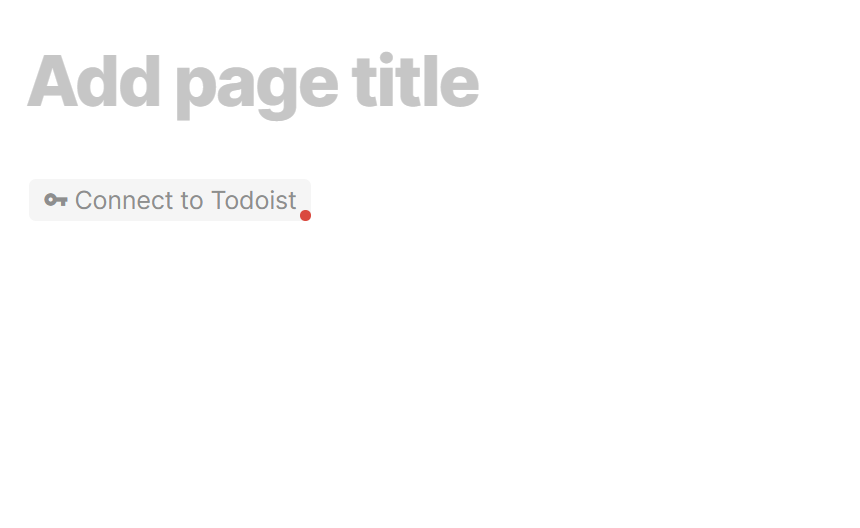
In the resulting dialog click the button Sign in with Todoist.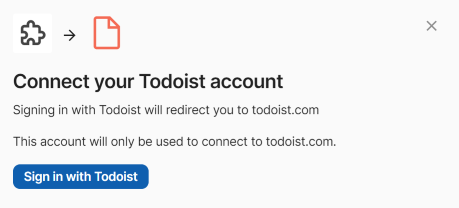
Coda opens the Todoist website in a new tab and shows the access prompt. The permissions listed reflect the scopes requested by the Pack. Click the Agree button.
After approving access, the Todoist tab will close and you'll be back in your Coda doc. Click the Complete setup button.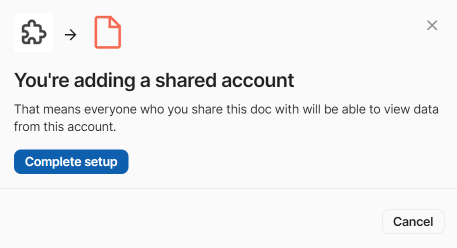
Try it out
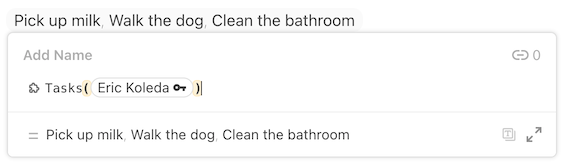
Add the Tasks() formula to the doc. If everything is working correctly you should see a list of tasks from your Todoist account.
You'll notice that it takes in an account as a parameter, and it should auto-select the account you just connected. This account parameter will appear before any other parameters you defined for the formula.
Next steps
Now that you have an understanding of how to use OAuth2 in Packs, here are some more resources you can explore:
- Authentication guide - Information about how authentication works in Packs.
- OAuth guide - More in-depth information about how to set up OAuth authentication.
- Sample code - A collection of sample Packs that use OAuth2 to connect to various popular APIs.