



5 min read
Using the Slack Pack
Bring your team’s Slack communication into your docs so updates, reminders, and project changes actually reach the right people.

What's covered:
- How to send messages to specific Slack channels
- How to create buttons
- How to automate Slack messages

What you’ll use:
- Slack Pack
- Buttons
- Automations
New to automations or Packs?
Before you dive in, it’s helpful to have a basic understanding of automations and Packs. You can check out this guide on automations and this article on Packs for a quick overview before jumping in.Add the Slack Pack
Start by adding the Slack Pack and connecting your account.
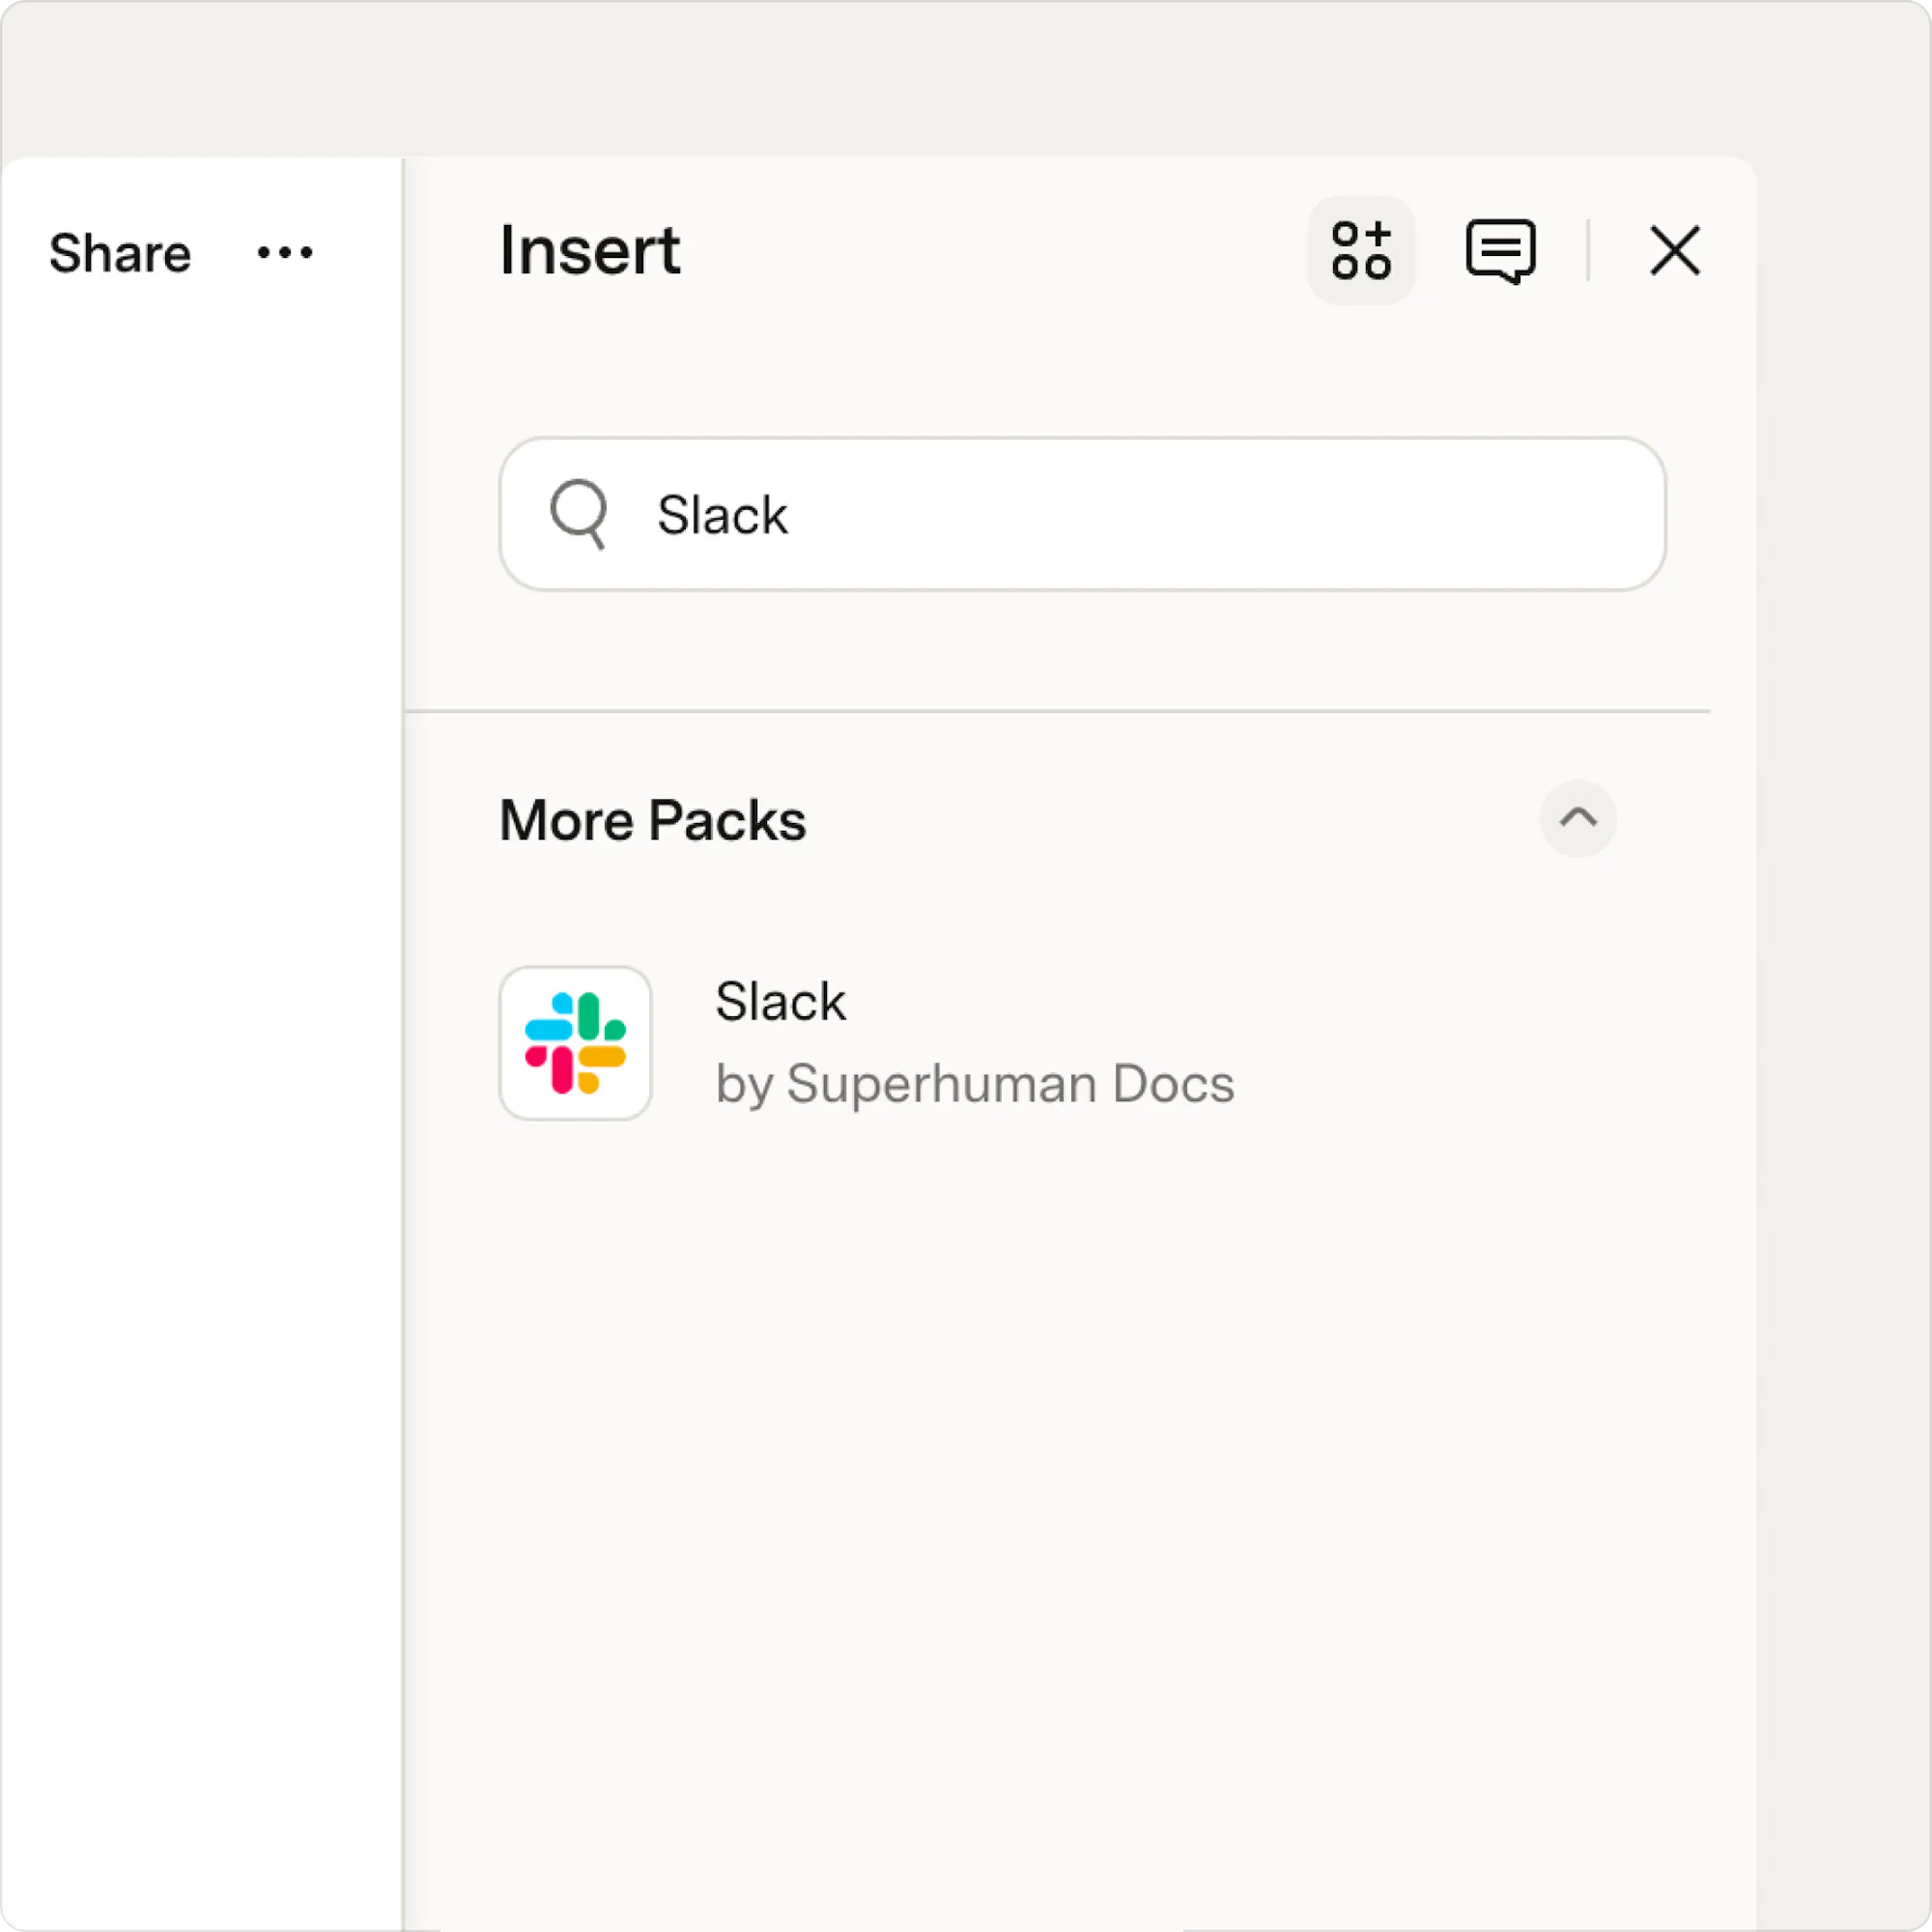
- Click the Insert button in the top-right corner of your doc.
- Then, search for “Slack.”
- Once found, select Slack under More Packs.
- Click Add to doc to continue adding the Pack.
- In the Slack panel, click the Settings option along the top.
- Now, click Connect an account.
- Select Sign in with Slack and complete the login flow.
- When prompted, click Allow to grant access.
- Finally, click Complete setup.
Send a reminder to a Slack channel
One of the most common ways to use the Slack Pack in Superhuman Docs is to send a message to a particular Slack channel after a change is made in your Superhuman Doc. This could be a status update, a notification to a point of contact, or a team reminder to read or update something in your doc. To set this up, you’ll use a button with the Slack Pack. But first, you'll set up a table.Set up your table
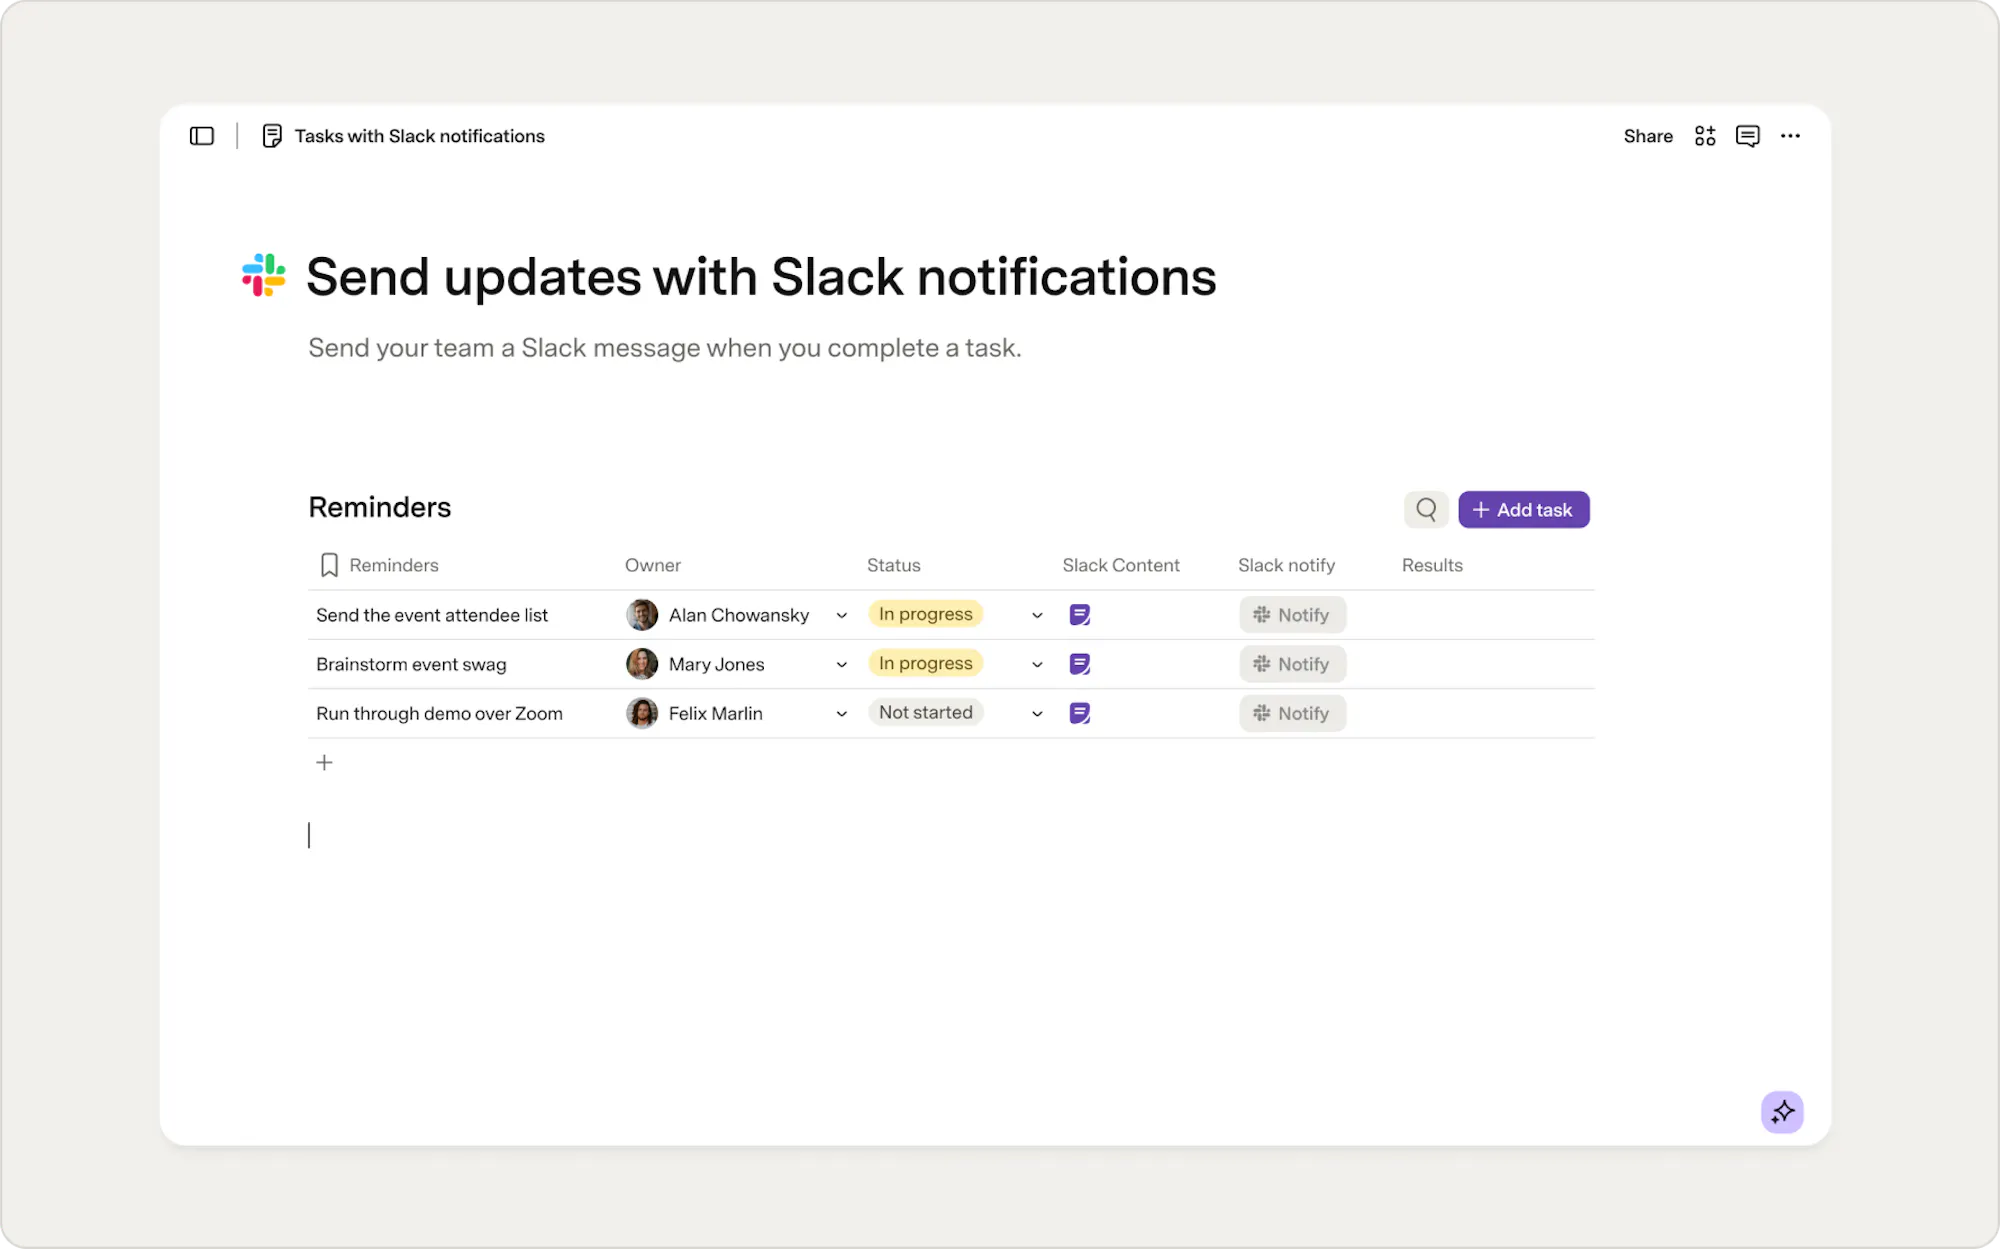
Add a table to your doc. If you don’t already have one, you can add a new table by typing /table on the canvas. This table will hold the messages you want to send to Slack. Add the following columns:- Text column — Reminders/FYI: Use this to track reminders or notices.
- Text or Compose column — Slack content: The message that will be sent to Slack. You can keep it simple or format it using Compose. Compose lets you draft more complex, nicely formatted messages.
- Button column — Send Slack message: This is where the action happens. When adding this column, choose button as the column type. You’ll finish configuring it in the next step.
Set up your Slack button
Now, let’s connect your table to Slack. Open the button setting by right-clicking on a button in your table or by clicking the column header and selecting Column options.Configure your button
- Under On Click, select Send message or notify user.
- For Send as, select Slack.
- Choose your Mode (Private or Shared).
- If prompted, connect your account.
- Set Content to your Slack content column by using the @ symbol and the name of your Slack content column.
- Choose your Channel or Email. Use your own Slack or a test channel while setting things up.
- For the Results column, use the pull-down menu and choose +New column.
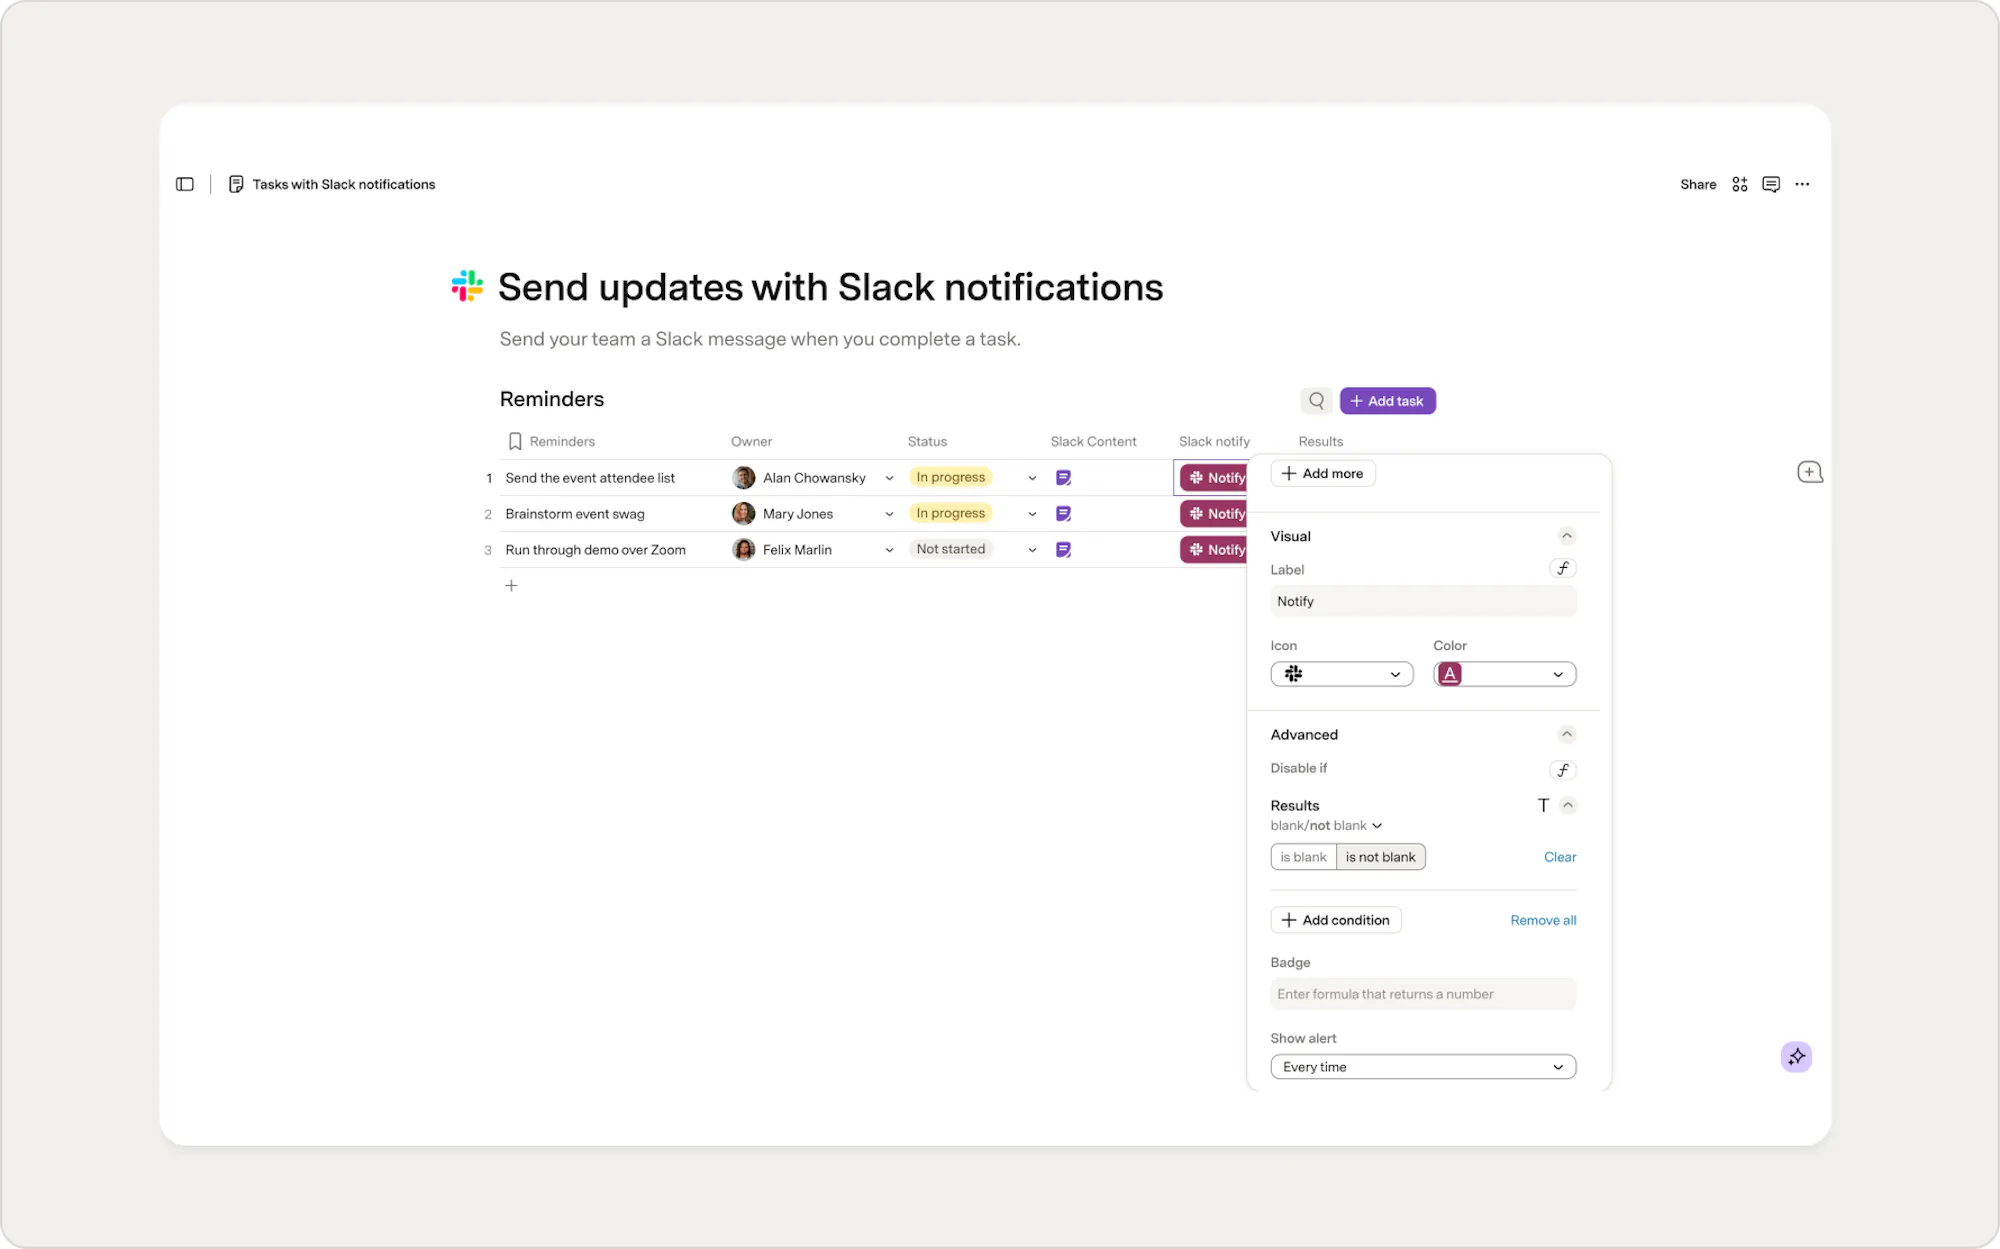
- Give your a button a name and icon under the Visual section.

Private vs. Shared mode
Private mode: each person uses their own Slack account when they click the button. If they haven’t connected to Slack yet, they’ll be prompted to do so. Shared mode: messages are always sent from a single connected Slack account, no matter who clicks the button. If you plan to automate this button, make sure it's set to Shared mode.
Prevent duplicate messages
If someone clicks the button more than once, it will send the message again. In most cases, that’s not ideal. To prevent this, you’ll use the Results column you added during button setup. That column logs the outcome of each button click. When a message is sent successfully, the result is written to that row.Add Disable if:
- Open the button settings.
- Scroll down to Advanced.
- Click Add condition.
- Choose the Results column.
- Use the dropdown to set the condition as blank/not blank.
- Select the option for is not blank.
Automate your Slack messages
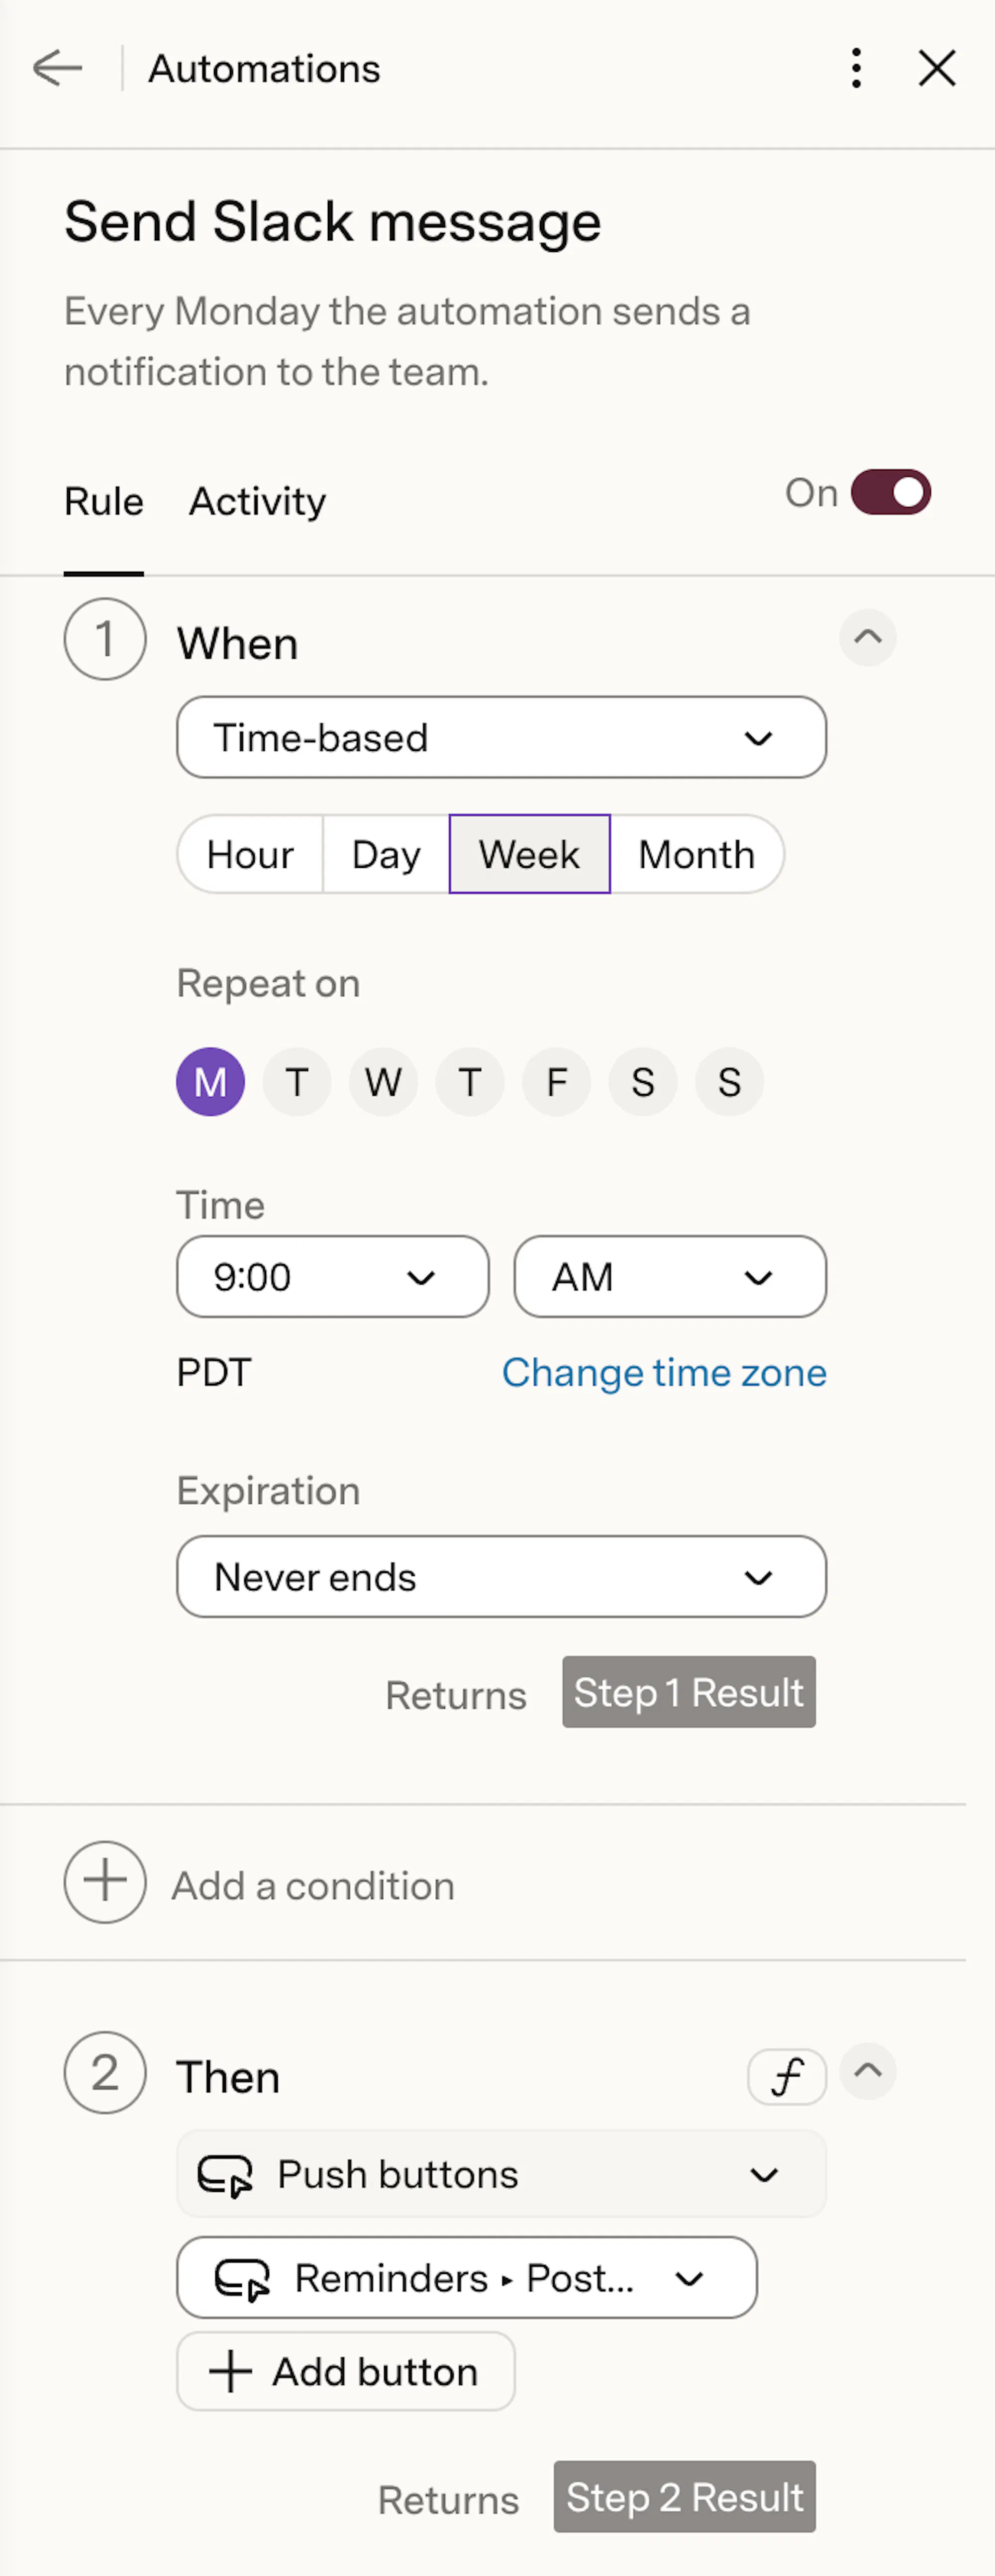
Once your button is working, you can automate it so that messages are sent automatically. Automations let your doc take actions based on a schedule or a change in your table. Instead of relying on someone to remember to click the button, let your doc handle it. Using the button as the action for your automation gives you one place to update your message and who it’s sent to.Set up the automation
Now, create a time-based automation that presses your button for you. Note: You can also trigger messages when a row changes, for example, when a status column is updated.- Click Insert in the top-right corner of your doc.
- Search for Automations.
- Select Automations under Doc settings.
- Click + Add rule.
- Give your rule a clear name and description.
- Under When, choose Time-based and set your schedule.
- Under Then, choose Push buttons.
- Select your table and your Slack button.
- Toggle the rule On.
What happens when it runs
When the automation runs, your doc will:- Look through the rows in your table.
- Check which buttons are active.
- Press the button for each active row.
- Skip any rows where the button is disabled.
Test your automation
Before calling it done, run a quick test. When you test an automation, it will press every active button in your table, not just one. If you only want to test a single row, temporarily disable the others. To test your setup:- Add a row that should trigger a message.
- Fill in the details and make sure the button is active.
- Open Automations and click Test rule.
- Check Slack to confirm the message looks right.
- The button is active.
- The automation is turned on.
- Your Disable if condition isn’t set correctly.
Now what?
You now have a simple way to send Slack messages directly from your docs. Use this pattern anywhere you’d normally post an update manually, like reminders, status changes, or quick notifications to your team.- Explore Slack basics.
- Check out how to use Superhuman Docs and Slack for effective project management.
Was this helpful?
YesNo