




10 min read
Make a wiki that saves your team time
Get everyone on the same page with a team wiki that brings all your team's resources, documentation, and processes into one source of truth.

You'll learn:
- How to organize content with pages and subpages
- How to make your wiki easy to navigate
- How to add rich content and links

You'll use:
- Pages
- Text and callouts
- Links
- Importers
Create a flexible, accessible, and always up-to-date wiki in Superhuman Docs
Superhuman Docs makes it easy to build a wiki that keeps everything organized in one place. With your team wiki, you can:- Create a single source of truth for company information
- Organize content with pages and nested subpages
- Add tables, text, images, embeds, and more
- Customize the look and structure of each page
1. Create your home page
Every doc deserves a good home page. This will be the first place your team lands, so it’s a good idea to make it inviting.Decide what belongs on your home page
Your home page is the first thing people see when they open your wiki. Consider including:- A short introduction
- The purpose of the wiki
- Where to ask questions
- Links to important resources
- An overview of how information is organized
Build your home page
- Add a title and start typing your content.
- Use headings to organize sections. You can type
/H1or/H2to insert heading blocks. - Add a cover photo by hovering over the page title, opening Page options, turning on Cover photo, and selecting Edit Cover.
2. Create category pages
Organize your wiki into top-level pages for major topics. You can have as many pages as you like, giving your doc infinite depth to grow your ideas. Consider adding a page for team information, the employee handbook, benefits, resources, team photos, meeting recordings, and whatever else your team needs.Create a new page
- Open the left panel by clicking the Open panel button.
- Click + New page.
- Rename the page by clicking Untitled and entering a new name.
- Add an icon by selecting Add Icon and choosing an icon.
3. Create subpages
As your wiki grows, some pages may need more detail or additional categories. No problem! That is where subpages come in. Use subpages to keep related content organized under a parent page. Add as many subpages as you like as your doc grows. Subpages can also contain their own subpages.Add a subpage
- Find the page you want to nest under.
- Click the three-dot menu next to that page name.
- Select Add subpage.
4. Customize pages
Once your pages are in place, you can add helpful details that make them easier to understand at a glance. For your team wiki, consider turning on:- Author
- Last edited
Customize a page
- Open Page options at the top of the page.
- Turn on the page details you want to show.
5. Make text easier to read
Wikis often contain a lot of information. Good formatting helps people find what they need without getting lost in a wall of text.Use headings and outlines
Headings make it easier to scan a page. When you turn on the Outline option in Page options > Seem more options, your headings will appear in an outline for quick navigation.Use callouts for important information
Callouts are useful for instructions, warnings, and tips. Type/callout to add one, then choose an icon and color to make it stand out. Add line separators
Line separators help break content into clear sections. Type/line to add one.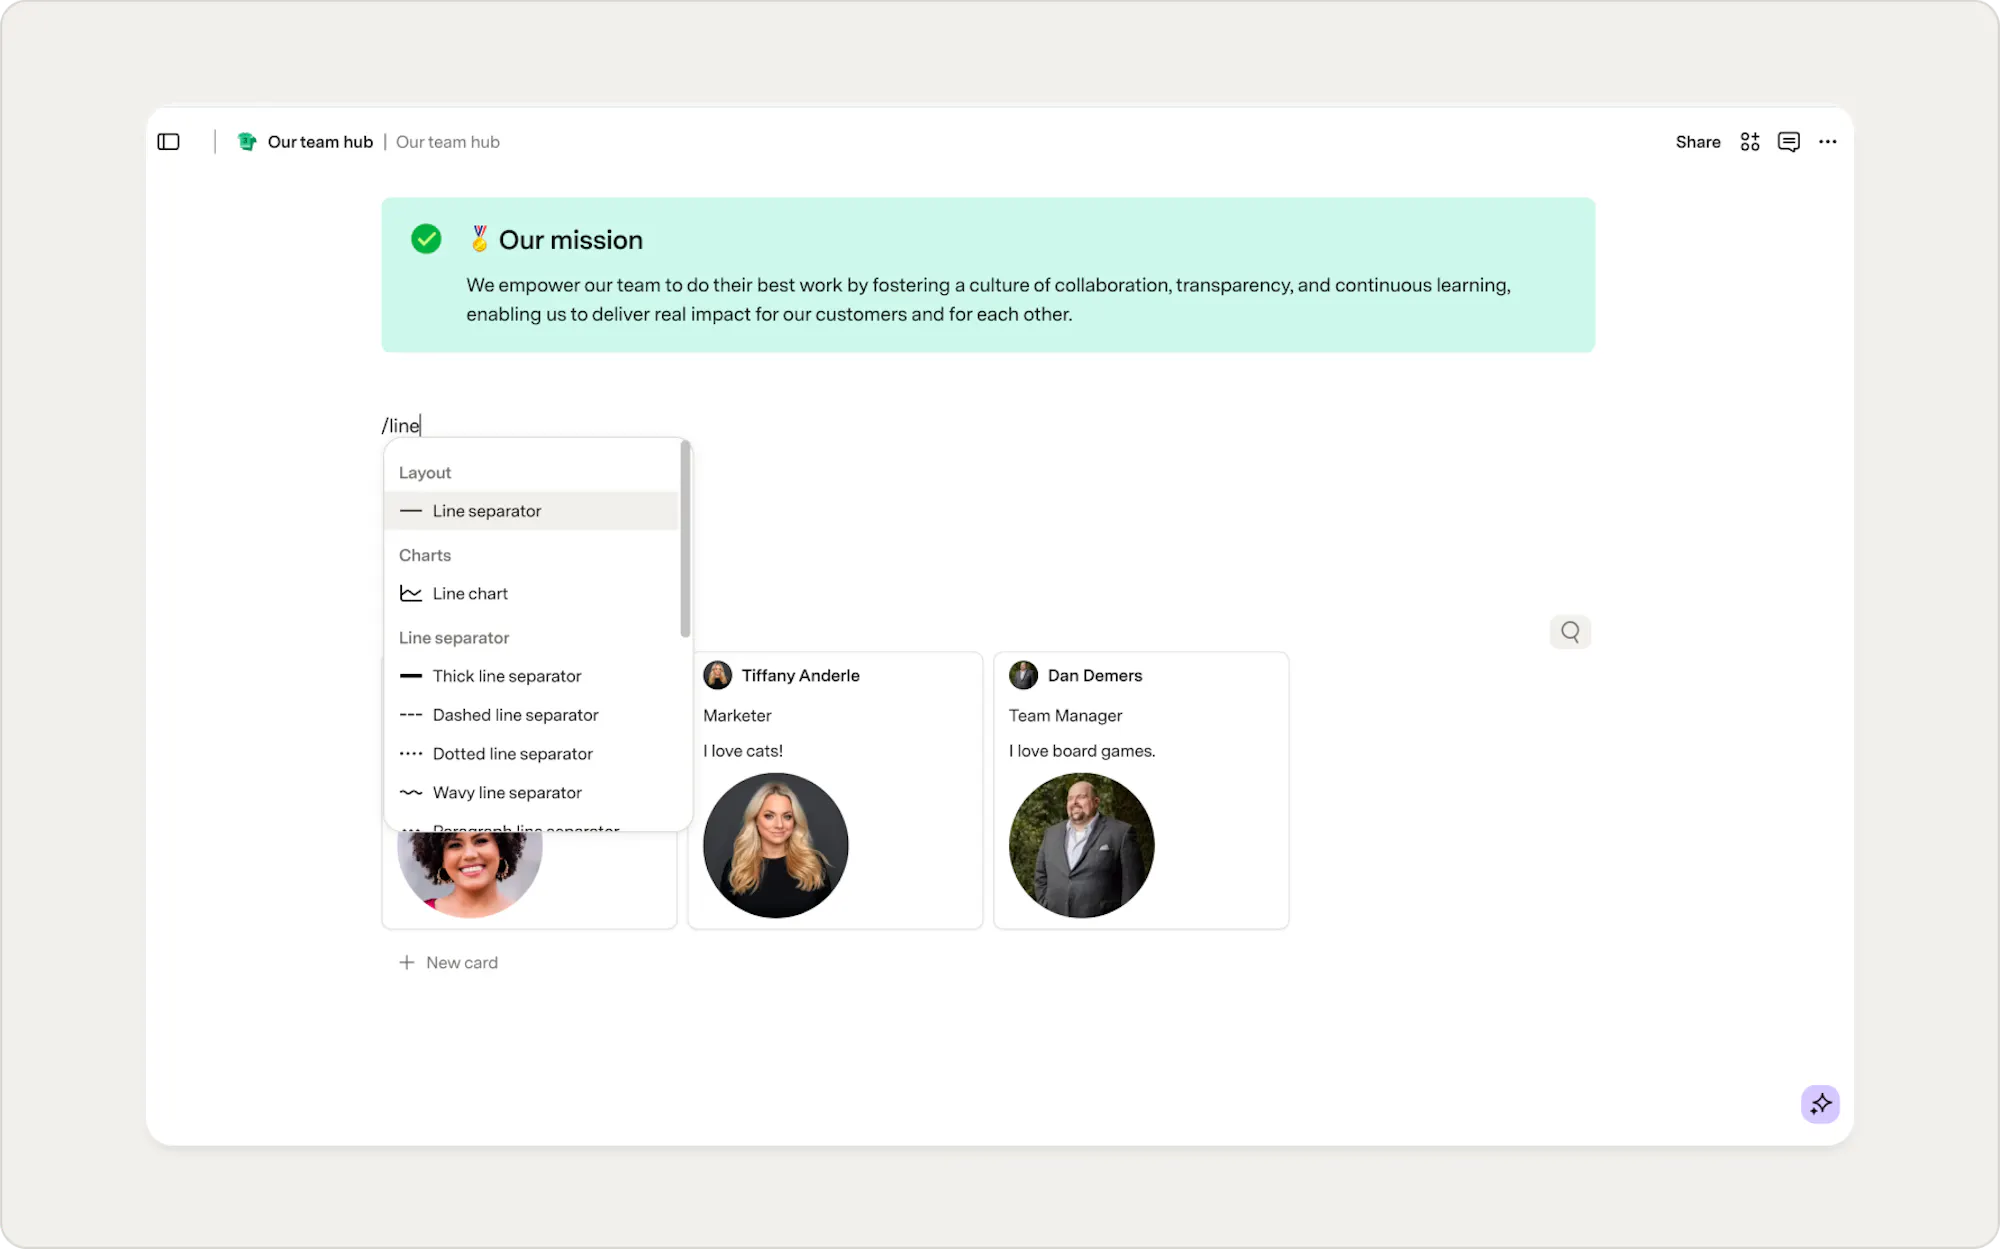
Use columns for layout
You are not limited to a single vertical layout. Columns can make pages easier to read and help you place content side by side. To add columns, type/column and choose the layout you want. Then drag content into each column. If you need more room, go to Page options, open the Page width section, and select Wide.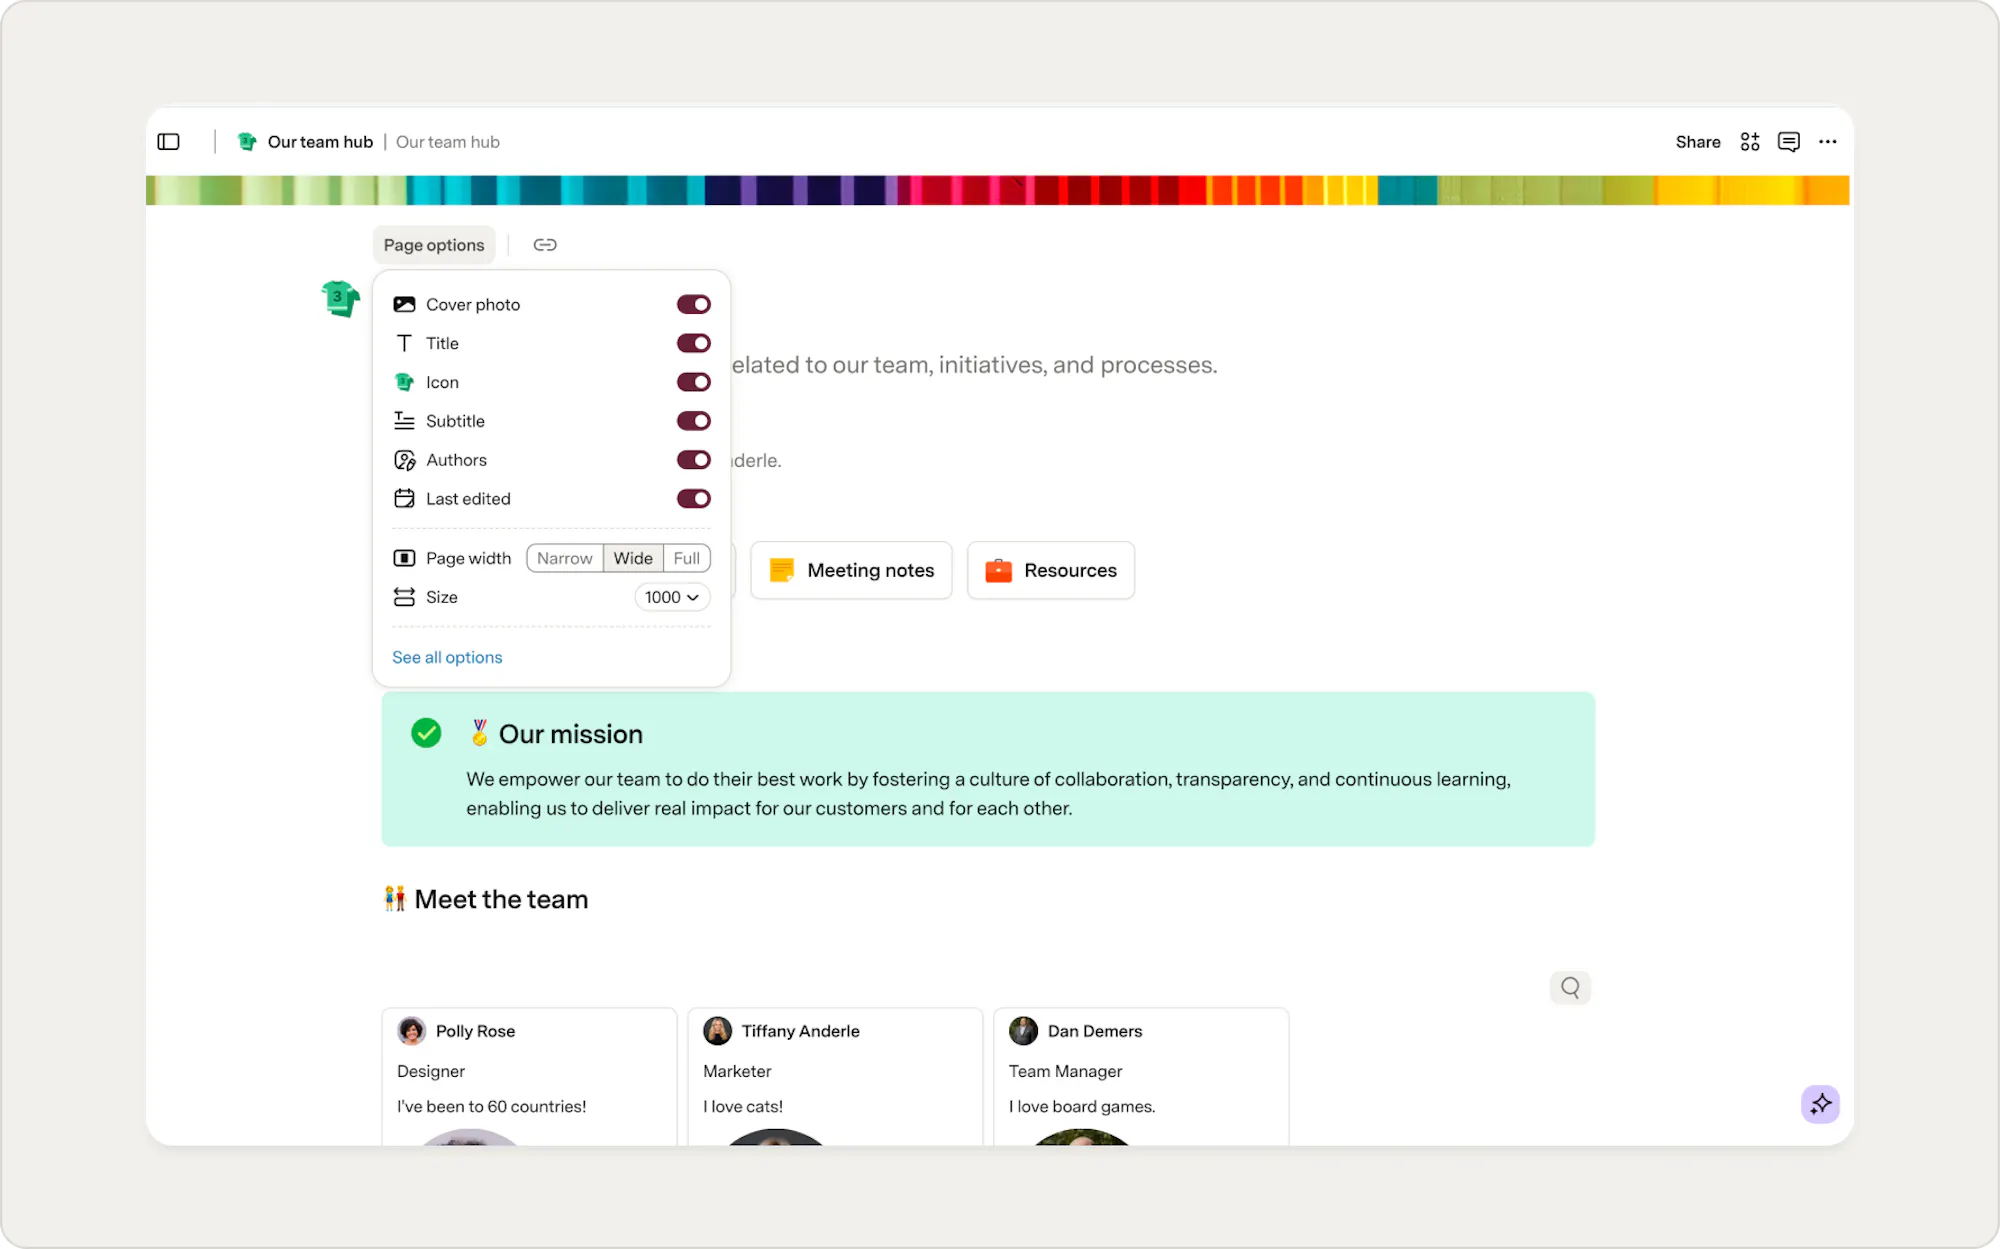
6. Add links
Links help connect related pages and make your wiki easier to navigate. You can link to other pages in your doc or add links to outside resources. Type/link to insert a page link, or paste a URL and choose to display it as a card. Cards are especially useful when you want links to stand out visually. You can also drag them around the page to change the layout.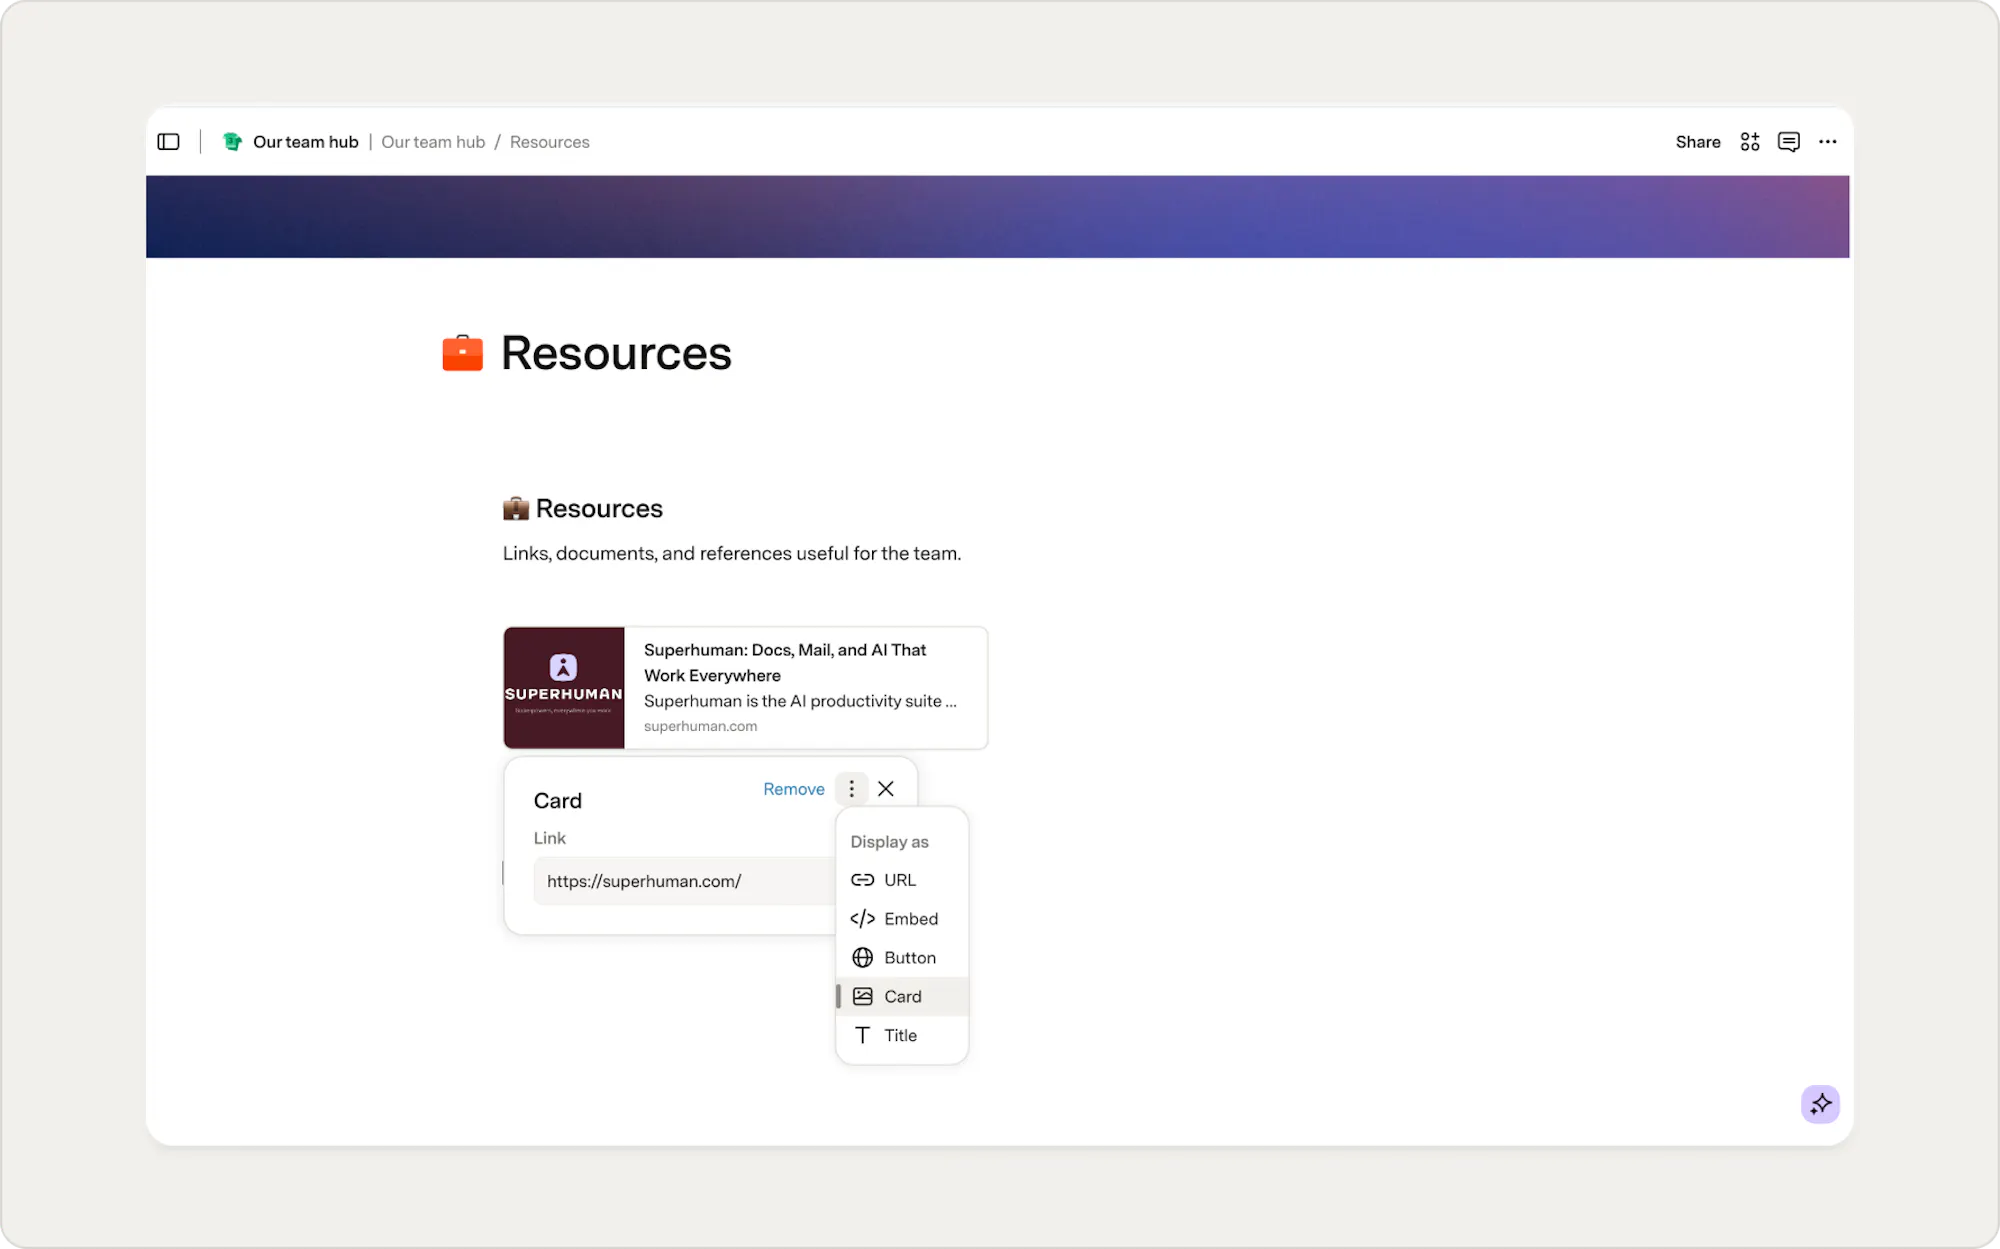
What's next?
Your wiki is ready to share. Invite your team to explore the doc, find answers faster, and keep information in one place as your team grows. Because everything is searchable, your wiki becomes easier to maintain over time.Ready to keep building? These resources may help:
Was this helpful?
YesNo