


5 min read
Create a backend for your doc
How to organize your base tables and views for optimal user experiences

What you'll learn:
- Frontend vs backend
- Applying these principles in your docs
- Best practices for backends

What you'll use:
- Tables and Views
- Hidden Pages
- Collapsing
- Locking
Backend vs frontend
For this guide, we’re going to borrow the idea of having a frontend and a backend for our docs. Imagine your favorite restaurant experience: The frontend is like the beautifully designed menu with mouth-watering pictures and descriptions that you interact with directly. It’s all about the ambiance, decor, and customer service that make your dining experience enjoyable. On the other hand, the backend is like the bustling kitchen where all the magic happens behind the scenes. It’s where the skilled chefs prepare delicious meals, manage inventory, and ensure everything runs smoothly. You might not see the kitchen, but it’s the powerhouse that makes the entire dining experience seamless and delightful. You probably already have a good idea of which pages and tables would make up your frontend — all the pages and tables you want your users to interact with.And, you probably also have an idea of which tables in your doc you wish would stay hidden — usually base tables that allow many other connected views to function. This is the data we’re going to work with in this guide to create our backend.

Docs tip
The terms frontend and backend come from the computer science world. If you don’t have a computer science background (don’t worry, you don’t need one!) here’s a quick breakdown of what these terms mean in the context of software development: Backend In the world of computer science, the backend is like the powerhouse of a program or application. It's where all the important databases are stored to make everything run smoothly. Users don't directly interact with the backend, but behind the scenes, it's working its magic to ensure that everything on the frontend functions seamlessly. Frontend On the other hand, the frontend is the welcoming face of a program or website that users get to interact with directly. It's all about the visual elements that make the experience engaging and user-friendly – think colors, layout, fonts, buttons, images, graphs, and navigation menus. The frontend is where the magic happens, taking the data from the backend and creating a seamless and delightful user interface.
1. Create a backend in your docs
Start by pinpointing those key base tables in your doc. These are the foundational tables with connected views. You can also bring over any standalone tables that you prefer to hide in the backend. Remember, you can choose to make a connected view of those standalone tables elsewhere in your doc later! Once you've identified these tables, create a dedicated page in your doc and give it a name – think "Backend," "Admin," or any name that resonates with you. It's all about making your doc management a breeze!
Docs tip
Not sure which table is the base table? No worries! Simply hover over the title of the table and keep an eye out for the icons next to it. A table icon with a link signals the base table, while a link icon signifies a connected view. Need a little more clarity? Just hover over each icon, and Superhuman Docs will guide you on whether you're looking at the base table or a connected view.
2. Move your base tables to the backend
Once you've set up your shiny new backend page, it's time to give those base tables a new home! Simply grab them and drag-and-drop them into the page you just created. Voilà! Watch as your doc transforms into a well-organized masterpiece.3. Hide this page
You can easily hide this page from view in the left-hand navigation panel so users won't be tempted to click on it. This is a neat way to enhance doc organization and keep users in the tables they need to be interacting with. Just a heads up, Doc Makers can still choose to display hidden pages, and they can also be found through the in-doc search, so this is more about keeping things user-friendly rather than a security measure.Backend best practices
When it comes to optimizing the back end of a doc in Superhuman Docs, there are a few key best practices to keep in mind. Here are some valuable tips to ensure your doc’s backend is running smoothly and efficiently for you:Keep tables organized
When considering how you’d like to organize your tables in your backend, you have two options:- One hidden page for each table: This works well when tables are larger, enhancing loading performance.
- All tables on a single hidden page: This option works well for many smaller tables. You can also consider collapsing the tables so that only the titles appear. No more endless scrolling! Simply click on the three dots next to the table title and select Collapse content to keep things neat and tidy.
Remove filtering and formatting from your base tables
When it comes to your backend, keep in mind that this area is not intended for your users to view or interact with. Start fresh with your base tables by clearing out any filters, conditional formatting, sorts, or groups. By removing filters, you also avoid any accidental filtering that could occur if you reference this base table in a formula. Formulas will take into account any filters applied to a table, so using an unfiltered base table in calculations across your doc eliminates the risk of errors due to overlooked or hidden filters. It’s best to save these fancy features for the connected views in other sections of your doc, where they can truly stand out!Add locking
For more precise control over the changes users can make to your backend, try doc locking. This feature helps prevent accidental changes and offers a smoother experience for contributors who only need to make specific adjustments. By implementing locking in your backend page, you can choose to make it view-only for everyone except the doc maker and a select few, or limit user interactions as necessary. Since hidden pages are not a security feature, adding locking to your backend page further ensures that your base table data stays safe and untouched if a user does end up on this page. Locking adds an extra layer of protection to your data. Only specific users can access and make changes to the data, reducing the risk of unauthorized modifications and ensuring that everything runs smoothly behind the scenes. It's like having a master chef in control of the kitchen, maintaining the quality and integrity of the dishes being served while keeping unwanted cooks out! Interested in learning more about Locking? Learn more here.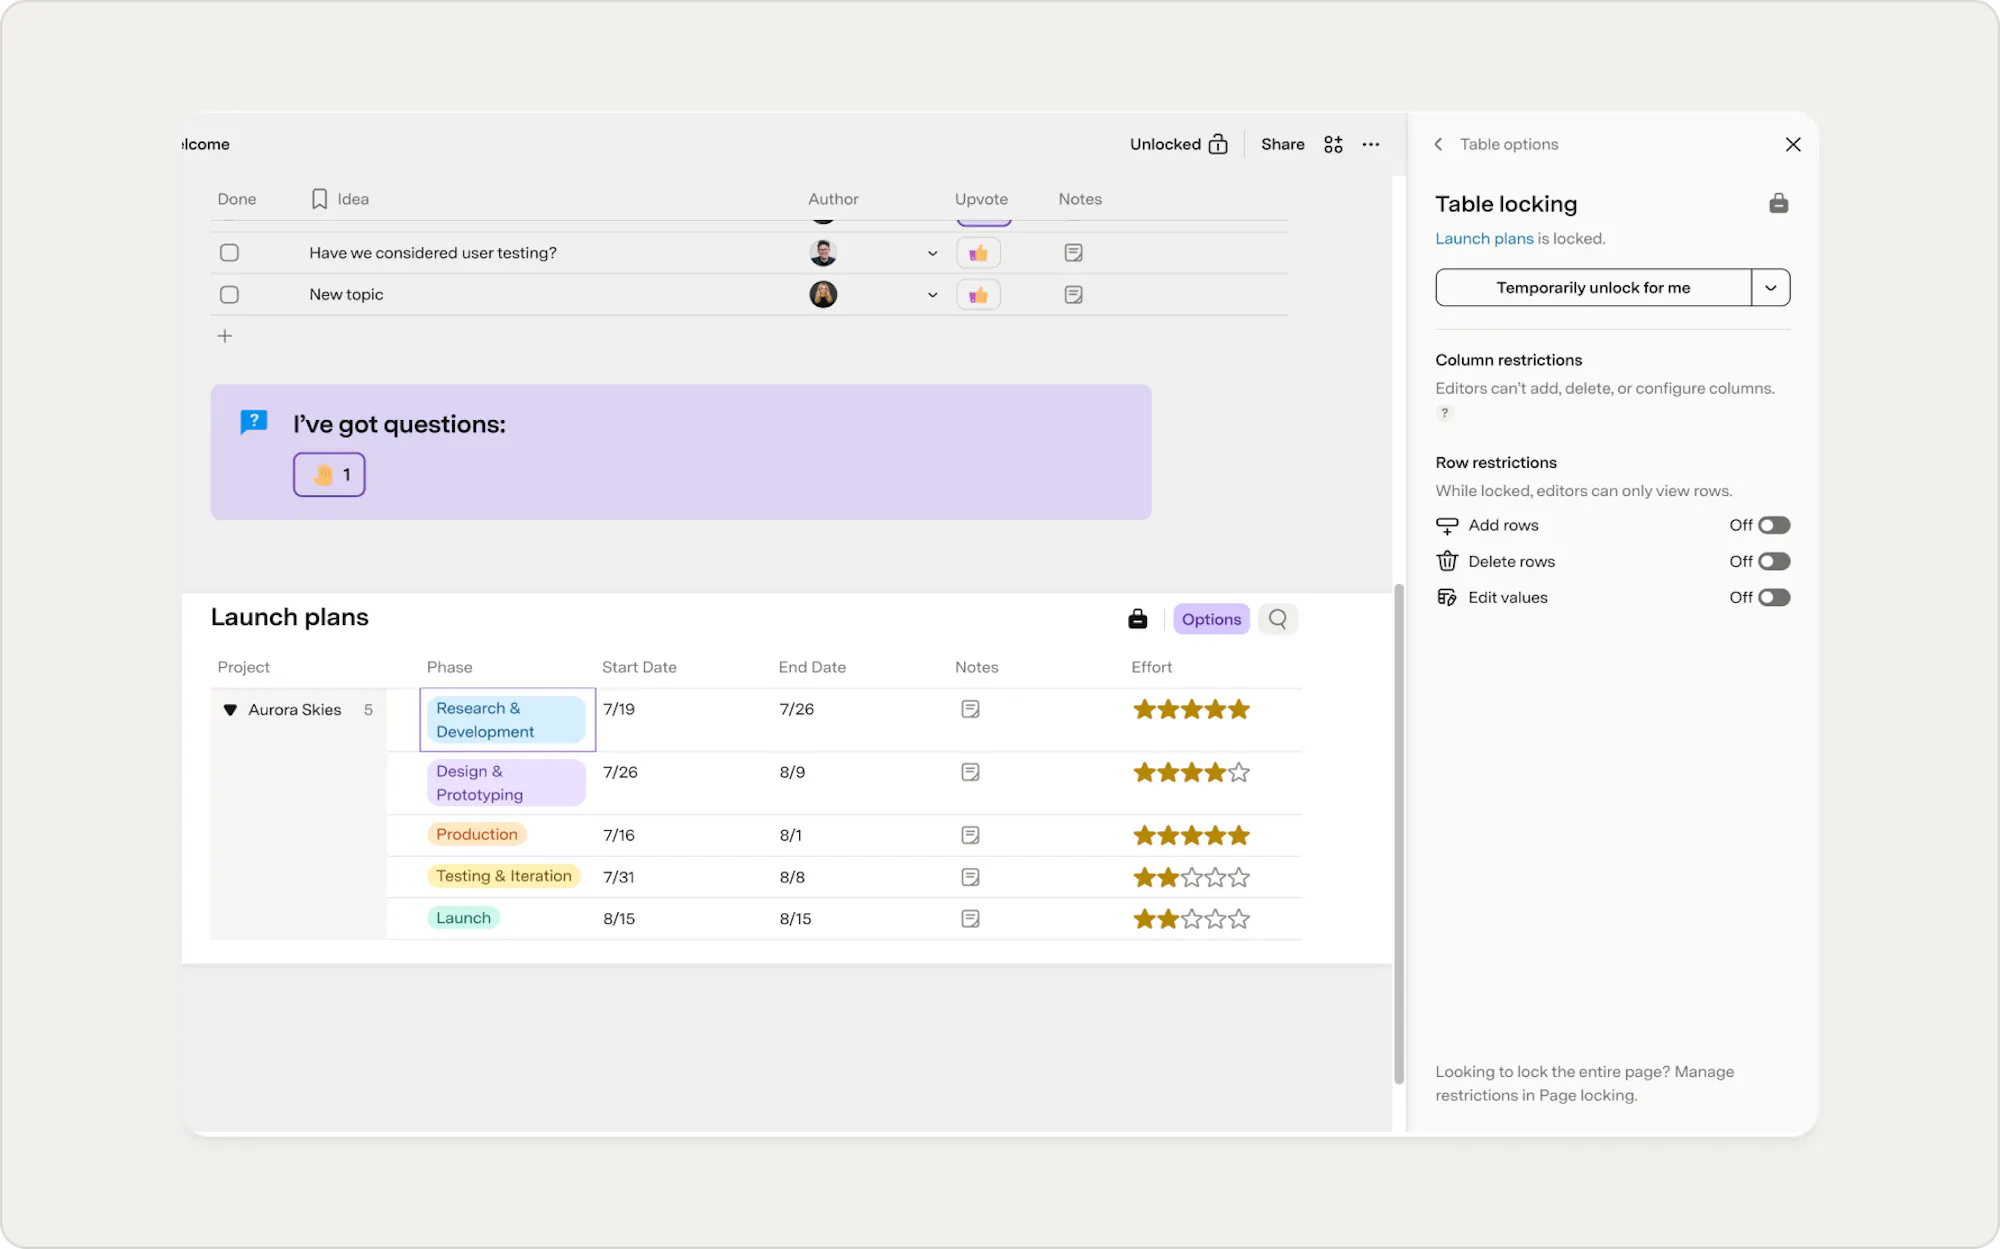
Now what?
A well-structured backend makes your doc easier to maintain and better for the people using it. Here are a few good next steps:- Locking pages and tables in Superhuman Docs — go deeper on how to control what users can see and edit in your doc
- How to retrofit an existing doc with connected views — if you have a doc that already has too many independent tables, here's how to restructure it
- New table or new view? — understand when to create a connected view instead of a new table
Was this helpful?
YesNo