Skip to content
Evenly Along Vector: Projectiles will spawn evenly along a vector and they will be spaced according to the SpawnLocationVariance vector’s X,Y and Z values. For example, a value of (X=32, Y=0, Z=0) will make the projectiles spawn along the Mesh’s X axis and they will be exactly 32cm away from each other:Randomly in Bounding Box: After specifying the bounds of the bounding box by setting the SpawnLocationVariance vector, the projectiles will spawn randomly inside this box. For example, a value of SpawnLocationVariance = (X=50, Y=50, Z=12) will make the projectile spawn randomly inside a box of 12cm height, 50cm width and 50cm length.Evenly in Circle: You will spawn the projectiles evenly in a circle. You can set the radius of the circle and its max angle as well as the rotation axis of the circle. The rotation axis of a circle is the vector perpendicular to it and looking away from it.
Create a child blueprint of the BP_SpawnHomingProjectilesAnimNotify class Inside the new class, override the function SetHomingTargetInside the function, use the Owner input and plug-in your targeting system however you like to obtain your target and return it as an output of the functionUse your new AnimNotify in your animations
Go to your Project Settings Scroll down to Collision on your left Expand the Preset section and scroll down until you find LyraPawnCapsule (if you can't find it, collapse the section and expand it again) Double-click LyraPawnCapsule and make sure Projectile is set to Block
 Open the AnimNotify BP_SpawnHomingProjectilesAnimNotify_Player or create a copyOpen the function SetHomingTarget and delete the "Check if is aiming" Branch


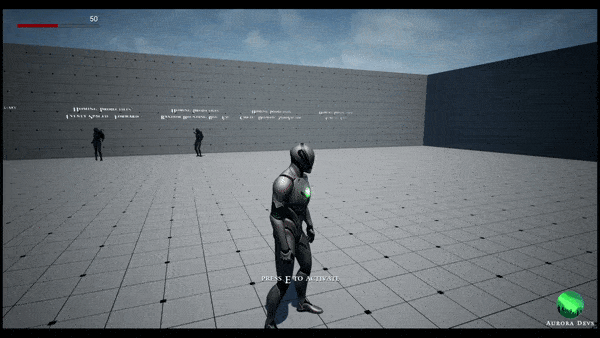
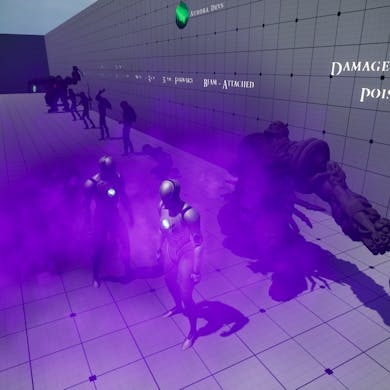
Homing Projectiles - Are simple projectiles not cutting it for you? Try our special-made homing projectiles. Not only can you set the homing target and speed as well as the damage and the collision shape, but you can also spawn them in bulk and in different methods.
Homing Projectiles

Setup
Setting this one up is quite simple. All you’ll need to do is open your projectile throwing animation and add the AnimNotify called BP_SpawnHomingProjectileAnimNotify. You can then set the projectile class, which has to be a child of BP_RHSHomingProjectileBase, the attachment bone/socket, the transform offset from the parent bone/socket as well as the projectile speed.

You can set the homing acceleration speed, i.e, how quickly the projectile will close in on the target. You can also set a delay before the homing begins as well as the initial velocity direction once the projectiles spawn.
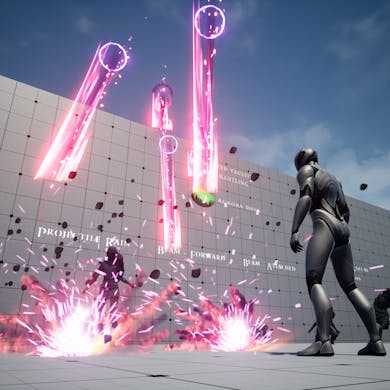
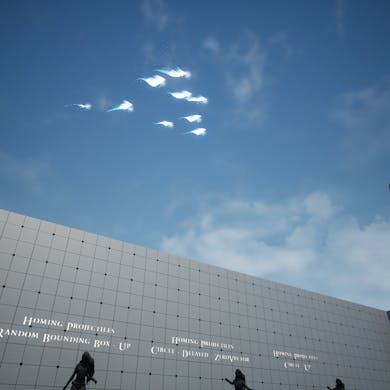
For example, if we set the SpawnInitialVelocityDirection to (X=0, Y=0, Z=1) and the DelayBeforeHoming to 1, then when the projectiles spawn, they will first go directly upwards then start homing down on the target after 1 seconds elapses. You can see this in action:
If you want the projectiles to go forward, simply set SpawnInitialVelocityDirection to (X=0, Y=1, Z=0). If you want them to not move until the HomingDelay has elapsed, set the SpawnInitialVelocityDirection to (0, 0, 0).
What’s different from simple projectile spawning is that you can use this notify to spawn homing projectiles in bulk. You can choose how many to spawn, their speed, as well as how deviated they are from the initial velocity direction.

In the previous GIF, you’ll notice that even though the SpawnInitialVelocityDirection was set to (X=0, Y=0, Z=1), the projectiles did not go straight UP. That is because we have set MinXYRandomVelocityDirection and MaxXYRandomVelocityDirection to -0.25 and 0.25 respectively.
This means that each projectile will be deviated slightly in the X and Y axes so as to make the projectiles more realistic. If you want the projectile to go straight along the SpawnInitialVelocityDirection, simply set the previous Min Max values to 0.
Spawn Methods
Now comes the most exciting part, the methods by which the homing projectiles are spawned. You can set these under HomingProjectileSpawnSettings inside the AnimNotify details

You can choose between 3 methods:

SpawnLocationVariance = (X=32, Y=0, Z=0)

SpawnLocationVariance = (X=32, Y=24, Z=28)

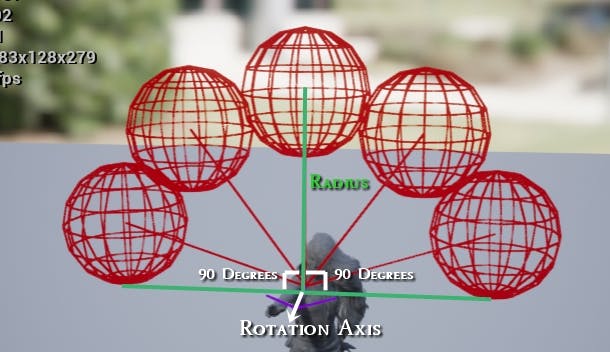
In this example, the radius is set to 100cm, the rotation axis is set to forward which is (X=0, Y=1, Z=0) and the max angle is 180 (90 + 90) degrees.
You can also set a completely different rotation axis and tune up the max angle to 360 degrees so that the projectile spawn all around the character:

CircleRotationAxis = (X=0, Y=1, Z=1), CircleRadius = 100, MaxCircleAngle = 360
Setting the Target
In order to set the target of your homing projectiles, you can follow the next steps:


Keep in mind that the Unreal Engine homing projectiles only target Scene Components, so if your target is a character the scene component can be its Collision Component, or Mesh; etc.
Lyra Setup
Want to print your doc?
This is not the way.
This is not the way.

Try clicking the ··· in the right corner or using a keyboard shortcut (
CtrlP
) instead.