Skip to content
Share
Explore
All the information from this page was taken from here:
All credits to Coda and Lena Webster
Add, select, and delete rows
Rows are the core of any table
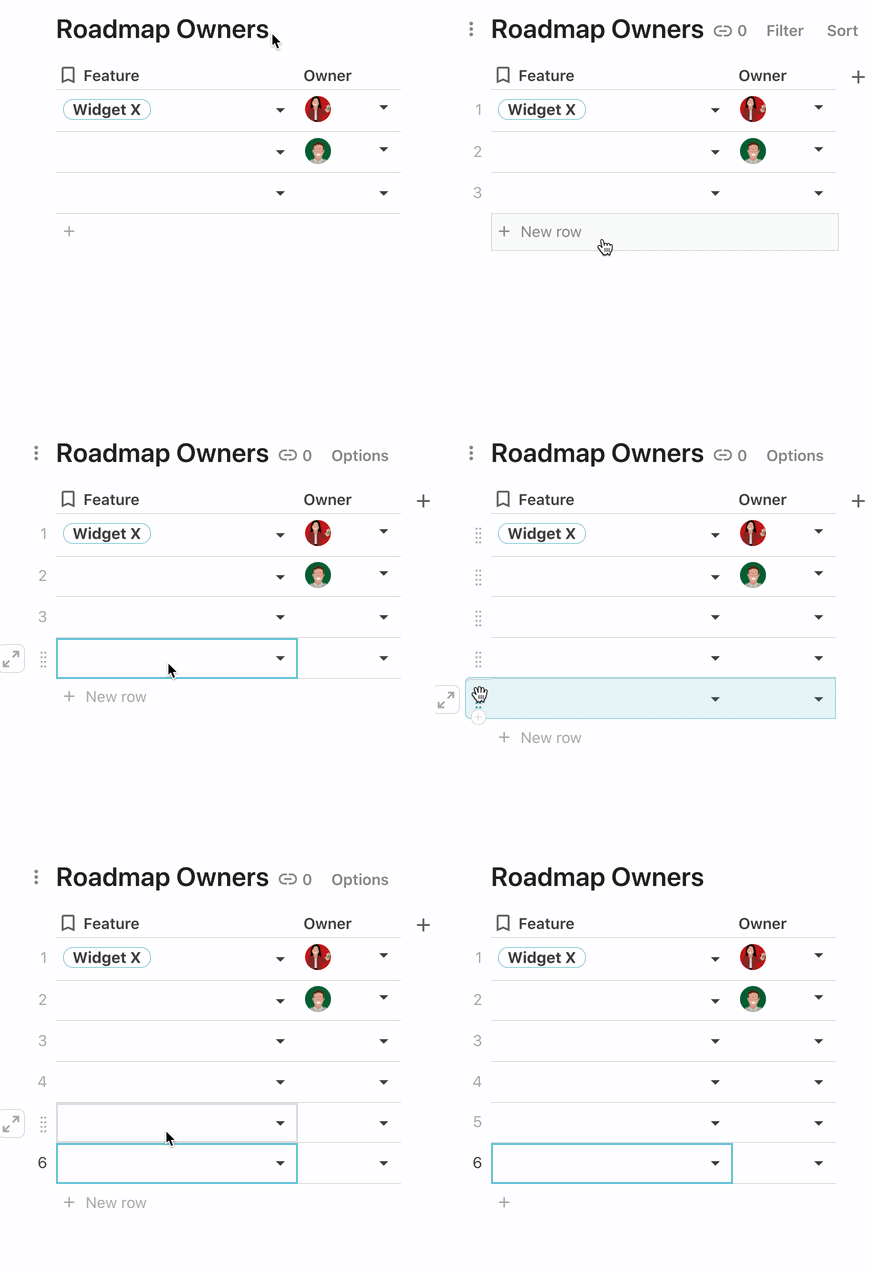
Add rows
Hover over your table and click the + New row below your bottom row. Alternatively, click into or select your bottom row, then hit Enter on your keyboard.

Select rows
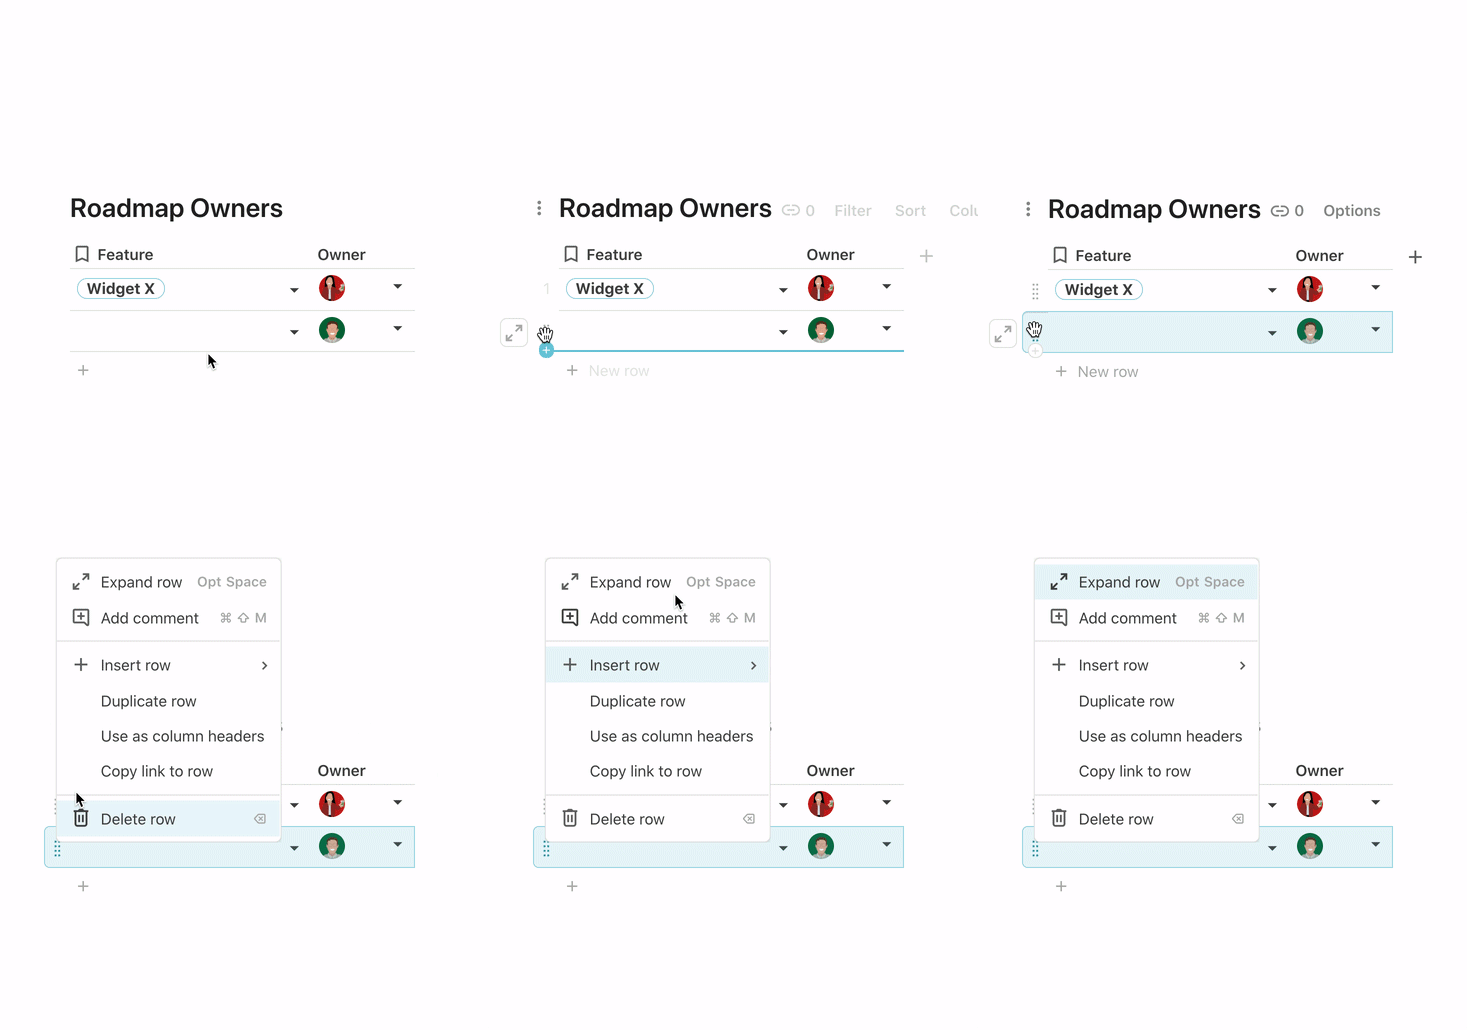
To select a row in a Table, click the row handle that appears to the left of the row when you hover over it. Or, if you like keyboard shortcuts, click a cell and arrow all the way to the left to highlight the entire row.

Select multiple rows
Select the first row, then press Shift or Command to select another row. If you're selecting adjoining rows, you can just arrow down or up while holding down Shift if you prefer.
Delete multiple rows
Once you've selected rows, you can delete them by simply clicking Delete on your keyboard. You can also delete one or more rows by using right-click to bring up the row menu and select "Delete row".
Managing columns: Hiding, Un-hiding, and Re-ordering
Sometimes when working with a table or a view of a table, you'll have columns that aren't relevant to your audience. These might be columns that are used for interim calculations, that run automations on the back end, or that you use to filter records but don't want to show your audience. In these cases, you may want to consider hiding columns.
By hiding or un-hiding columns, you can control what your doc's end users will see for a given view. Hiding columns is view-specific and doesn't change what hidden formulas do.
The primary way to manage column order and visibility is via the column panel. From the column panel you can also change column types, add columns, remove columns, rename columns and reorder columns.
Manage Columns:
To manage columns in the column panel, hover your cursor over the table so that the Filter, Sort, Columns, and Options links appear. Click the Columns option to open the columns panel on the right.
(Alternatively, you can find the columns panel by clicking on Options, then selecting Columns from the right panel.)
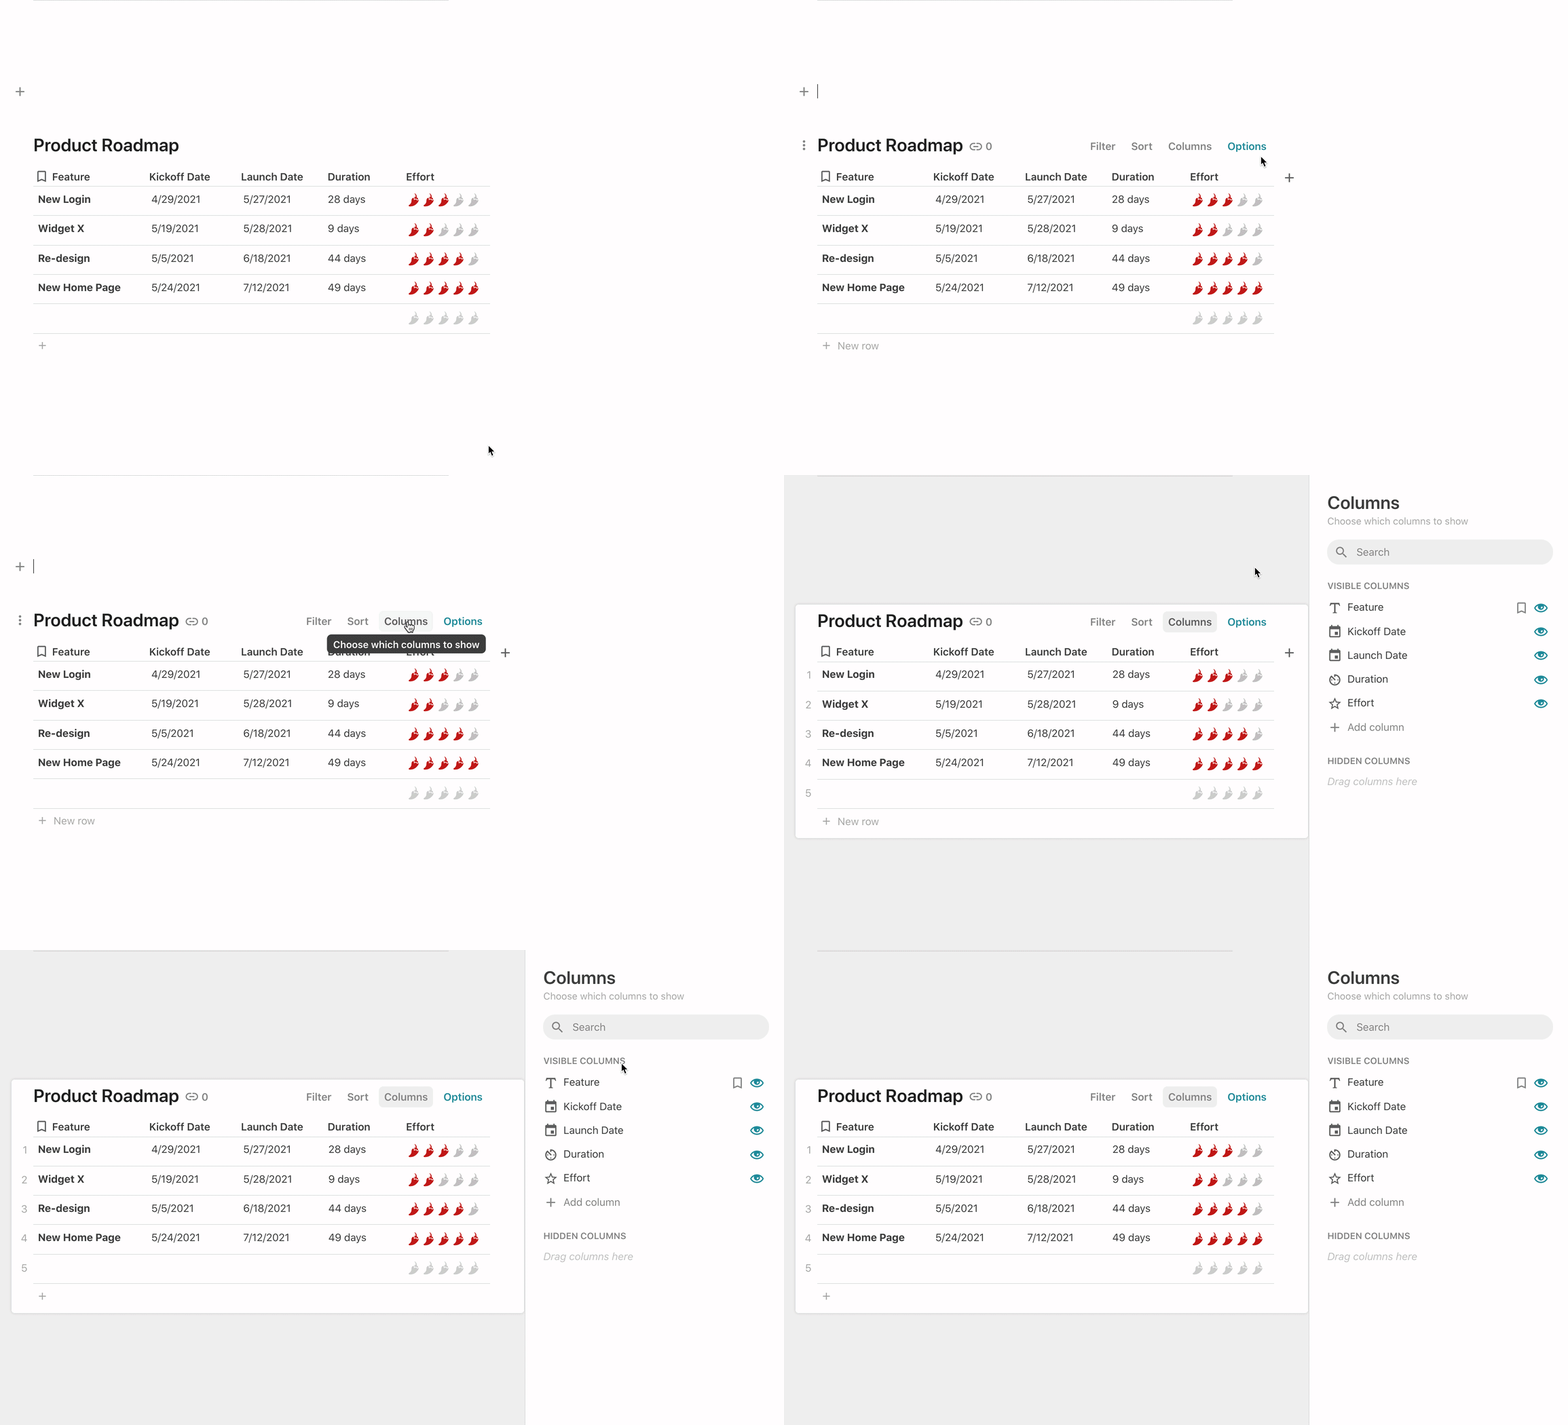

In the column panel, you can take actions and find lots of useful info:
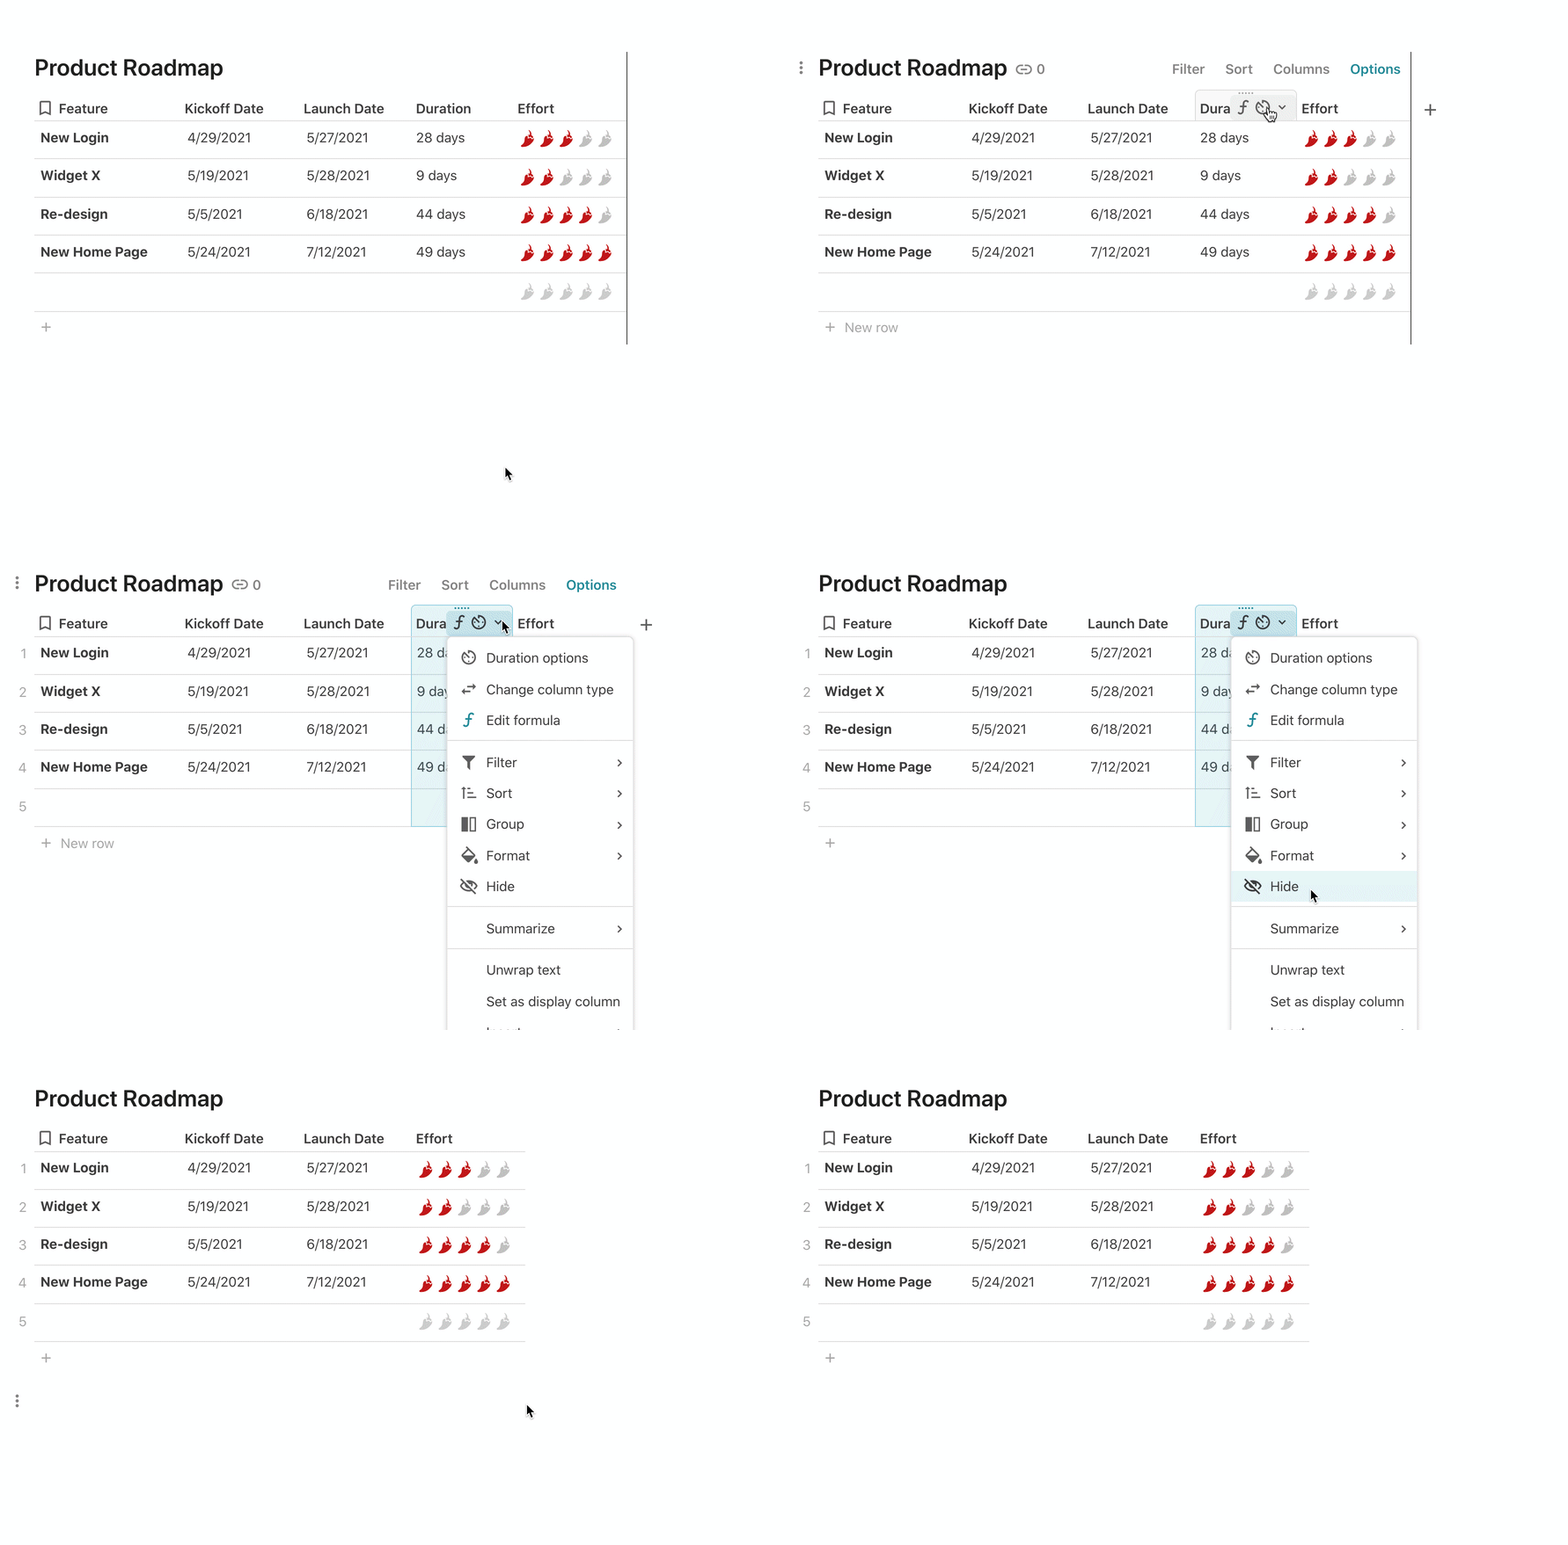
To hide an individual visible column, you can also select and right-click on an individual column's header to pull up the column menu, then select Hide:

Row Activity
As you probably know now, the smallest unit within Coda is the row. The row gives you each column value for that particular row in a table.
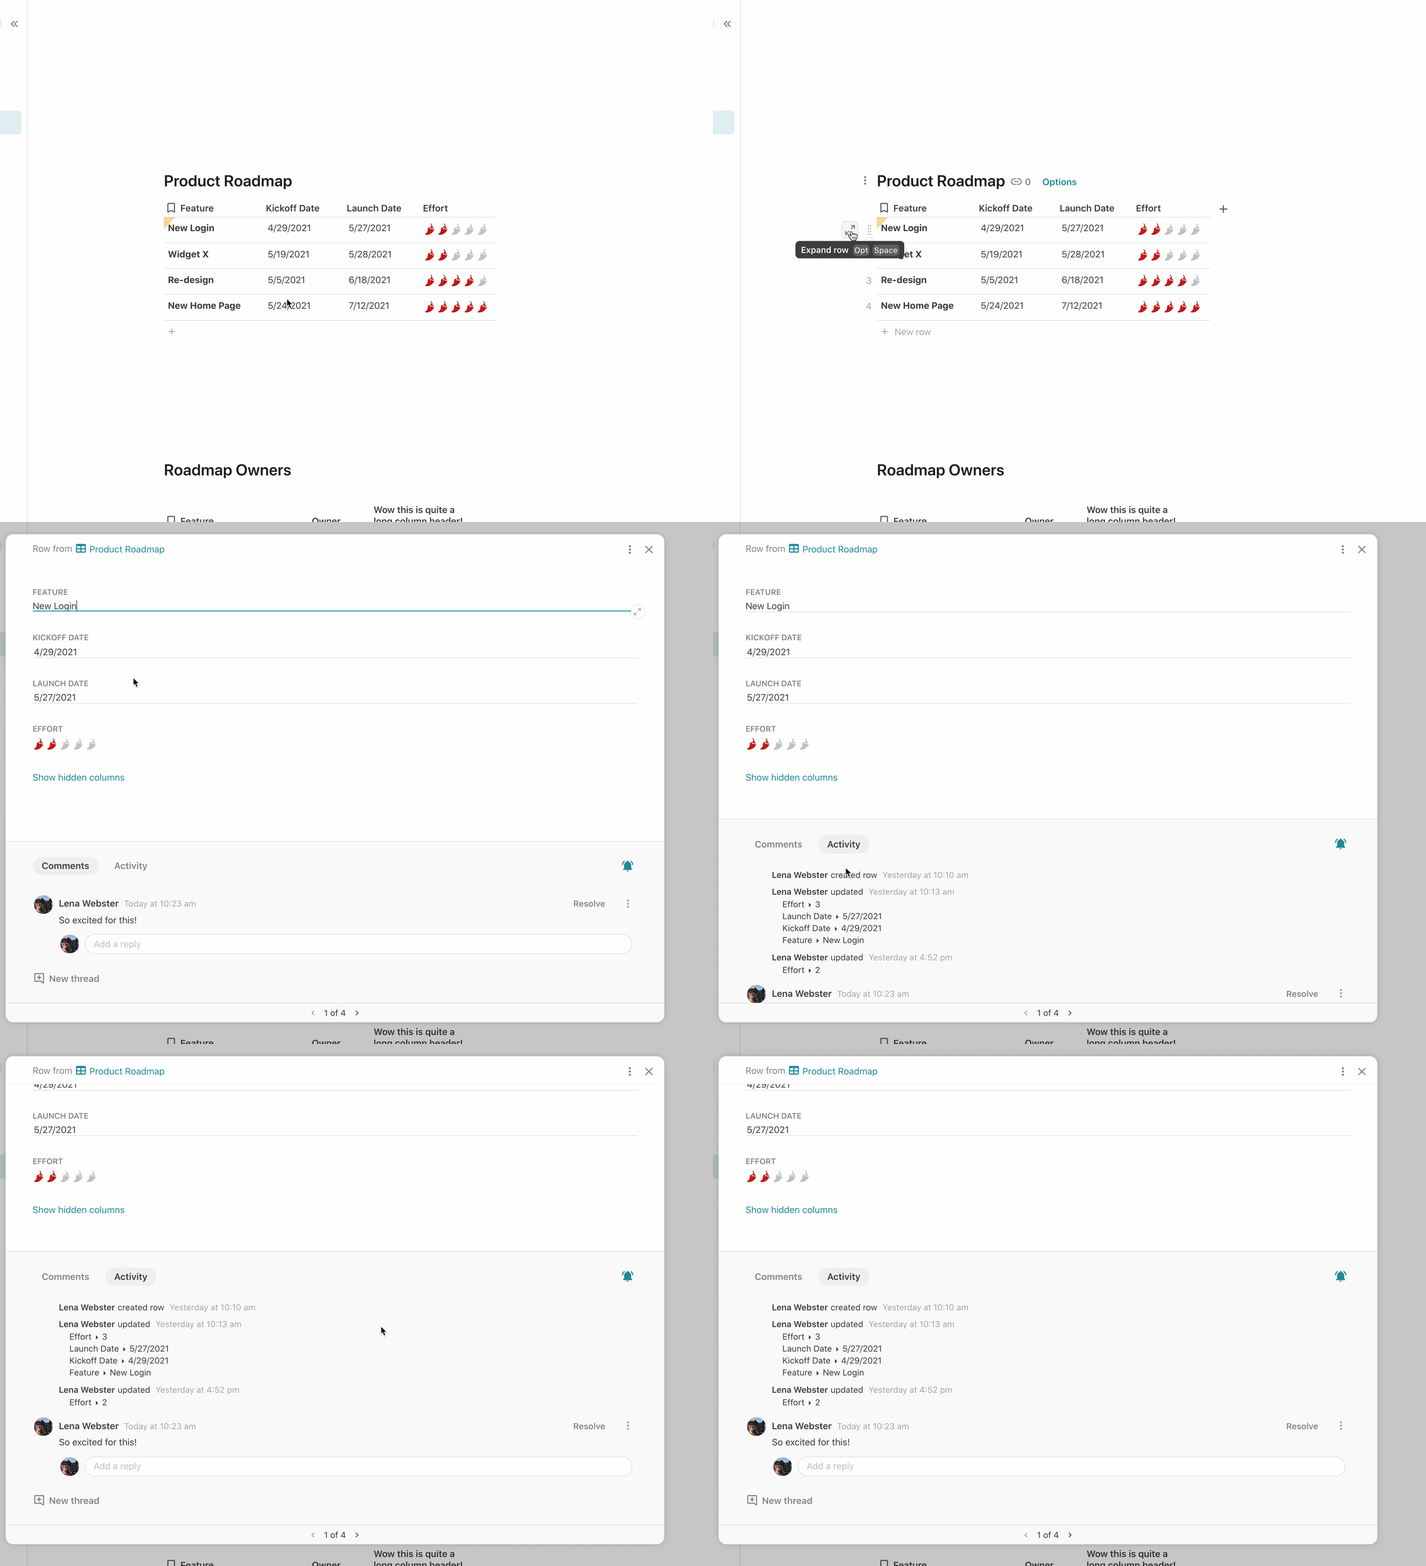
When you open the row modal by hovering on the row and clicking the double-arrow expand icon, you're able to view a lot of details about that row's actions.


At the bottom of the row modal, you'll see there are two things we can dig into: Comments and Activity.
When you click on Comments, you can see all comments for that single row. Similarly, when you navigate to Activity, you can see details about the row, such as when and by whom:
This can be useful as you work with your team within the same collaborative surface.
Let's see it in action.

Want to print your doc?
This is not the way.
This is not the way.

Try clicking the ⋯ next to your doc name or using a keyboard shortcut (
CtrlP
) instead.