Skip to content
New CRM users who opted-in for the newsletter should be subscribed to MailchimpNew Mailchimp users signed up for the Newsletter should be listed in the CRM users tableUsers who will be permanently removed from the CRM should also be removed from Mailchimp
 CRM / Sync MC Audience with Coda table
Note that this is not a guide for handling data privacy! Please make sure your setup is in line with current data privacy regulations! The pack creator is not responsible for any data privacy related issues and has no access to any Coda doc or Mailchimp account of a pack user.
The following guide helps you to keep a doc table with people in sync with a Mailchimp audience.
In our example, we have a CRM User Table that lists all people the company has contact with. The CRM Users were able to agree with a checkmark if they want to receive newsletters and allow data transmission to Mailchimp.
What we want to achieve:
Syncing from Coda to Mailchimp
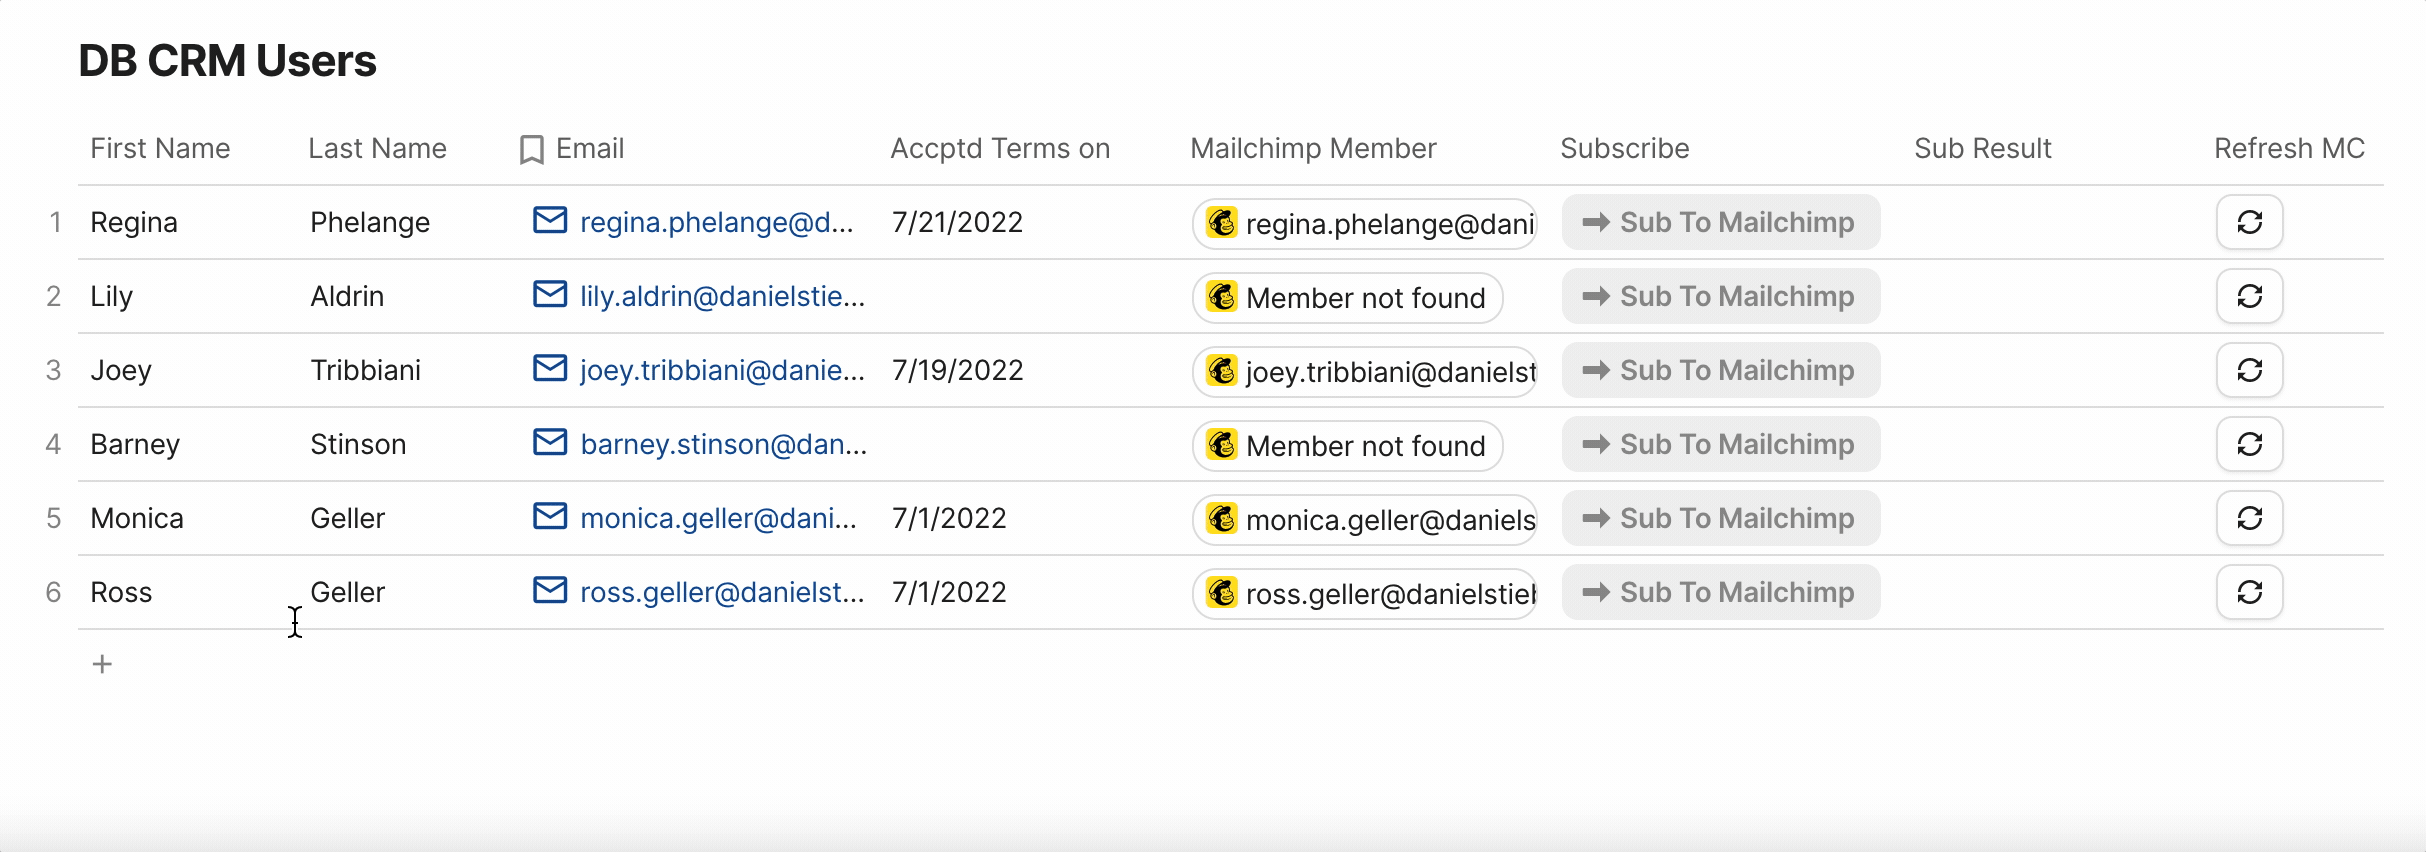
We start with a simple CRM table of users including their email address and a field to store newsletter acceptance. I’ve learned to store a date when a user accepted newsletter retrieval instead of just using a checkbox. Also, some marketing campaigns like competitions require you to delete users after a specific time, also helpful to store the date then.

We now add multiple new columns to integrate Mailchimp into our table:
Retrieve Mailchimp user data
We add a column “Mailchimp Member” with the GetMember formula to retrieve the user data / information if the user exists there.

If a user does not exist in the Mailchimp audience, the field “user_exists” is set to false and the Object shows a “Member not found” status.
Subscribe users
To make a subscription for users who are not on Mailchimp yet, we add a Subscribe button to the table.
The Subscribe button allows working with merge fields and that is what we need for First Name and Last Name, but we have to use it as a formula and can’t rely on the actions builder. Learn more about that here:
We also add a result column, to see if the subscription has worked. With the ModifyRows action, we can select a column to store the result of the Subscribe action.

To make sure we can’t accidentally add a user to Mailchimp or make unnecessary requests, we add a condition to disable buttons for rows where the user either did not accept the terms or is already a member.

Now let’s give it a try. We add a user and use the button.
Automate it
To automate the process, we can now implement a Coda automation and run the buttons.
In the given scenario, we already put all the conditions into the button itself, so we just need to define a trigger and a push button action with our subscribe column.
This is an example of how it should work, but you can also go e.g. time-based.

In case any accepted terms field has been updated, the automation triggers all enabled Subscribe buttons in the CRM table.
To update users or sync tags, you would need the Update, UpdateOrSubcribe or SyncTags buttons. Check out the guide to learn more about tag syncing.
Syncing from Mailchimp to Coda
Now let’s have a look at the other way around. There might be several ways to sync in that direction, but for simplification, we try to make the process as similar as possible to the Syncing towards Mailchimp.
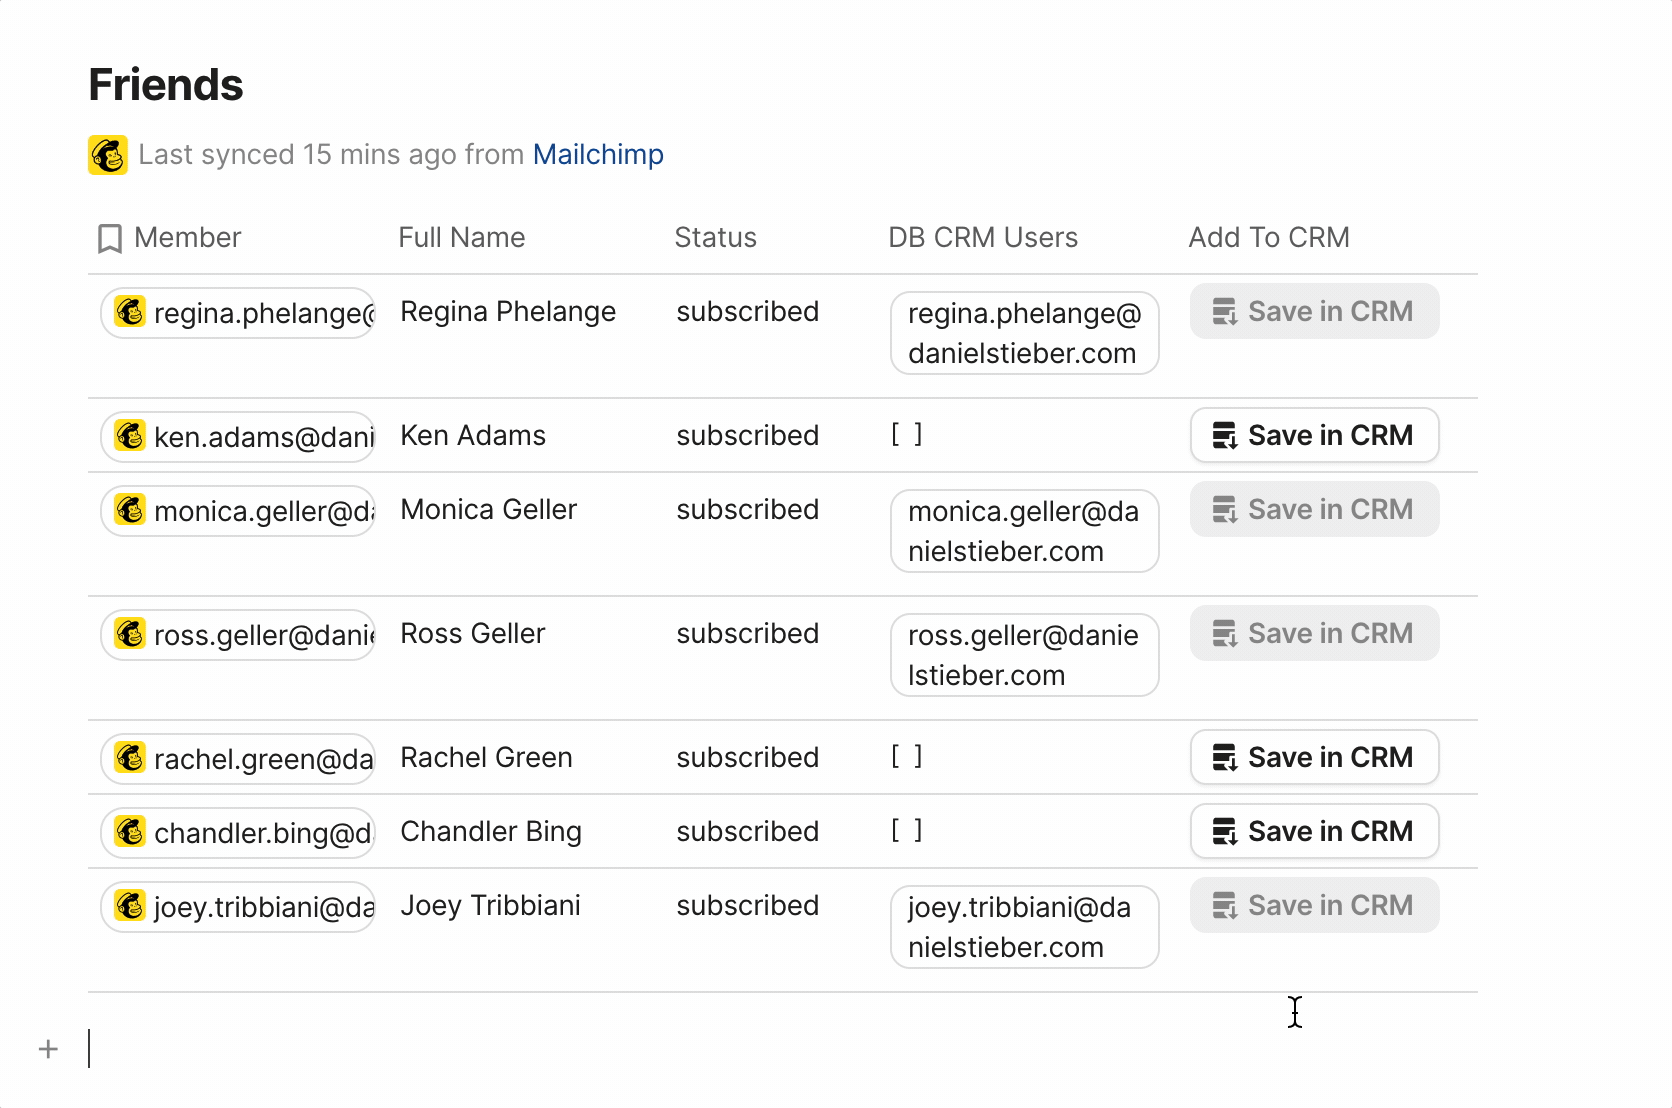
First of all, we need to implement the Audience table from the Mailchimp pack.

Check for CRM status
To check if the user already exists in the CRM table, we can use a simple lookup formula

Now we can see in our Mailchimp pack table who is in the CRM and who is missing.
Add Subscriber to CRM table
To add an audience member to the CRM table, we can just use an add row button and fill out the columns with the respective data.

Same as before, we can use a condition to disable the buttons we don’t need.

Since there is no API request required, the action runs in the blink of an eye.
Automate it
Before we can set up the automation in the doc, we need to edit the refresh data settings of our Audience table. That way we automatically get the latest Audience list daily or hourly into our doc. You can open the table options by clicking on “edit” below the table name.

After we are sure we automatically have fresh data, we can set up the actual automation. This time we can go for a time-based event and trigger the button column again.

As always there are multiple ways to accomplish tasks and hopefully, this guide is a good thought starter to let you set it up in your own way suited to your use case.
Want to print your doc?
This is not the way.
This is not the way.
Try clicking the ··· in the right corner or using a keyboard shortcut (
CtrlP
) instead.