icon picker
Set up a Slack Automation

This covers setting up both time-based and change-based automations to send a notification via Slack.

Automations in Coda can be either time based (like sending a weekly meeting reminder) or change-based (for when something gets updated in one of your tables.)

Want to learn more? Check out
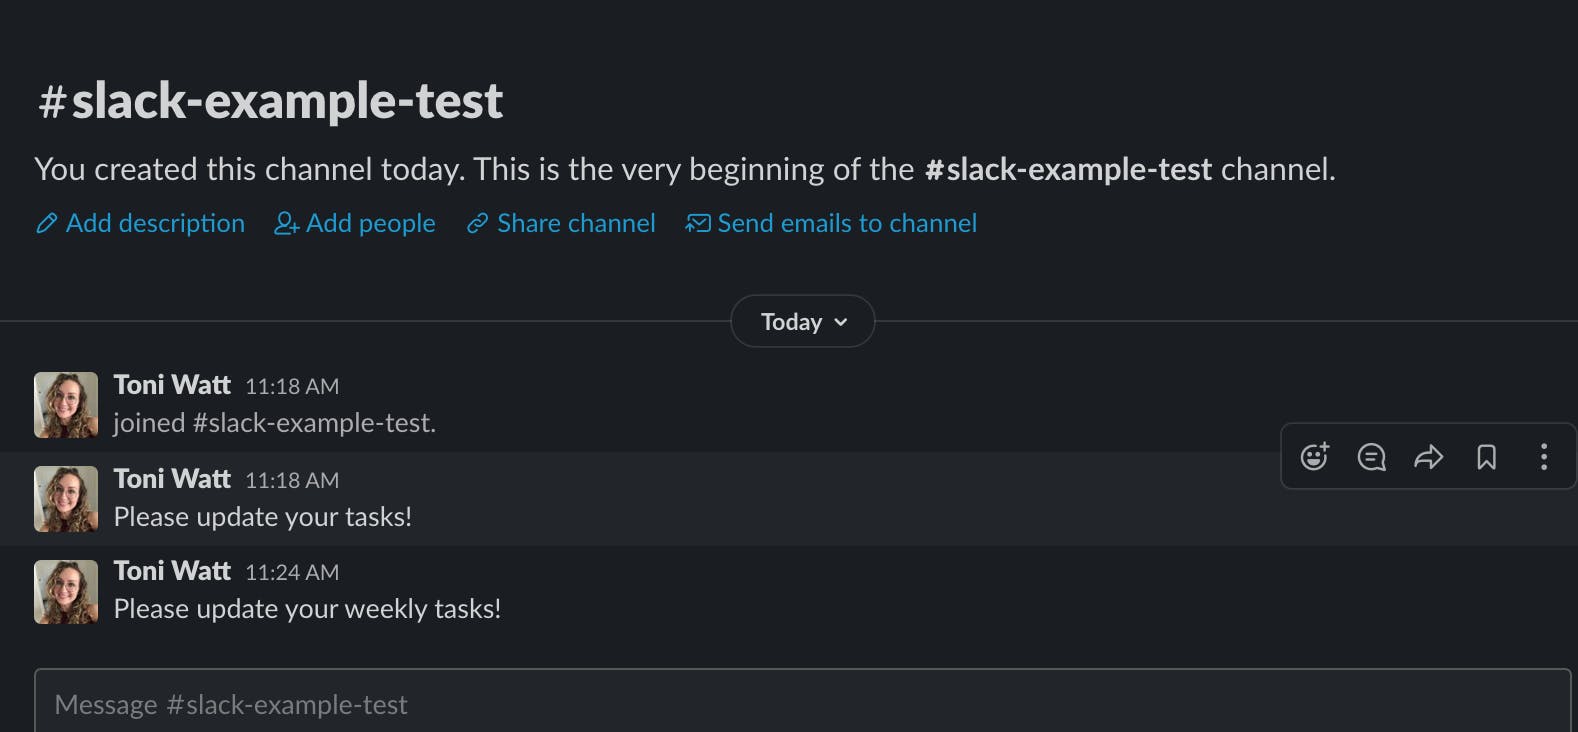
Slack Automation - Team Task Manager
1

Setting up a Timed-Based Automation

Time-Based Automation Video Walkthrough


Loading…

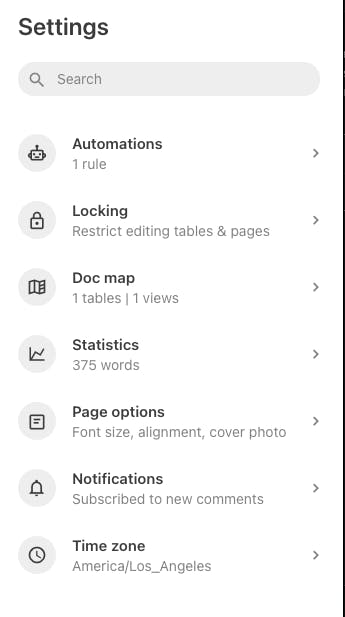
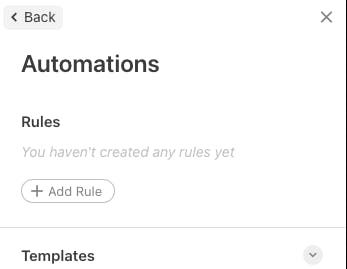
1. Click on “Settings” in the upper right hand corner of your doc, and select “Automations.”
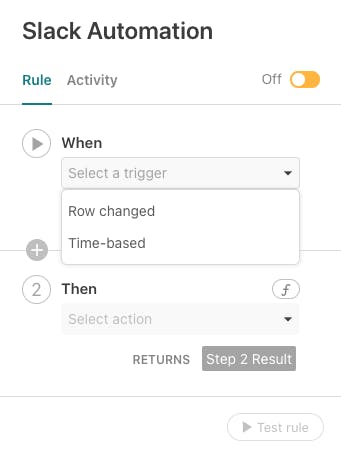
Screen Shot 2021-05-07 at 11.08.02 AM.png
Screen Shot 2021-05-07 at 11.08.16 AM.png

2. Click “Add Rule”

Screen Shot 2021-05-07 at 11.08.20 AM.png

3. Rename the rule, and then under “When” from the dropdown menu select “Time based” and choose the time when you would like it to run.

Screen Shot 2021-05-07 at 11.08.43 AM.png

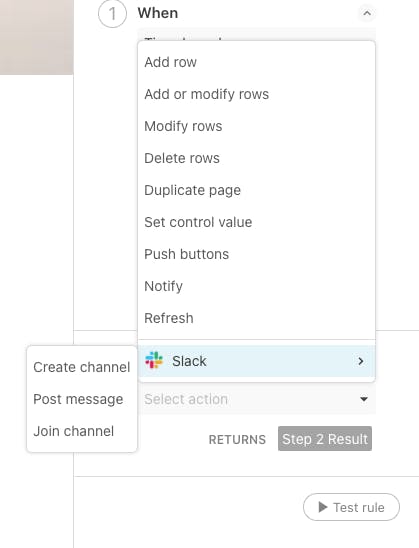
4. Under “Then” select Slack, and “Post Message”

Screen Shot 2021-05-07 at 11.09.07 AM.png

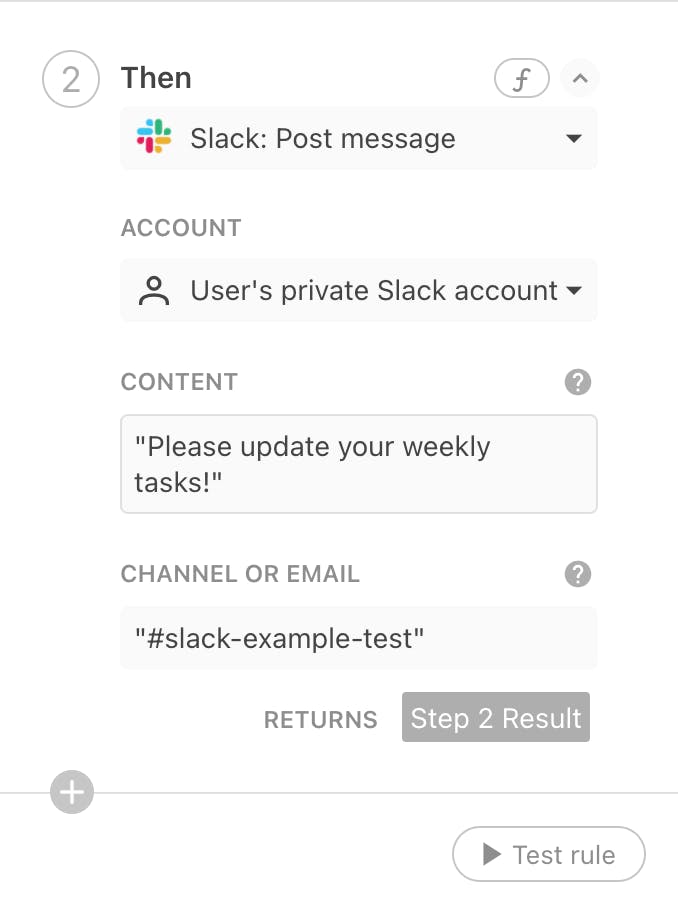
5. Fill in the details to build your notification

Account: Select the Slack account you are connecting to this automation
Content: Add your message that will be sent to Slack from this automation
Channel or Email: Fill in the Slack channel or the email address in Slack you are sending this notification to
Screen Shot 2021-05-07 at 11.40.52 AM.png

6. Test your rule by clicking “Test Rule.”

A message will appear in your linked channel if the automation is set up and working as expected.
Screen Shot 2021-05-07 at 11.44.40 AM.png

Setting up a Change-Based Automation

Change-Based Automation: Video Walkthrough

Loading…

1. Select “Settings” in the upper right hand corner of your doc, and then click “Automations”

image.png

2. Click “Add Rule’ to create a new automation

image.png

3. Rename your automation, and then under the “When” section select “Row changed”

Screen Shot 2021-05-07 at 11.52.15 AM.png

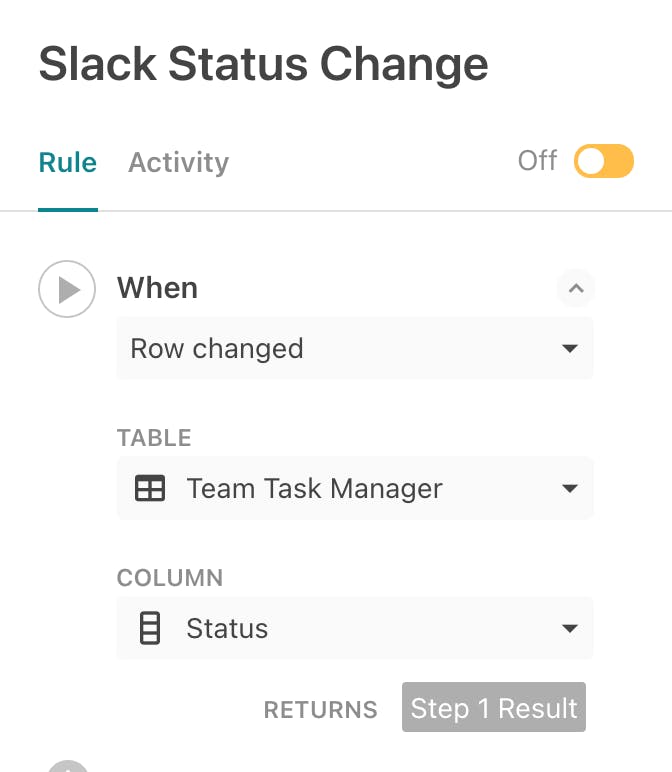
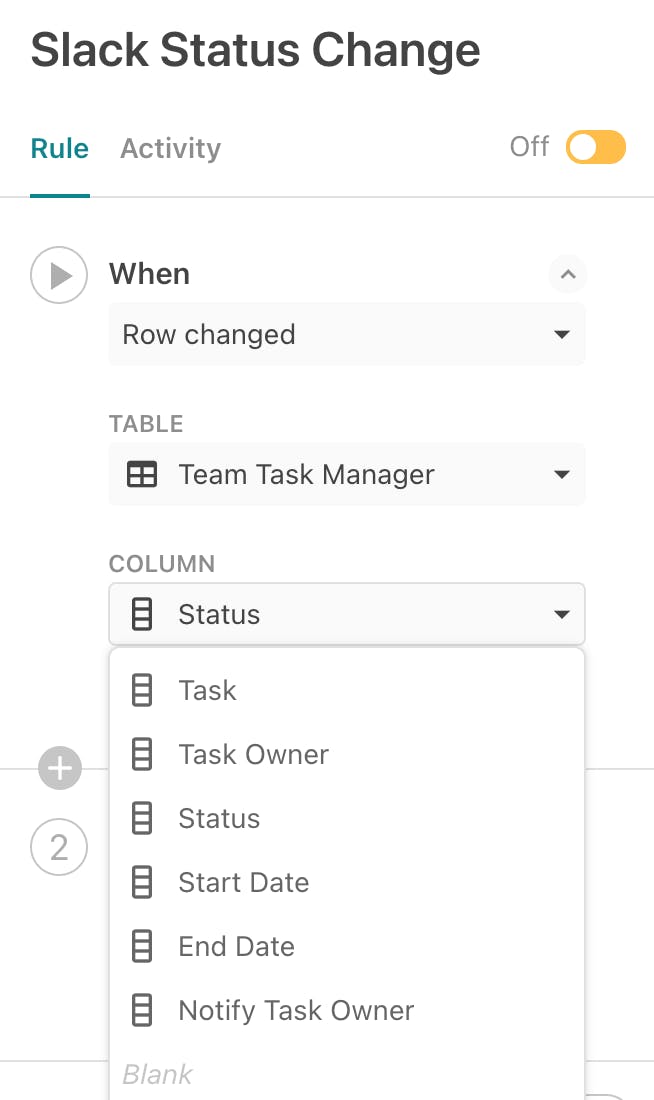
4. From the dropdown menu select the table, and the column you would like to associate with the automation.

This will set the automation to run when the column in this table is updated.
Screen Shot 2021-05-07 at 11.52.26 AM.png

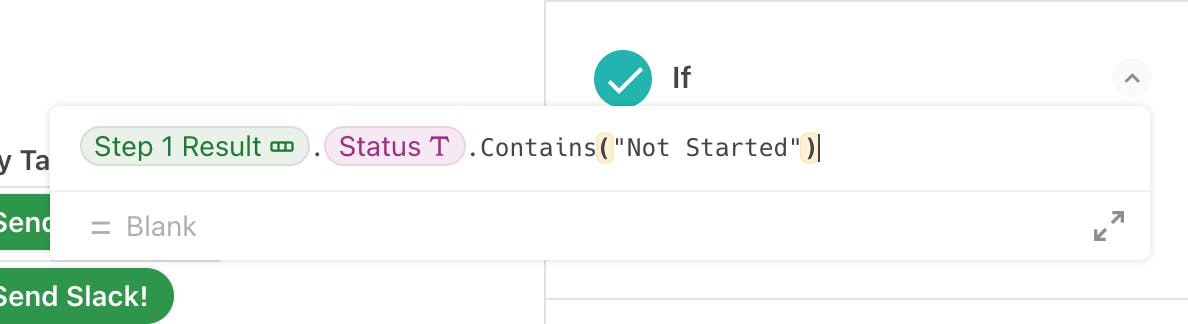
5. Include requirements for when the automation should run using the “If” statement field.

For this example, we’ve used our formula builder to say that the automation will run any time the “Status” column is updated to “Not Started.”
Screen Shot 2021-05-07 at 11.54.39 AM.png

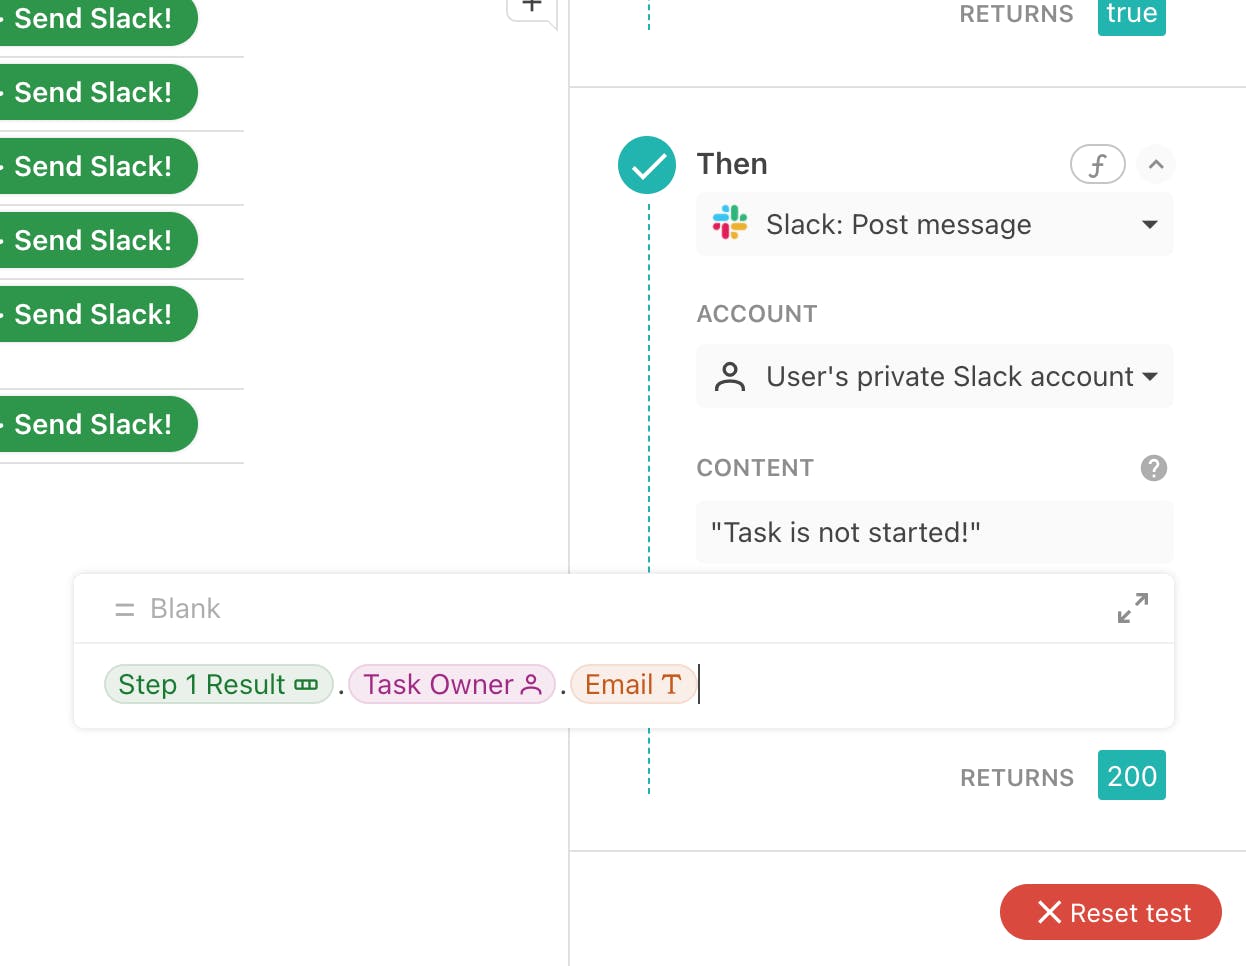
6. Set the action you’d like the automation to take under “Then,” by selecting Slack and “Post Message”


7. Fill in the details to build your notification

Account: Select the Slack account you are connecting to this automation
Content: Add your message that will be sent to Slack from this automation
Channel or Email: Fill in the Slack channel or the email address in Slack you are sending this notification to. For this example we are sending to the Task Owner listed for the tasks where the “Status” has been updated.
Screen Shot 2021-05-07 at 11.54.52 AM.png

8. Test your rule by clicking “Test Rule.”

A message will appear in your linked channel if the automation is set up and working as expected.
Screen Shot 2021-05-07 at 11.55.22 AM.png


Get started on your own Slack notifications by copying this doc!
Copy doc


Want to print your doc?
This is not the way.
Try clicking the ⋯ next to your doc name or using a keyboard shortcut (
CtrlP
) instead.