Skip to content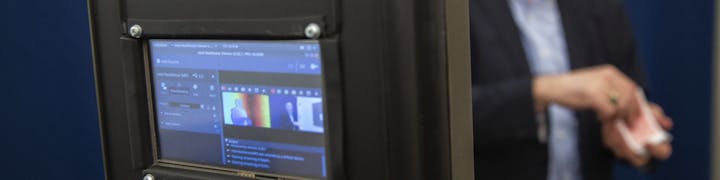
A slate to organize takes, since each take was recorded on multiple devicesa wider background
Check noise disruptionSilence all devicesCheck batteries
Try to use a fixed focal length lens (avoid zoom lenses) a 24mm or 35mm lens works bestShoot in manual exposure mode, manually setting the f stop and shutter speed for a proper exposureUse custom white balanceUse manual focusWe captured the stills two ways as an experiment but settled on horizontal images.
Glossary ー what are the common terms?re
Thing oneThing two Thing three
“Place at least two control points prior to adding the distance constraint.Activate the tool.Select an image in the 2D image view which contains control points between which you want to define a distance. Alternatively, select a layout with two or more 2D image views and select more images so that you can see both end points.Click and hold the left mouse button on any of the two end points.Move mouse cursor to the second control point (in any view). You will see a dotted line starting in the first point and ending at the mouse cursor pointer. The dashed line end will automatically snap near the control points and the application will automatically highlight them.Release the mouse button to confirm the creation.
 The Capture Process
wHere is the process developed by Volum and tested by the Newmark Team. The steps involve capture and prepare 3D footage with the Volum Box workflow. The capture pipeline involves a combination of cameras and software. This workflow emphasizes working as cheaply and portably as possible given the current equipment available. (3D video capture tools are rapidly evolving so capabilities are improving frequently). This is not a fixed process–alternative hardware and software exist for many of these steps. The cornerstone of making this capture process portable is the Volum Box. The Volum Box is not a commercial product, it's a do-it-yourself portable 3D camera and computer in a lunchbox size container. You'll find more info on the Volum Box below.
This is a high-level overview of the process so that you can see how all of the parts of the pipeline fit together. Detailed steps are listed in the tabs below. There are many steps in this process, but once you become familiar you should be able to go through the process from start to finish in two or three hours.
Recording: to create a 3D scene you will record 3D video; audio; and photos for a static 3D model.
The capture phase of the process starts with recording 3D video with the RGB+D camera (Volum Box or equivalent). Audio should also be recorded separately to accompany the video (The RGB+D camera's don't record audio.) The next step is to capture photos of the space where the video was recorded. These photos will be used to create a photogrammetry model. The photogrammetry model and 3D video are used together to properly scale and place all of the elements in the scene.
Processing: Once the 3D video, audio and photos for the 3D scene have been recorded, those raw recordings need to be processed and converted to be ready to edit and playback as 3D assets. The 3D video from the Volum Box needs to be transferred from the Volum Box hard drive to another PC, then converted into a DepthKit format mp4. Once the 3D video is in the DepthKit mp4 format you can edit it in video editing software like Premiere or Final Cut, sync your audio files, and export.
The photos go into photogrammetry software to create a 3D model of the space.
Putting it all together: The final step of post-production is to align the photogrammetry model and the 3D video. We're using the Unity software-development engine for this step and also for putting the 3D scene into an augmented reality experience.
Note: the photogrammetry model will add detail to the scene, but is not required to get the 3D video to playback.
Click the triangle toggles for details
Required Equipment
-Camera for photogrammetry
Cameras
1. Intel RealSense D415 RGBD camera
2. Azure Kinect
3. DSLR Camera to capture stills for photogrammetry ( a Canon 5d Mark II)
4. iPhone
5. GoPro (to capture a timelapse of our process, not required)
Audio equipment
1 Audio recorder (Marantz PMD 660)
2. Wireless microphone transmitter and receiver (Lectrosonics 100 series)
A Windows Computer to run the following software tools:
Intel Realsense SDK
ffmpeg
rs_bag2image
Renamer Lite
Reality Capture
Depthkit
Adobe Premiere
Unity
Other things we used
1. Two lights bounced off the wall and ceiling to create soft, even lighting
2. iPhone to capture 4k video of Magician
3. GoPro (to capture a timelapse of our process, not required)
4. Tripods and light stands
Things we should have used
Video Capture
(Intel RealSense D415)
Pre-Recording Checklist
The camera should be on a tripod. Try to level it and put it at the height of your subject's shoulder
Volum Box Workflow
Photogrammetry Capture
(DSLR)
We used Photogrammetry to build a 3D model of the scene. We also made a still image capture from our video depth cameras and we added that still to the other stills when when the was creating the model. Using the coordinates of the still capture from the 3D video model, we could add the cooprdinates of the video capture to Unity to "place" the video stream in the proper place in the 3D still model.
To create the 3D model of the scene, we used a still camera to capture a series of images that overlap with each other. Capturing this series stills of the scene from different heights and different directions we used which stitched the still images into a 3-D model of the space. (PC only)
a few tips:
While you can use a smart phone, a DSLR or any camera that has manual settings is best as you have much more control over the process.
No matter which type of capture device you use, avoid any automatic settings
Converting Video
Depth Video (DepthKit)
converting stuff goes here
Used rs_bag2image () in the command line tool to extract our two .bag recordings from the second take.
EXAMPLE:
-b input bag file path. (required)
-s enable depth scaling for visualization. false is raw 16bit image. (bool)
-q jpeg encoding quality for color and infrared. [0-100]
-d display each stream images on window. false is not display. (bool)
The result is one folder for each .bag file with extracted color and depth frames. New folder is created in same folder as original files.
Now we can select all of the newly extracted color stills and use the Rename command (right-click) that is part of windows explorer to rename the extracted color stills as RGB (1), RGB (2)... etc
Open command prompt.
Navigate to the drive (name of drive (eg D:) and enter) then folder where the files are stored.
Then copy and paste Ben’s ffmpeg command (from rs_bag2image and FFMPEG Instructions.txt) into the command prompt and run.
FFMPEG:
the file will be output (in this case) to: sensor01.mp4
This will create an mp4 file called sensor01.mp4
Copy the sensor01.mp4 file into the empty container depthkittake/_sensor/sensor01/ folder
Select all of the extracted depth files and copy into the empty depthkittake/_sensor/depth/ folder
Drag all of the depth frames in the depthkit container into ReNamer Lite
In ReNamer Lite add a rule and select user input. Paste in all of the contents of Ben’s Frames LIst - 10 Minutes.txt doc. Uncheck the skip extension box and click add rule. It may say not responding while loading the new names. Then click Rename to make the change.
Open Depthkit and open the project folder for the depthkit containers that hold the extracted/converted realsense frames. Go into edit mode. Export combined per pixel video.
Syncing Audio and Video
Audio and Video (Premiere)
Bring the depthkit format mp4 and the audio recordings into a non-linear editing software such as Premiere or Final Cut.
Visually match your sync point (a clap, slate or other moment) with the point that the sound shows up in the audio file. You can do this by looking at your video frame by frame and examining the waveforms of the audio recording. Check that you have the audio and video correctly in sync by watching your clip from start to finish.
Once the audio and video are in sync, you can export the video clip with the audio added. Make sure that the video resolution and codec stay the same as the original clip on export.
Publishing
From Reality Capture to Unity
(Unity + AR Foundation)
In Unity…
Start in Unity Hub, ver 2.3.0
New button to start a new project> unity version 2019.2.19 F1
Program creates a new project
Go to Assets> Import package>Custompackage
Then navigate to to depthkit package, ending in .unitypackage (unity depthkit plugin)
….Under assets folder, this adds a bunch of new assets related to depthkit
Make a folder for Depthkit clips named DepthKit Clips
Inside that folder, make a folder just for each clip
(go back to connect depthkit capture export per pixel video. Where there is mp4 and a png.
Put both into the new clips folder inside Depthkit Clips Folder you just made
Also put the .txt in the same folder
Go to the depthkit menu in nav bar at top
Click on Create DepthKit Clip..you’ll see it in your scene hierarchy
Select that clip...you’ll see info
in inspector window at left
Drag txt file to metadata file , png in poster,
under video player tab, drag video clip (question on audio clip..shows up since we synced previously in Premiere Pro)
SAVE
Under depthkit photo look tab, msh density set to highest, not sure it seems to improve quality.
Viewing
(iOS and Android)section here
FAQ
Additional Material
Stuff about apps and viewing etc.
Steps
Juggling test. With the Azure Connect
While recording make sure to label left and right cameras clearly.
Recording with Azure connect...
Settings: 2160, 1024x1024 wide raw,
Clap to sync audio with second source audio.
Stay still for 5 seconds at start and finish of the recording.
Make the recording
Export as combined per pixel video
Each take creates its own folder
Important: create a still photo of the empty scene using the azure connect camera in the same position as when you recorded the video
After recording the video, record the scene again without the subject to capture the scene empty. DO NOT do an export from depthkit for this empty scene...this is automatically saved as part of the recording process
You’ll use this still to position the video capture in your volumetric scene.
Go to the folder from the empty scene you just recorded take>sensor>sensor01 folder. Inside will be a video foil
Use Adobe Premiere to export a still frame...drop this video of the empty scene
In the source viewer, hit the little camera icon, rename the still. We exported as a jpeg since we used jpegs to create the Volumetric capture
SYNC audio to Video
Import video and audio into Premiere
Create a sequence from the video clip , add the audio from the second source audio recorder and sync them by lining up the the spike the clap makes on the audio track with the video of the hands coming together.
Trim and export.
Use the export settings for video>In basic video setting window, choose “match source.”
Bringing the azure connect image into the model…
Try to have several still images around and slightly behind the position of the azure connect
With RealSense
In Unity…
Start in Unity Hub, ver 2.3.0
New button to start a new project> unity version 2019.2.19 F1
Program creates a new project
Go to Assets> Import package>Custompackage
Then navigate to to depthkit package, ending in .unitypackage (unity depthkit plugin)
….Under assets folder, this adds a bunch of new assets related to depthkit
MAke a folder for Depthkit clips named DepthKit Clips
Inside that folder, make a folder just for each clip
(go back to connect depthkit capture export per pixel video. Where there is mp4 and a png.
Put both into the new clips folder inside Depthkit Clips Folder you just made
Also put the .txt in the same folder
Go to the depthkit menu in nav bar at top
Click on Create DepthKit Clip..you’ll see it in your scene hierarchy
Select that clip...you’ll see info
in inspector window at left
Drag txt file to metadata file , png in poster,
under video player tab, drag video clip (question on audio clip..shows up since we synced previously in Premiere Pro)
SAVE
Under depthkit photo look tab, msh density set to highest, not sure it seems to improve quality.
Back to Reality Capture…
Our model is finished.
-Photogrammetry
Working on the messed up door capture with a big hole…
(note...had problems capturing the door because it was too smooth)
Align photos
Set reconstruction area
Normal detail
Simplify tool (set to 1,000,000 triangles)
Check integrity
Check topology
Clean Model
Close Holes
Unwrap
Colorize
Texture
Defining a distance
In the real world, measure a distance between two points in the scene you are capturing in the photogrammetry model.
From the Reality Capture HELP tool
This procedure will create a distance constraint between two points. However, you have not defined a physical distance between two end points yet. To do so, you need to set the distance in the panel which was opened right after you created the constraint.
Once you are satisfied with the newly-defined distance, click the Update or the Align Images (F6) button in the Alignment tab.”
The scale of the defined distance is meters.
Export
Click Model in the reconstruction tab to export
Create an exports folder within the Reality Capture folder
Export as FBX following Ben’s instructions from the video and export cameras with their original names.
Bring the FBX file into Unity and extract the textures and materials
Add the extracted materials to the FBX
Bring the FBX into the scene and copy the coordinates and orientation of the depth camera to the depth model
...starting in the middle
-following Ben’s .bag Files to Depthkit video
Used rs_bag2image () in the command line tool to extract our two .bag recordings from the second take.
EXAMPLE:
"C:\Program Files\rs_bag2image\rs_bag2image" -b="D:\SpatialNewsChallenge\juggling test\RealSense Captures juggling\juggle2\20200221_160154.bag" -q=90 -s=false d=false
"C:\Program Files\rs_bag2image\rs_bag2image" -b="D:\SpatialNewsChallenge\juggling test\RealSense Captures juggling\juggle2\20200221_160154.bag" -q=10 -s=false d=false
-b input bag file path. (required)
-s enable depth scaling for visualization. false is raw 16bit image. (bool)
-q jpeg encoding quality for color and infrared. [0-100]
-d display each stream images on window. false is not display. (bool)
The result is one folder for each .bag file with extracted color and depth frames. New folder is created in same folder as original files.
Now we can select all of the newly extracted color stills and use the Rename command (right-click) that is part of windows explorer to rename the extracted color stills as RGB (1), RGB (2)... etc
Open command prompt.
Navigate to the drive (name of drive (eg D:) and enter) then folder where the files are stored.
Then copy and paste Ben’s ffmpeg command (from rs_bag2image and FFMPEG Instructions.txt) into the command prompt and run.
FFMPEG:
ffmpeg -r 29.97 -f image2 -s 1280x720 -i "RGB (%d).jpg" -vcodec libx264 -crf 10 -pix_fmt yuv420p sensor01.mp4
-r is the framerate (fps)
-crf is the quality, lower means better quality, 15-25 is usually good
-s is the resolution
-pix_fmt yuv420p specifies the pixel format, change this as needed
the file will be output (in this case) to: sensor01.mp4
This will create an mp4 file called sensor01.mp4
Copy the sensor01.mp4 file into the empty container depthkittake/_sensor/sensor01/ folder
Select all of the extracted depth files and copy into the empty depthkittake/_sensor/depth/ folder
Drag all of the depth frames in the depthkit container into ReNamer Lite
In ReNamer Lite add a rule and select user input. Paste in all of the contents of Ben’s Frames LIst - 10 Minutes.txt doc. Uncheck the skip extension box and click add rule. It may say not responding while loading the new names. Then click Rename to make the change.
Open Depthkit and open the project folder for the depthkit containers that hold the extracted/converted realsense frames. Go into edit mode. Export combined per pixel video.
Synching videos with audio etc in Premiere. I’m going to try trimming everything down.
_______________________
Jump Back>
Jump Forward>
Want to print your doc?
This is not the way.
This is not the way.

Try clicking the ··· in the right corner or using a keyboard shortcut (
CtrlP
) instead.