Gallery
Org Config
Share
Explore

icon picker
Setup Tag/Pixel Tracker


Step-by-step Guide
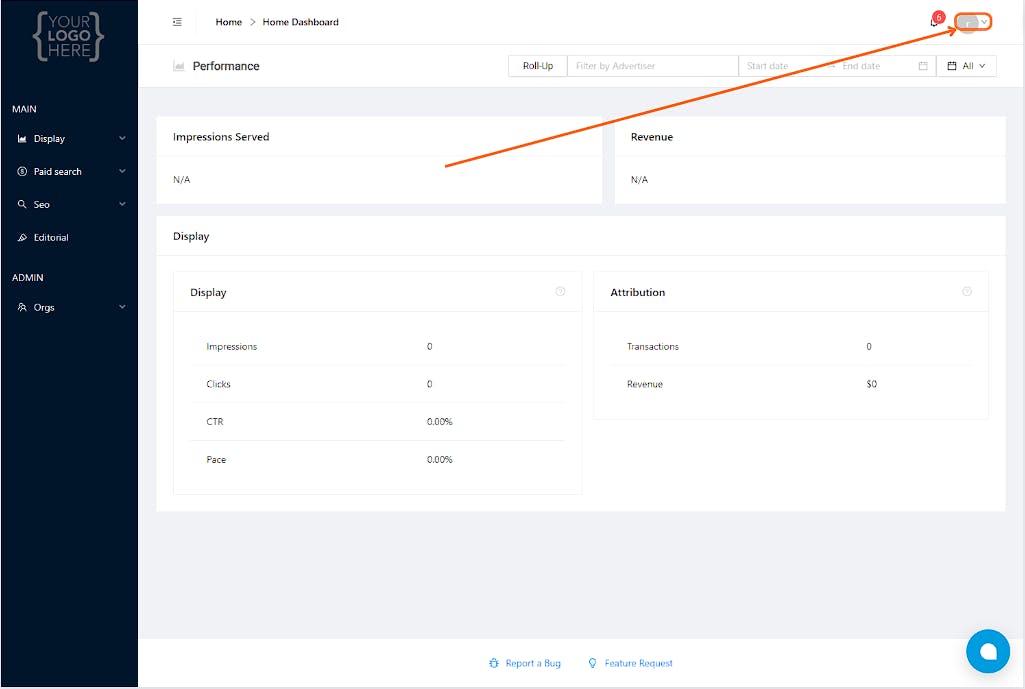
1. Login to

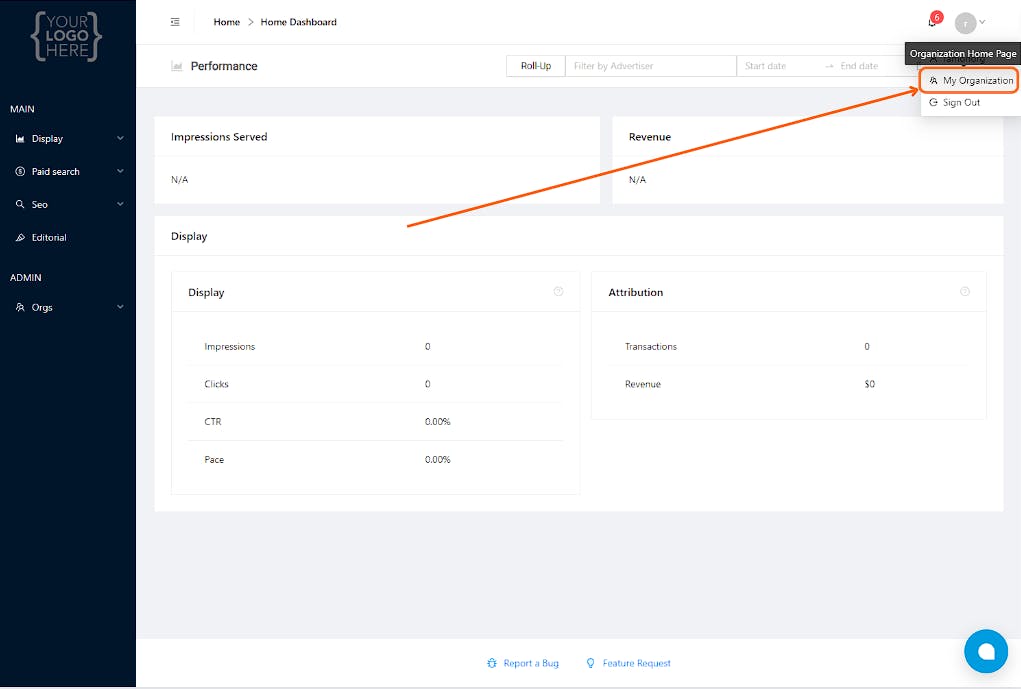
2. Click on your PROFILE ICON
image.png

3. Click your COMPANY NAME (in our sample, it’s named as “My Organization”)
image.png

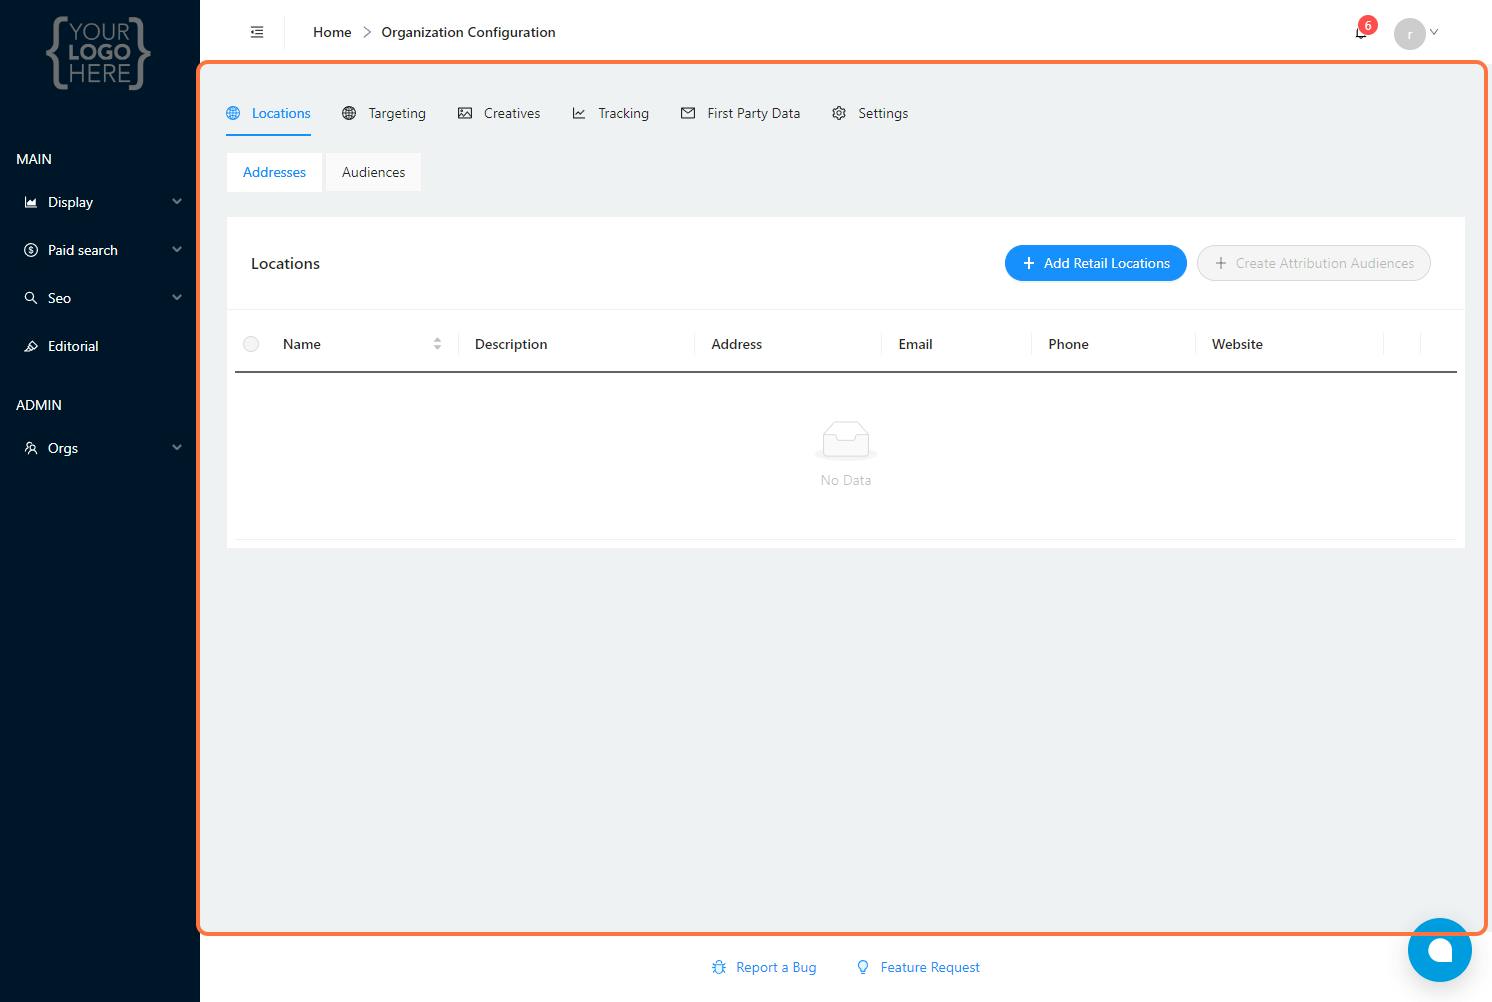
4. You will be redirected to your company’s configuration page
image.png

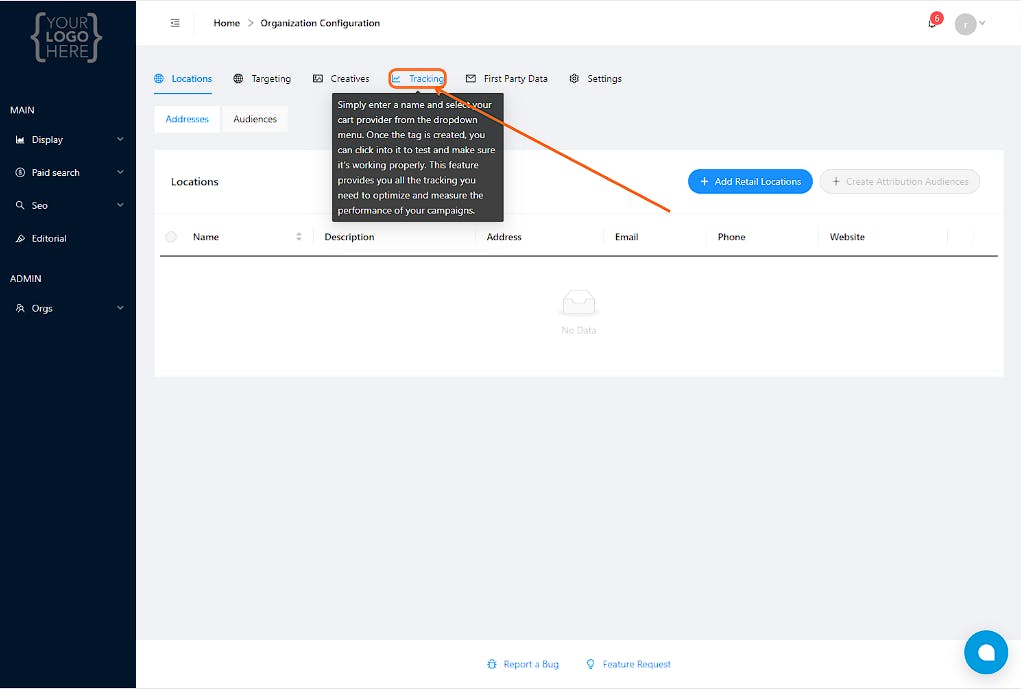
5. Next, click the TRACKING TAB button
image.png

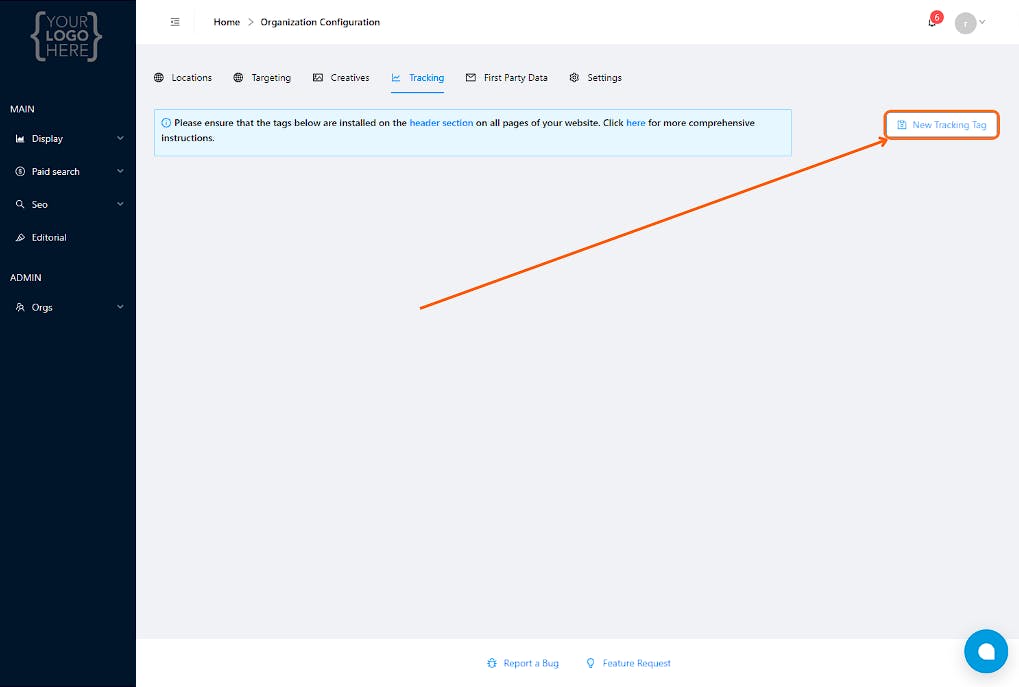
6. Once you’re in the Tracking Tab page, click the “NEW TRACKING TAB” button
image.png

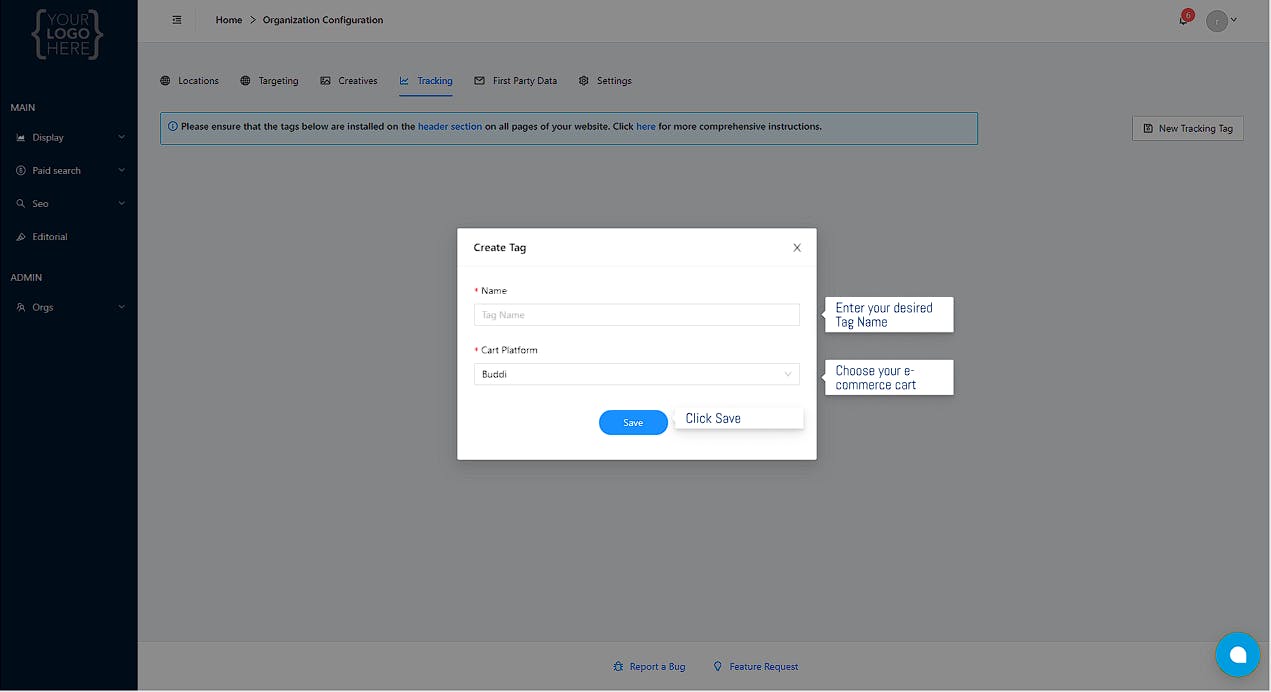
7. The new tracking tag form will show up
a. Enter your desired tracking tag name
b. Choose your e-commerce cart platform (Simply select the “Thirdparty” option if you can’t find your cart on the Cart Platform drop-down options)
c. Click the Save button
image.png
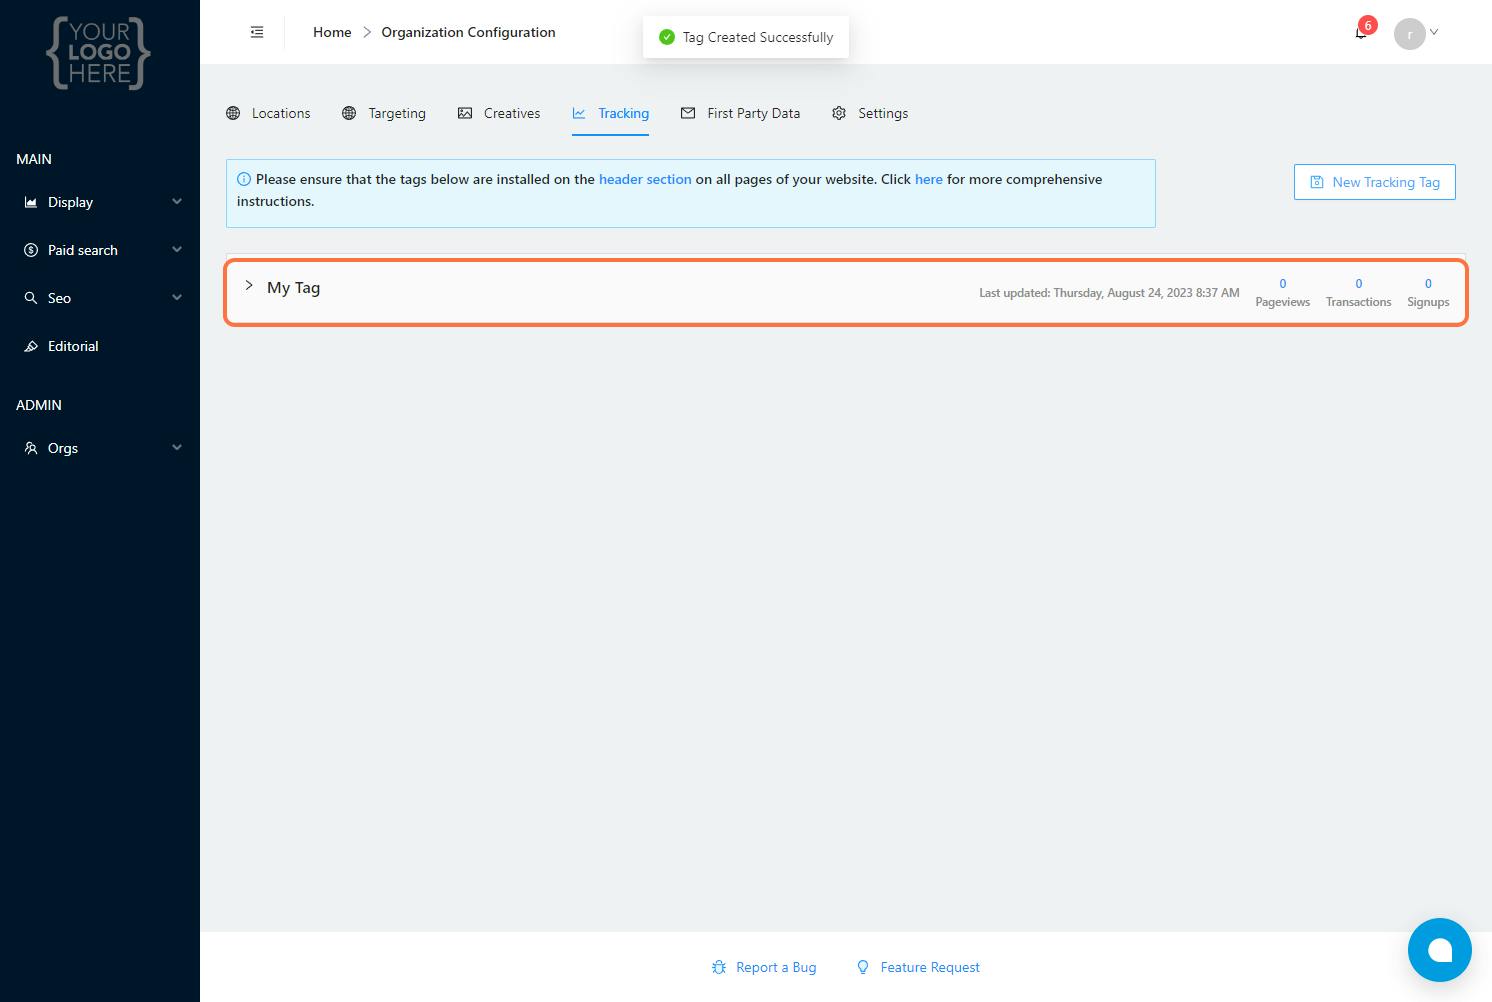
8. Your tracking tag will be saved. Click it to show more details
image.png

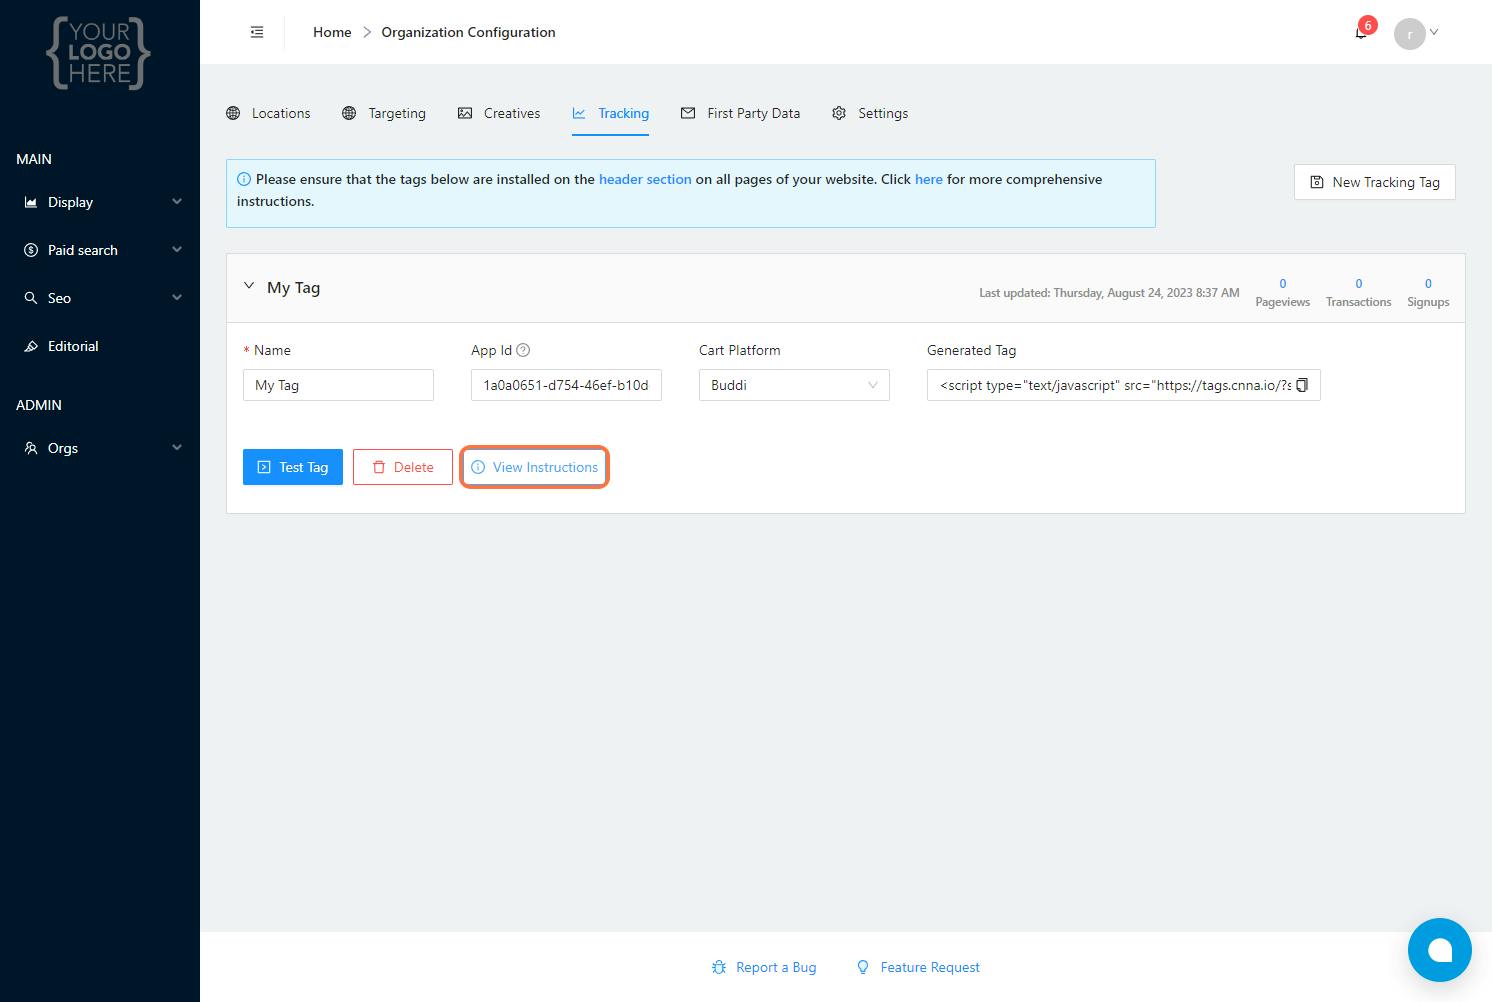
9. Finally, click the “VIEW INSTRUCTIONS” button to show you the instructions on how to install the tag/pixel on your website
Note: Instructions differ depending on the cart that you’re using
image.png

10. Follow the instructions that will be shown on the dashboard to install the tag/pixel on your website.

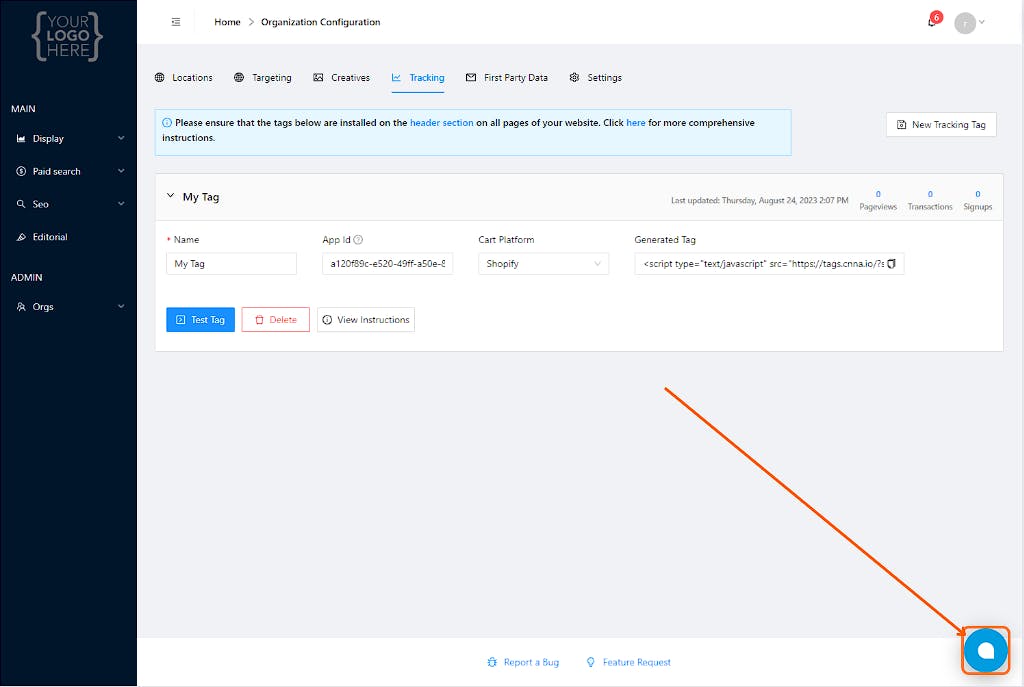
11. If you need live customer support, click the ChatWoot button to communicate with us
image.png

Related Links

Tag Installation Guide

Share
 
Want to print your doc?
This is not the way.
Try clicking the ⋯ next to your doc name or using a keyboard shortcut (
CtrlP
) instead.