Skip to content
 Pack Installation
Last edited 1282 days ago by Emil Lamprecht.
Step 1 | Search for & Start Installation
To begin installation, navigate to the Insert bar in the upper right hand side of your doc. Then type “Dropbox sign” and select the pack.
Make sure to select the pack that is “by Dropbox Sign”!
If you do not have a Coda account:
You’ll need to set up an account and create a new doc to use this Coda pack.
Sign up for Coda
Step 2 | Login To Dropbox Sign & Create API Key
Open a new browser tab and navigate to and log in to your account.
If you do not have an account:
You’ll need to set up an account to use this coda pack. Any paid Dropbox Sign account will work. Free Accounts may work but are not stable.
Step 2.1 | Settings
Once logged into your account, navigate to your account settings:

Step 2.2 | API Panel
In your settings, navigate to the API panel in the center of the screen:

Step 2.3 | Generate API Key
Click on the Generate key button to create a new API key you can use with the Coda pack:

Step 2.4 | Generate API Key
Name and complete generation of the new key:

Step 2.5 | Generate API Key
Copy API key value for use in Coda:

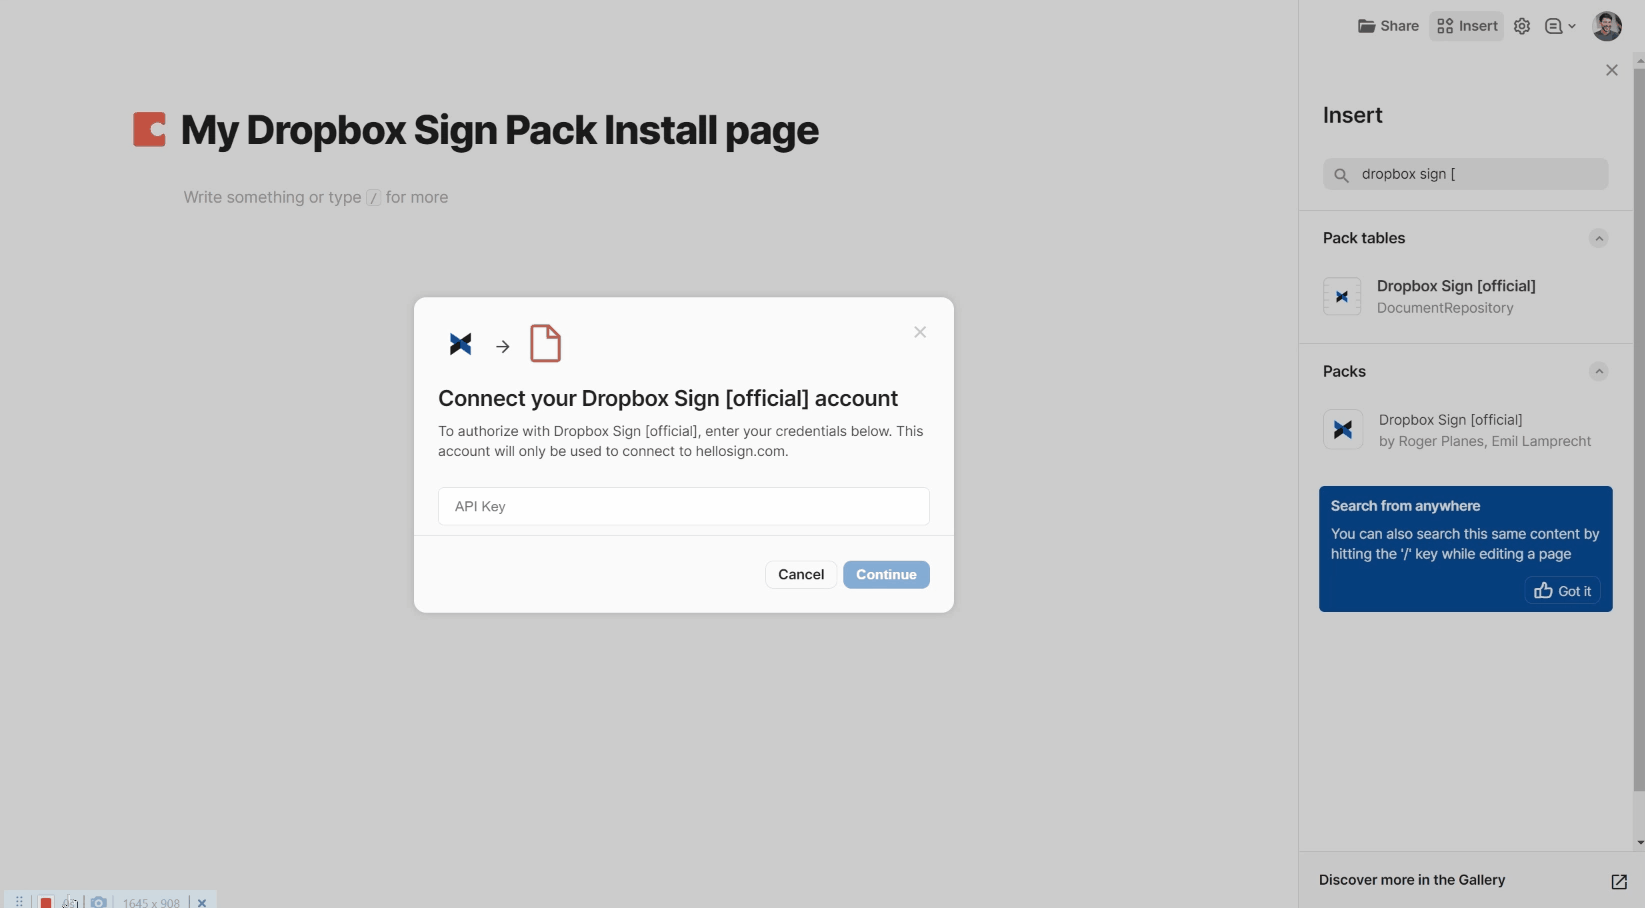
Step 3 | Complete Pack Installation In Coda
Once you’ve generated and copied a new API key in Dropbox Sign. You can bring that back to Coda and pick up where you left off.
Paste the key in the available field and follow the prompts to complete installation. You can then drag and drop the pack table and any available templates into any page in your doc.
Step 3 | Sync Refresh & Settings
Make sure to explore the sync table refresh options and additional pack settings. Bear in mind that you will only be able to sync table updates every 2 minutes and additional requests will time out or fail.
If you have any issues or questions regarding the installation or use of this pack, please reach out to us at .
🎉 ENJOY!
Want to print your doc?
This is not the way.
This is not the way.

Try clicking the ··· in the right corner or using a keyboard shortcut (
CtrlP
) instead.