Skip to content
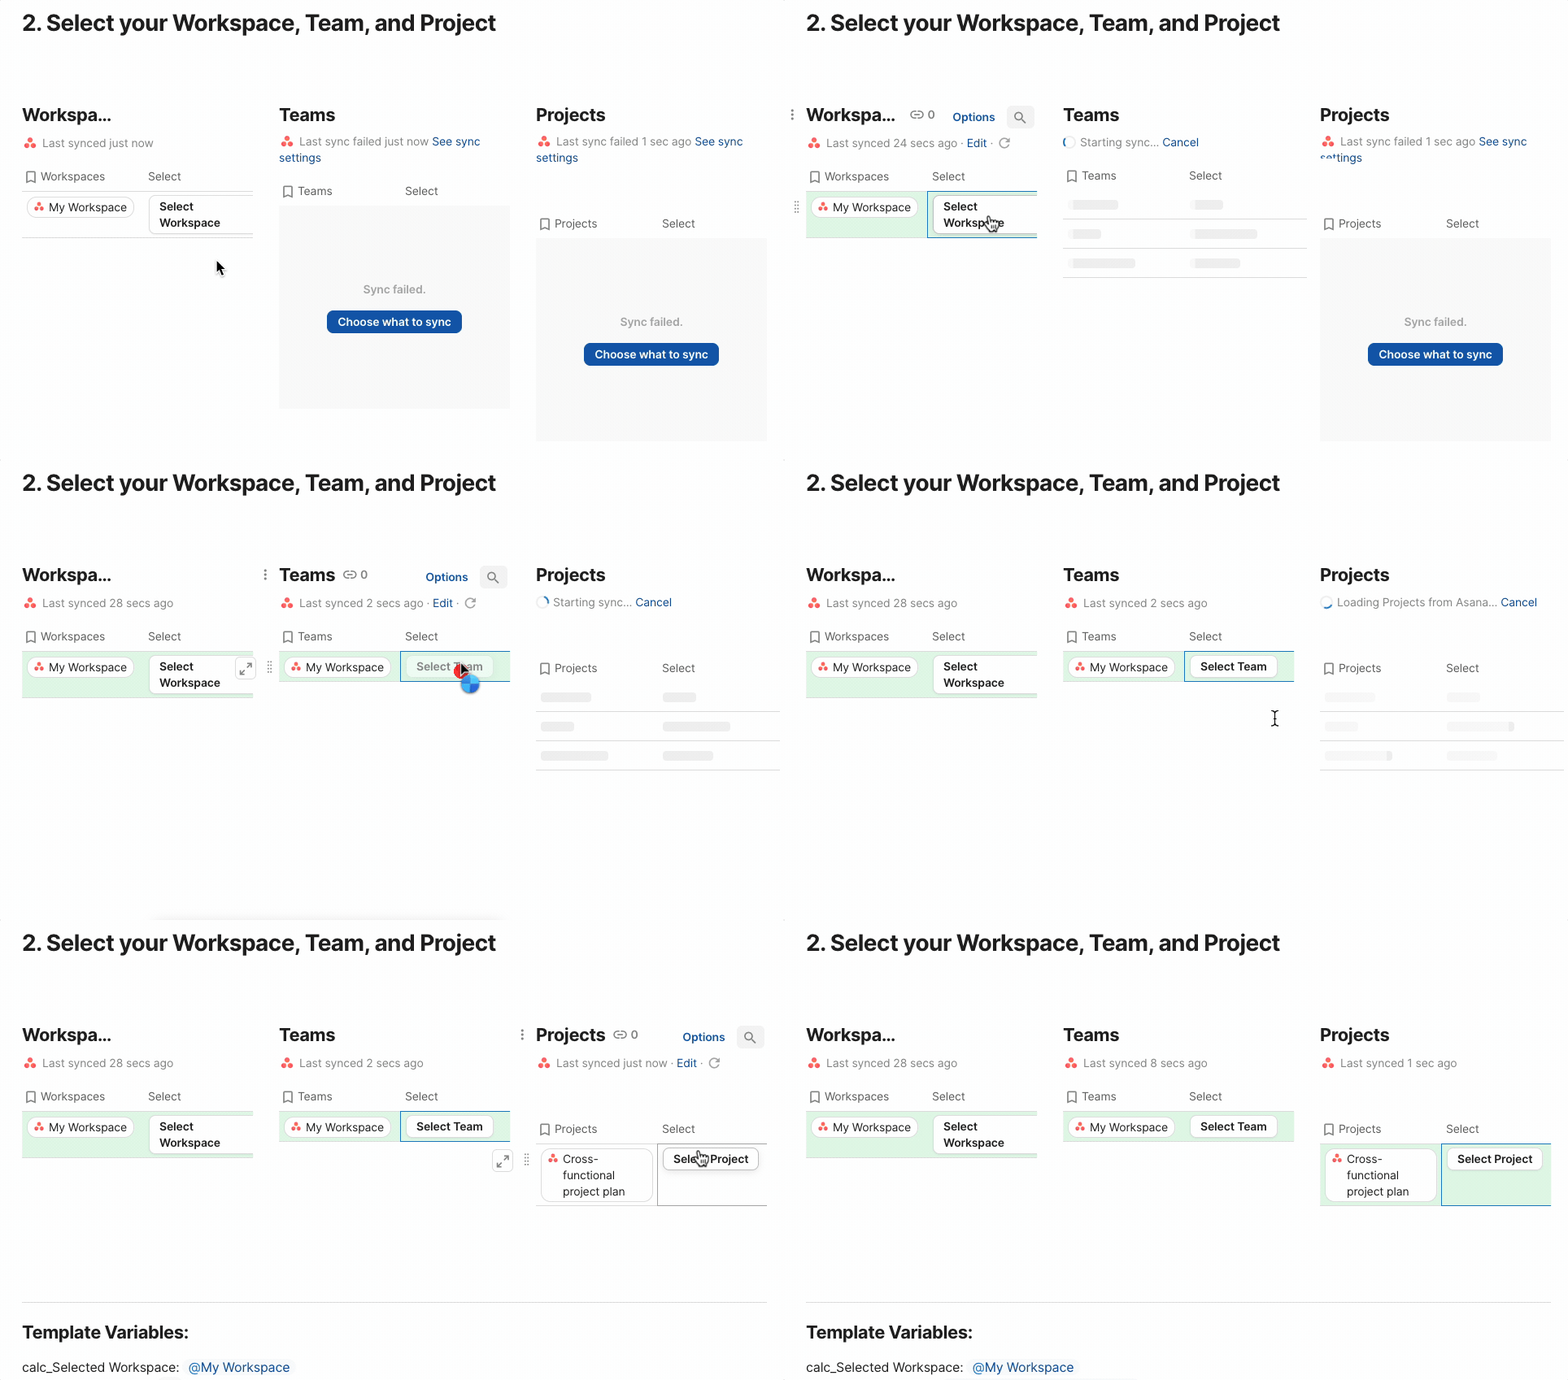
Select a Workspace from the table using the buttons provided, it will load in the teams within that workspace on the table.
 Setup
Setup
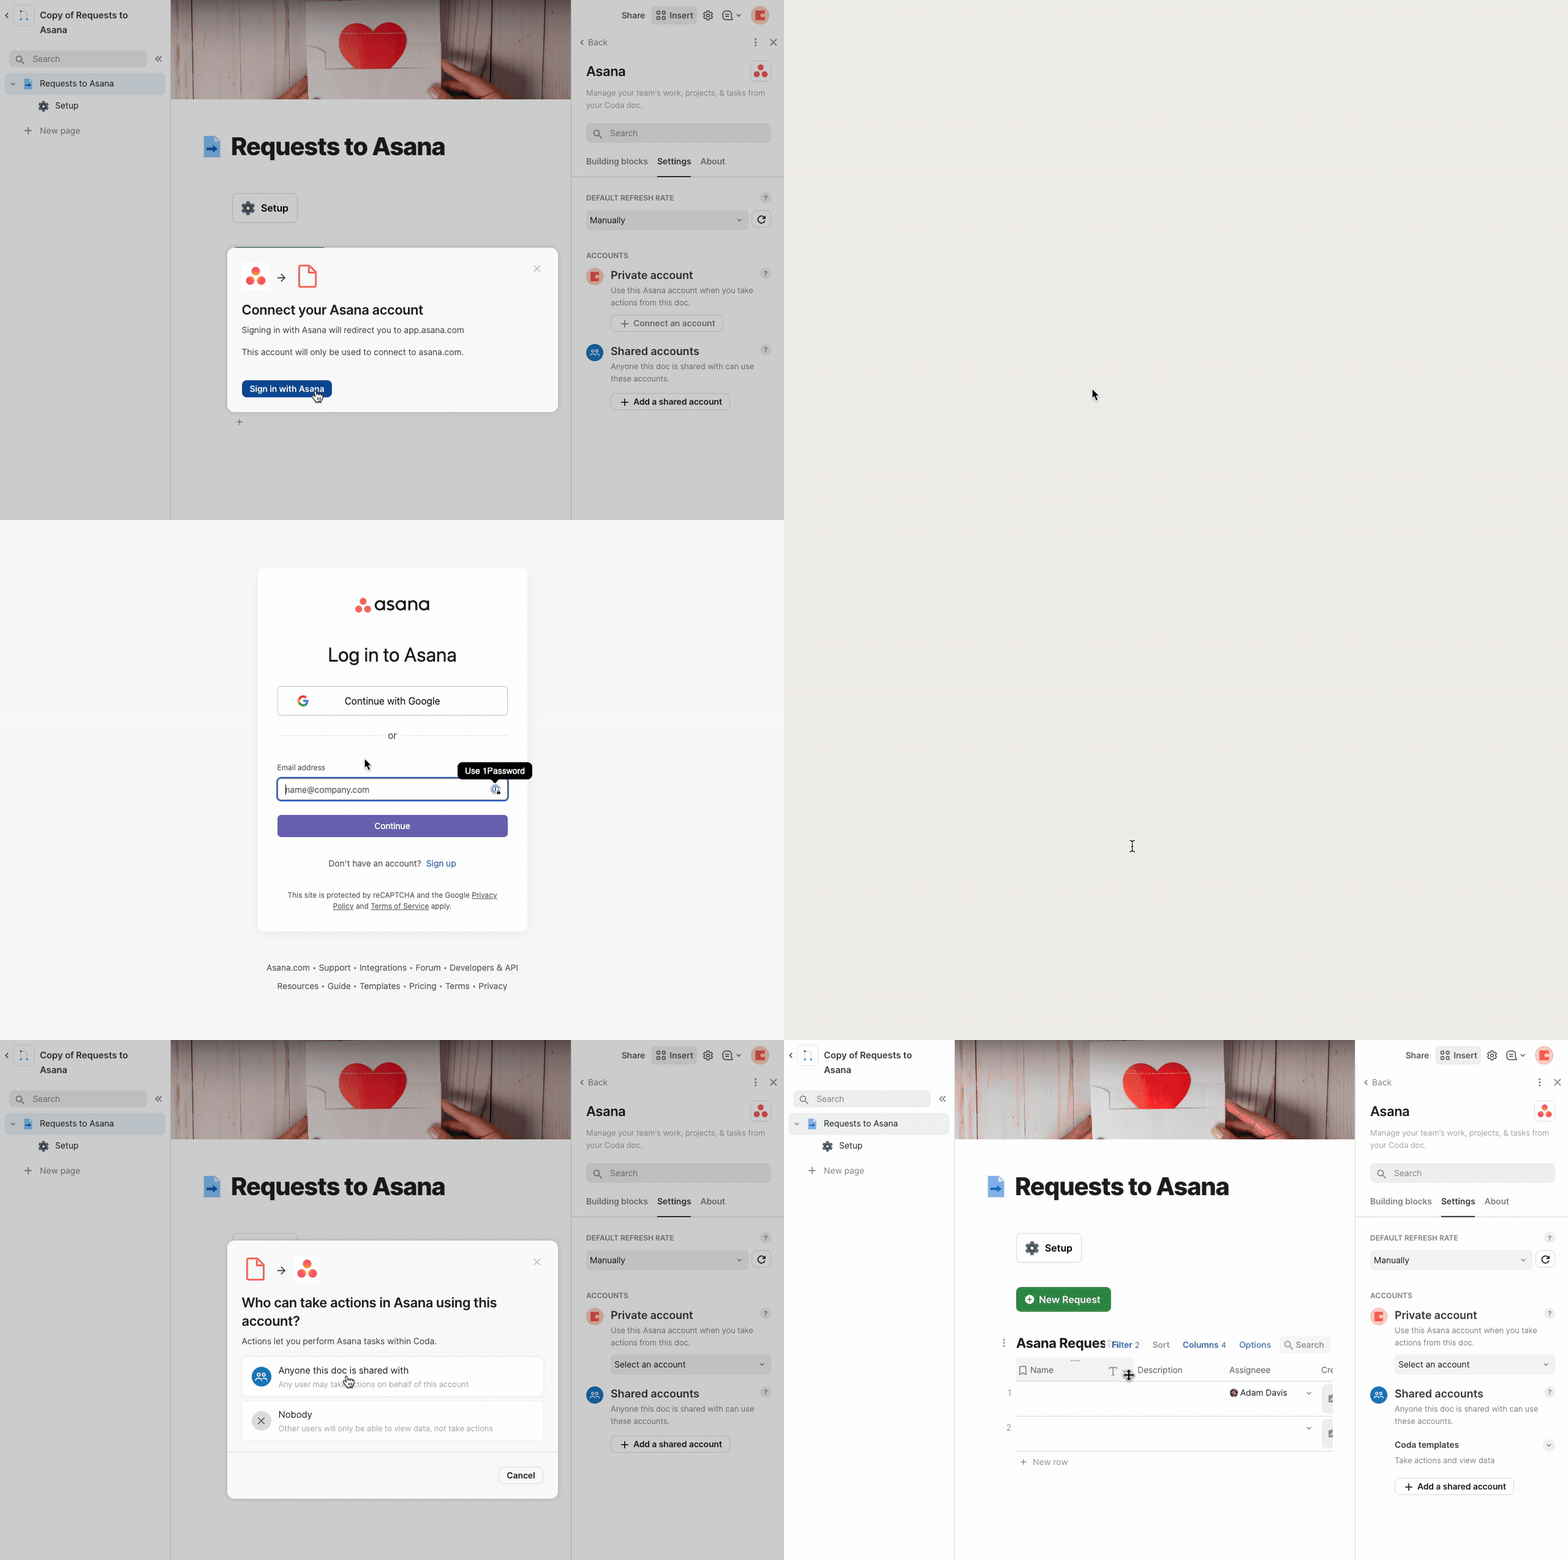
1. Connect to Asana
You should have already been prompted to do this when you copied the doc, but if you have not done so yet, go to the top right nav and click Insert then Packs and finally Asana. From the settings tab in the menu. you should be able to set a shared account to use for this doc.
Note: Due to how we handle re-authentication for templates we recommend doing this on the dialog when you initially copy or drag this template in.
Help GIF 📹


2. Select your Workspace, Team, and Project
This template assumes you will be creating tasks on a specific project on behalf of a team. With that in mind you’ll need to select your Workspace, Team, and Project in order.
Workspaces
Select
Select
Select coda.io
There are no rows in this table
Teams
Select
Select
Select Design Requests
Select Activation
Select Another team
Select Coda Design
Select Coda Workspace
Select Customer Success Team
Select Customers
Select Design
Select Design
Select Design
Select Design Team
Select DOT
Select Engineering
Select Engineering Team
Select Engineering Team
Select Marketing
Select Marketing
Select My First Team
Select Product
Select Product
Select S's First Team
Select Sales
Select Sales Team
Select yolo eng
Select joe's First Team
There are no rows in this table
Projects
Select
Select
Select test
Select Creative Requests
There are no rows in this table
Help GIF 📹


3. Clear the template data
You should be able to use the template at this point. As you add tasks to the table be sure to use the “Create Task in Asana” button to send the task to asana.
Clear Template Data
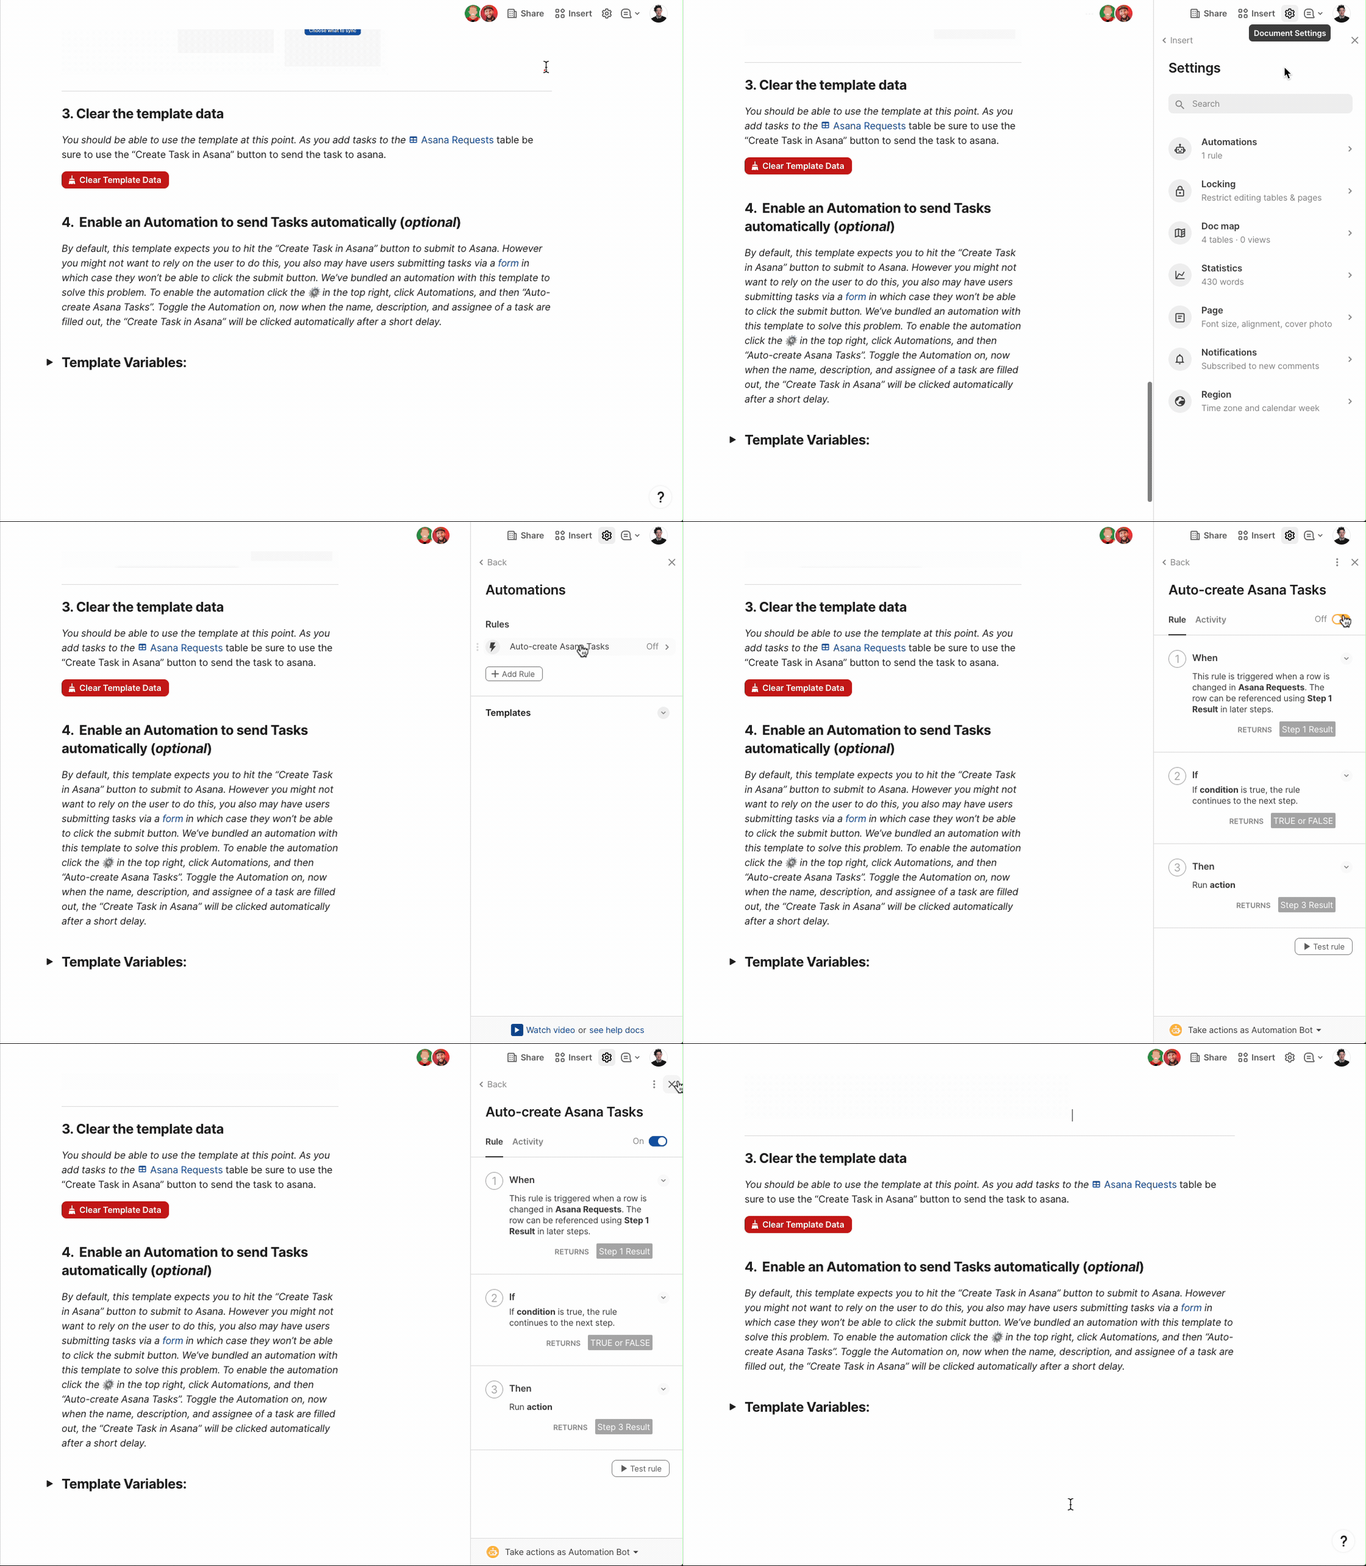
4. Enable an Automation to send Tasks automatically (optional)
By default, this template expects you to hit the “Create Task in Asana” button to submit to Asana. However you might not want to rely on the user to do this, you also may have users submitting tasks via a
in which case they won’t be able to click the submit button. We’ve bundled an automation with this template to solve this problem. To enable the automation click the ⚙️ in the top right, click Automations, and then “Auto-create Asana Tasks”. Toggle the Automation on, now when the name, description, and assignee of a task are filled out, the “Create Task in Asana” will be clicked automatically after a short delay.Help GIF 📹


Template Variables:
These are some variables used to make everything work behind the scenes. Don’t mess with these unless you know what you’re doing.
calc_Selected Workspace:
calc_Selected Project:
calc_Selected Team:
calc_Selected Project Gid:
@coda.io
@test
@Design Requests
1203061300920147
Want to print your doc?
This is not the way.
This is not the way.

Try clicking the ··· in the right corner or using a keyboard shortcut (
CtrlP
) instead.