Skip to content
Website: The native Google Ads conversion tracking - is recommended. On our setup, the first one is Analyzify's Google Tag Manager integration, and the second is hard-coded. GA4: Google Analytics 4's purchase eventUA: Universal Analytics's transaction count.

 Chapter 1: Shopify & Google Ads Conversion Tracking Audit
✅ Ensure only to have one PRIMARY conversion.
Having multiple purchase conversions will result in double-tracking. And it will negatively affect your ROI and reports.
Visit your Google Ads Account > Tools & Settings [Top Menu] > Conversions [under Measurement].
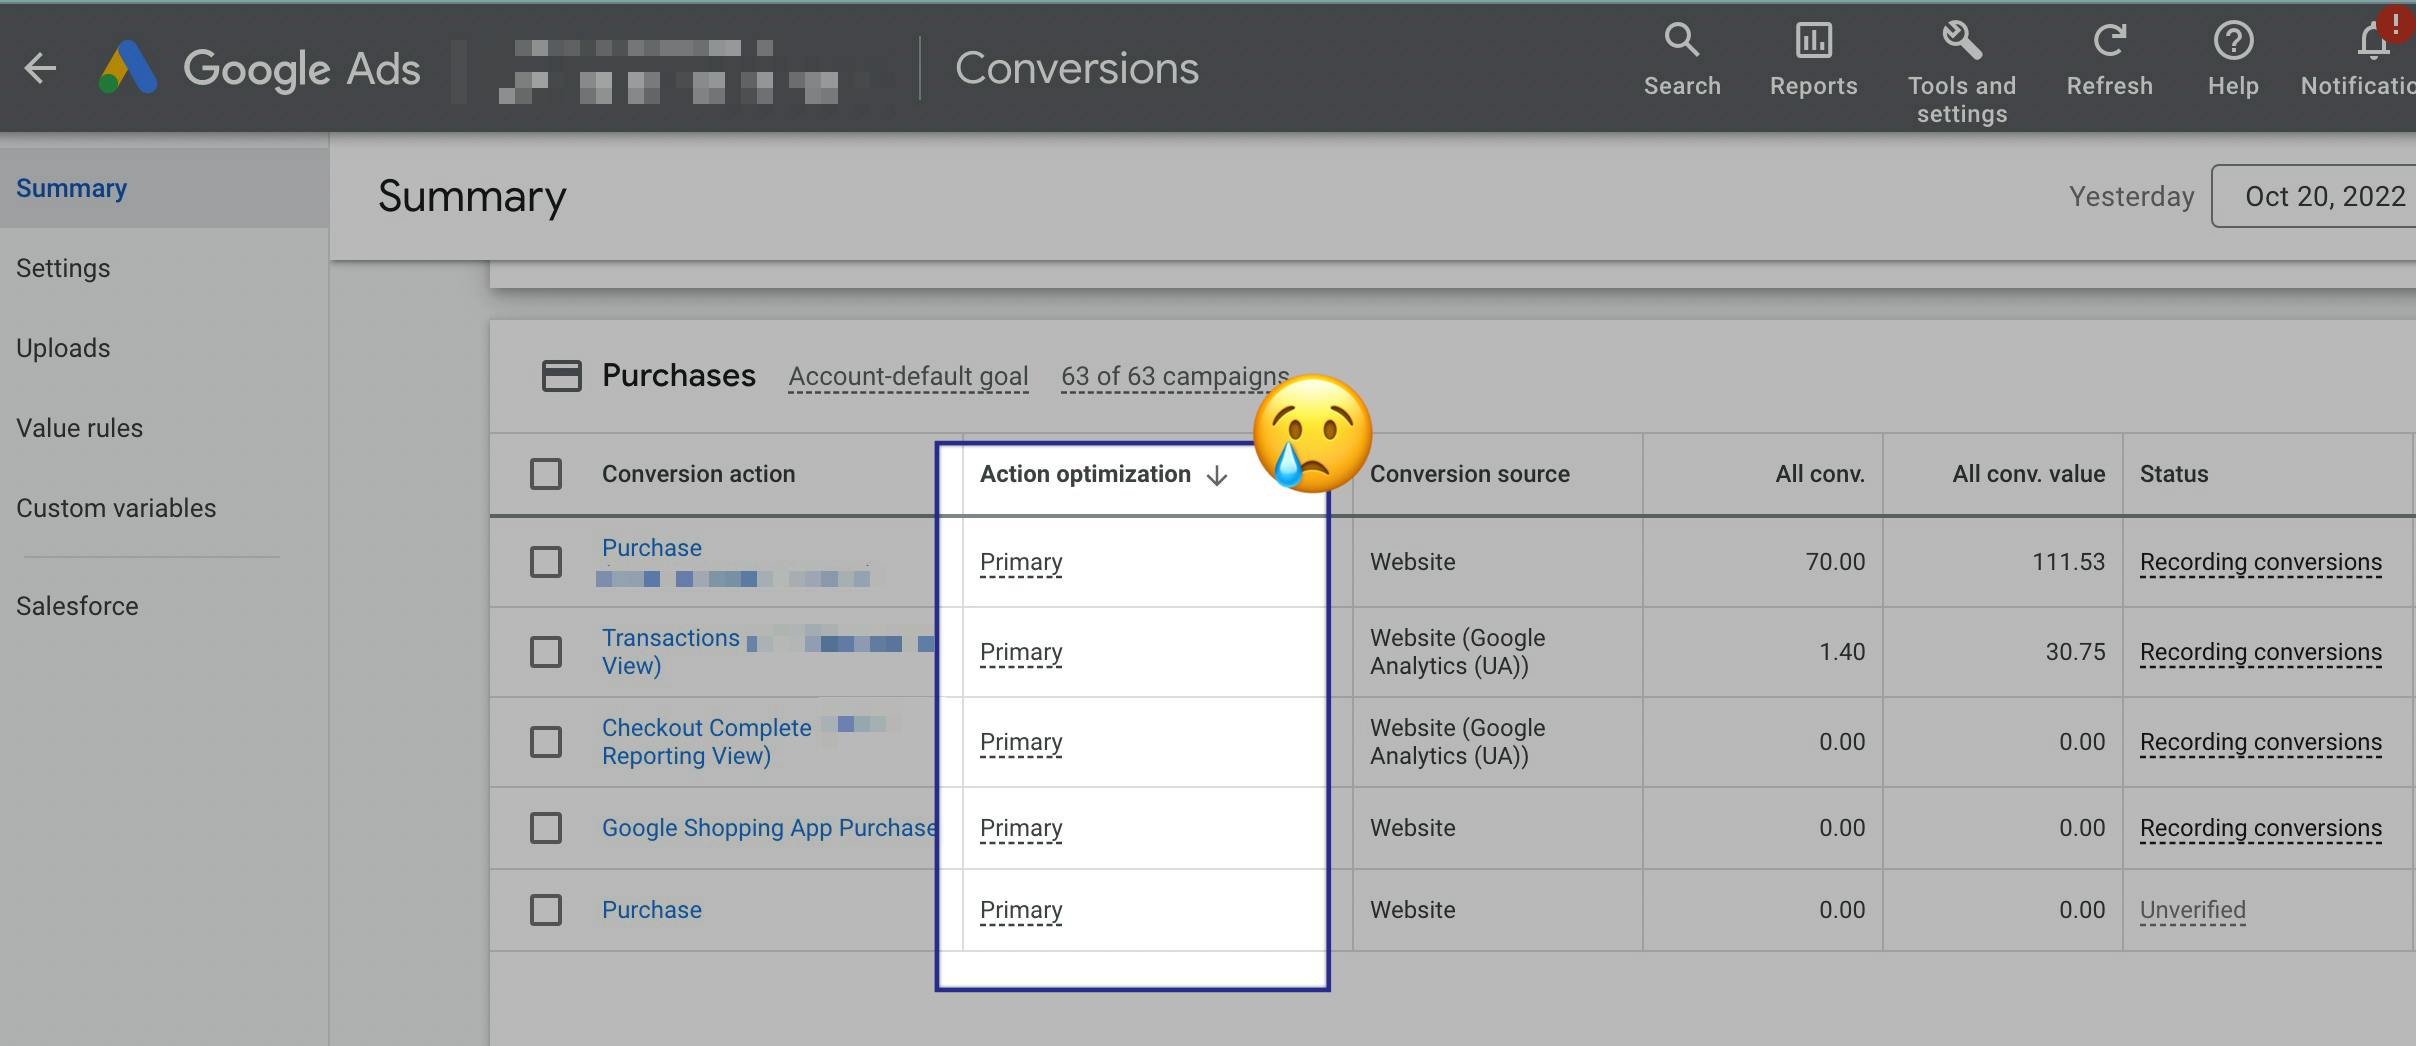
Having multiple purchase conversions is okay. But the trick is we DO NOT want to have various Primary conversions here. Only one must be Primary, and the rest must be Secondary.
✅ Use different channels as conversion sources.
You should be getting the data of a conversion event from multiple sources. In the example, you will see the exact Purchase conversion from various conversion sources:
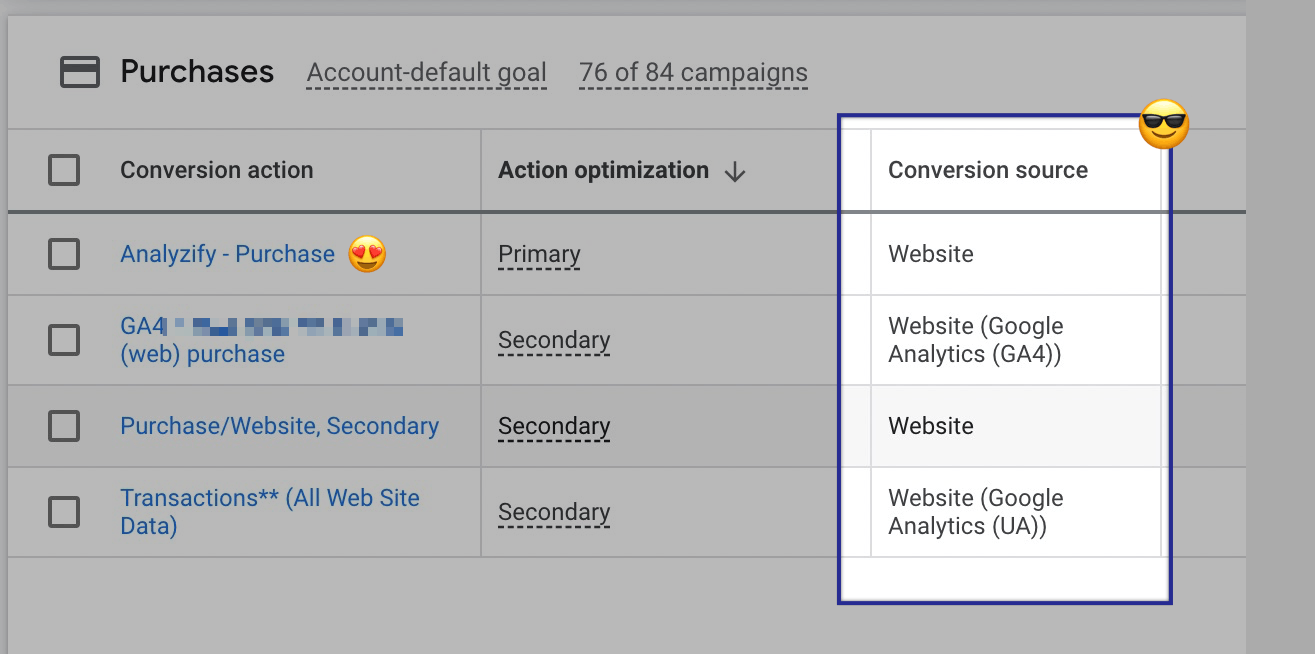
Use multiple sources to compare results and have backup conversion data in case one of the sources fail to provide. It's crucial to emphasize additional conversions again must be set as Secondary.
✅ Check "Last seen:" as proof.
You don't need to wait for a sale from Google Ads to verify your conversion tracking. Google Ads will only show the conversions on this table if the traffic source is Google Ads. But there's a more straightforward trick for verification.
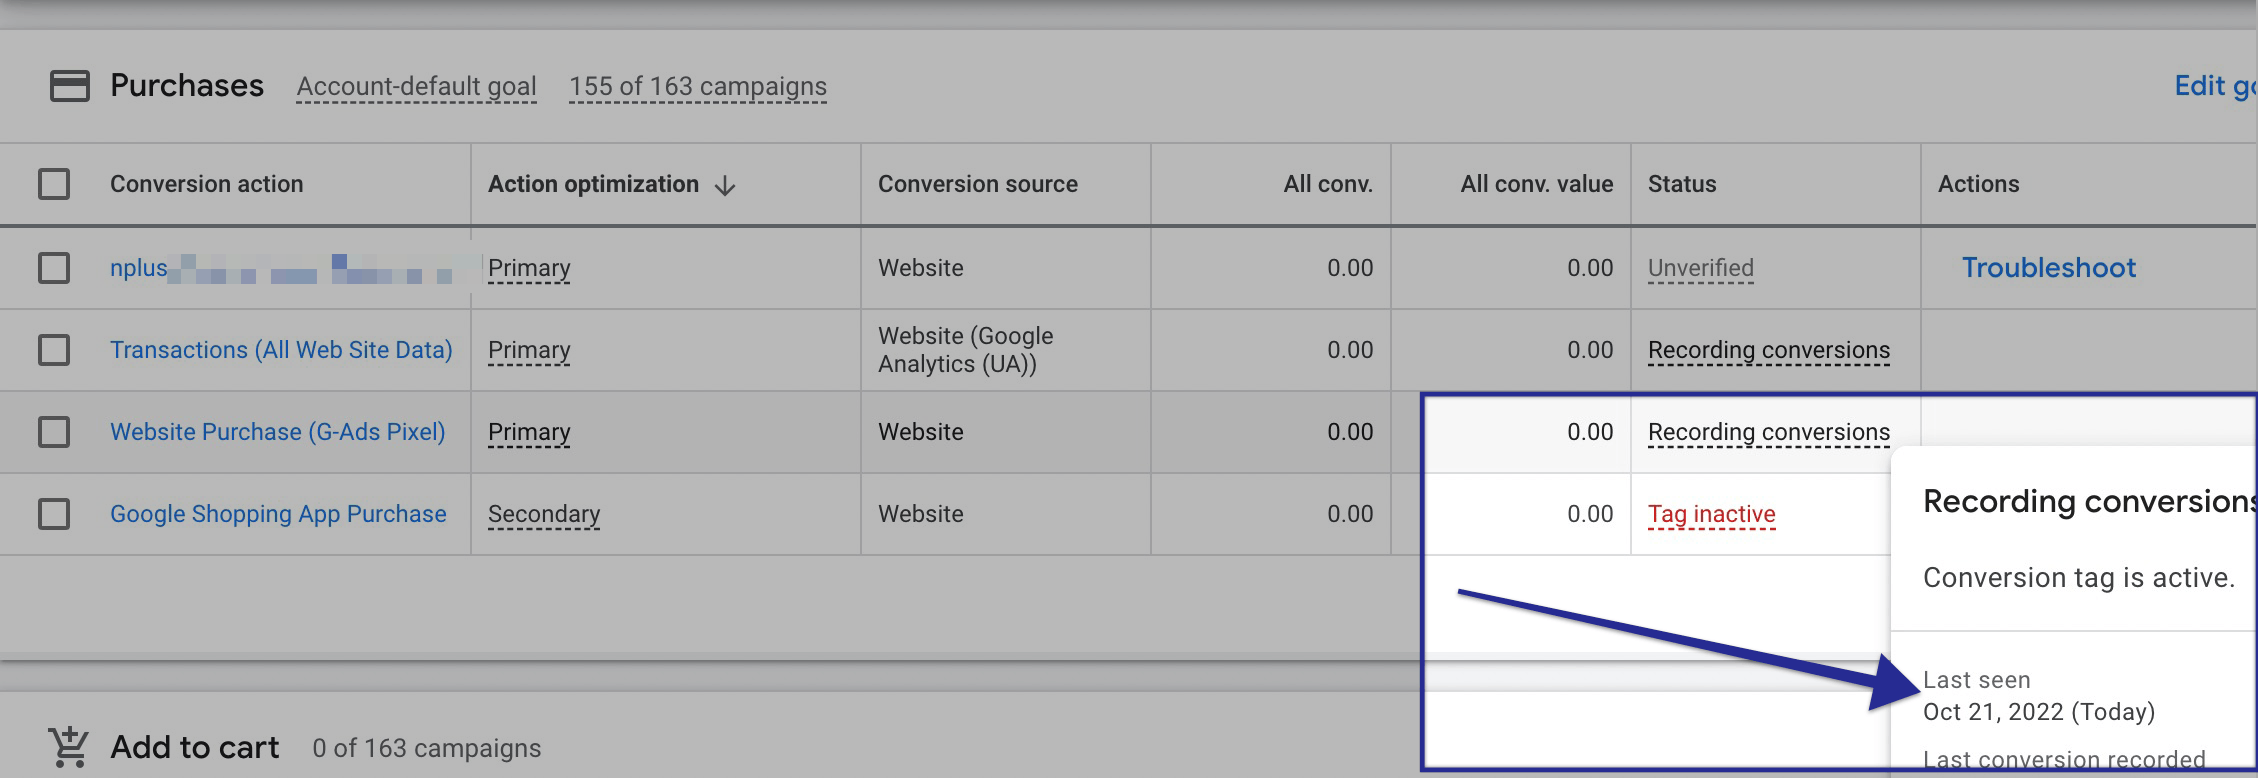
Hover over the "Recording conversions" section to see the "Last seen:". It'll show the last time when this purchase event was triggered. (Ideally.)
You must make a test purchase and wait a couple of hours if your conversion tracking was set very recently. The test purchase data should be visible under the last seen within 1-3 hours.
Your conversion tracking setup is wrong if you don't see your last sales data here after 12 hours.
✅ Cross-compare conversion data with Shopify sales.
Google Ads shows the URLs of the pages where that conversion happened. And what we need is the Thank You page.
Go to Google Ads > Conversions and then click on the conversion. It'll lead to Conversion Settings. Click the WEBPAGES tag on the top left.
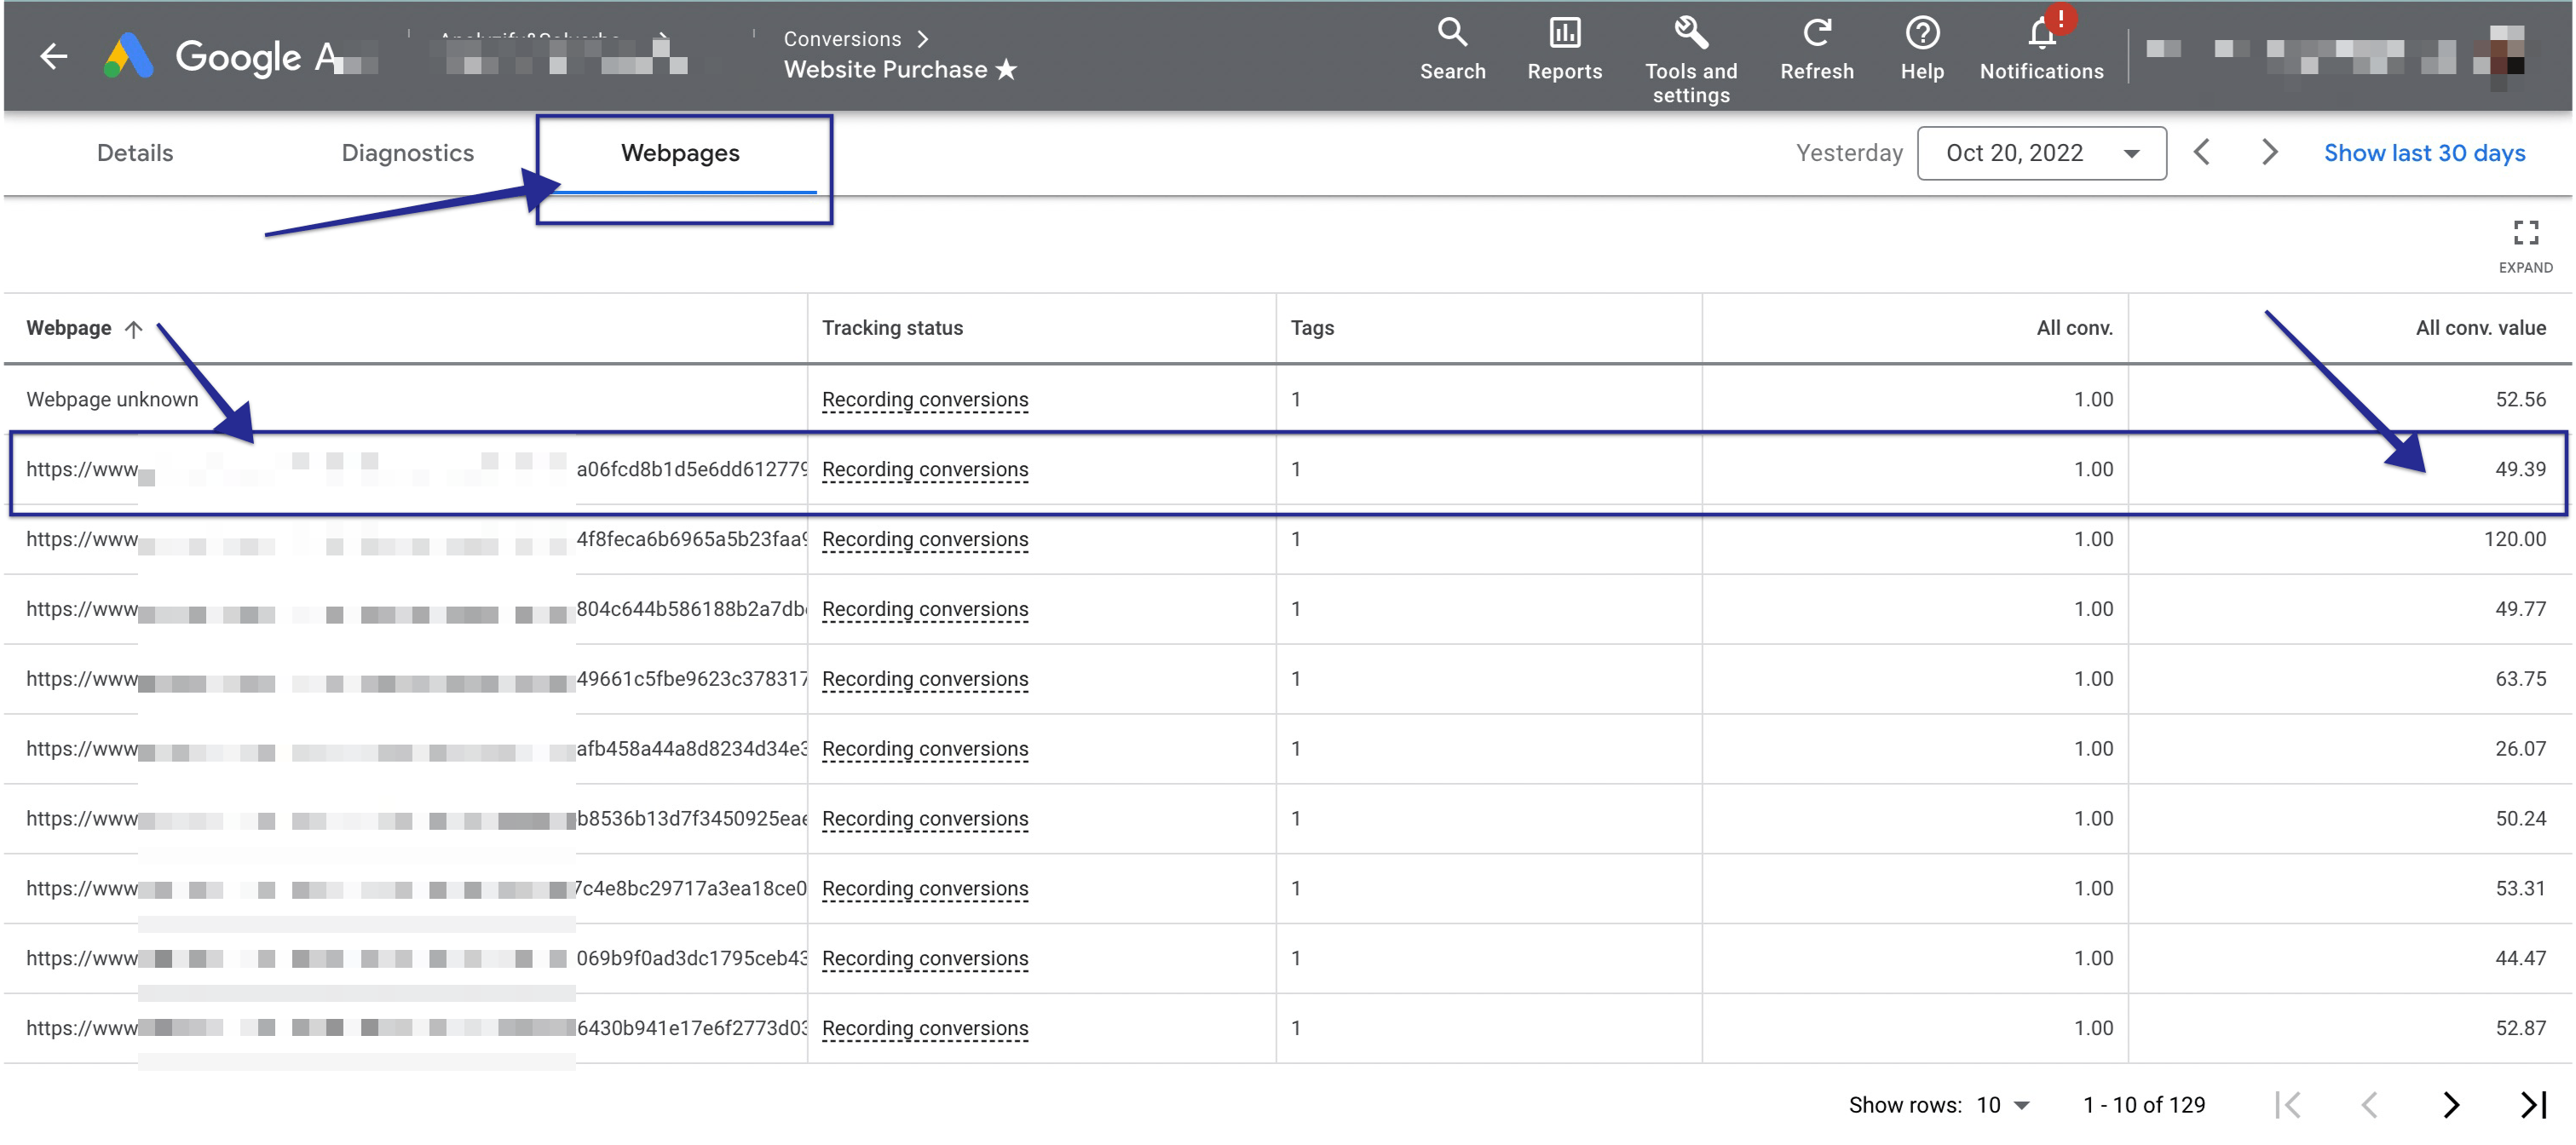
You'll see a list of URLs and values. Copy those URLs and visit some. Check out the order status page, and compare it with the value you received in the Google Ads Conversion screen.
Pretty cool, huh?! You'll catch any inconstancies here.
Check to see if the conversion value matches the purchase value. If they don't, you might have a problem.
Move to Chapter 2 after completing the audit; create a new secondary conversion using (another guide included!), and then you can cross-compare the results.
Want to print your doc?
This is not the way.
This is not the way.

Try clicking the ··· in the right corner or using a keyboard shortcut (
CtrlP
) instead.