Share
Explore

REACT Native Lab Workbook
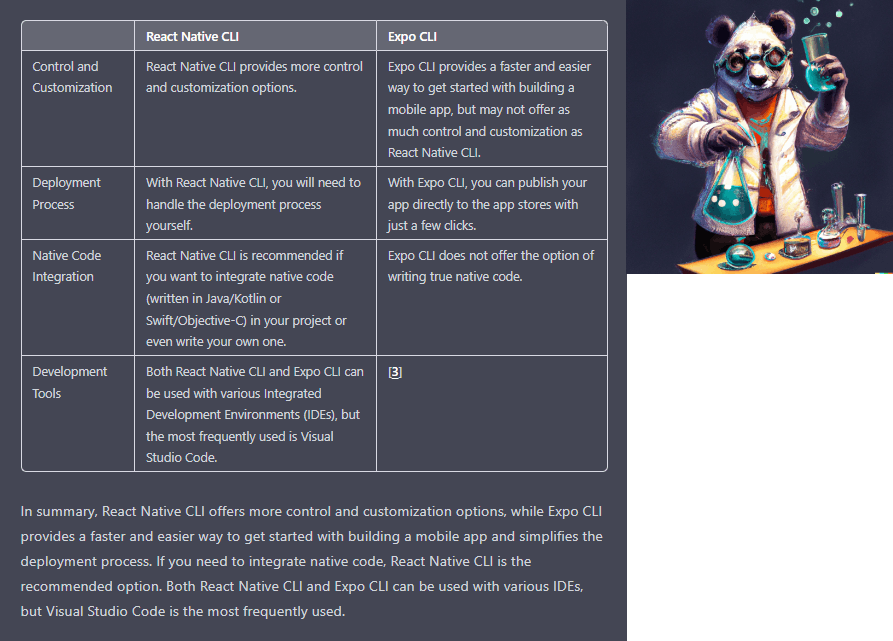
image.png

Introduction

In this lab, you will learn how to create REACT Native apps using the full spectrum of UI components available. You will also learn how to use styling and layout to create visually appealing and responsive apps.

Prerequisites

Before beginning this lab, you should have a basic understanding of JavaScript and familiarity with REACT Native. You should also have the following software installed:
Node.js
REACT Native CLI
A code editor (Visual Studio Code is recommended)

Getting Started

To begin, create a new REACT Native project using the following command:
npx react-native init MyApp

Replace MyApp with the name of your project. Navigate to the project directory and start the development server using the following command:
d MyApp
npx react-native start


In a separate terminal window, run your app using the following command:
npx react-native run-ios # for iOS
npx react-native run-android # for Android

Your app should now be running on your device or emulator.

Creating UI Components

REACT Native provides a wide range of UI components that you can use to create your app's interface. In this section, you will learn how to create some of the most commonly used components.

Text

The Text component is used to display text on the screen. You can use it like this:
import React from 'react';
import { Text } from 'react-native';

const App = () => {
return (
<Text>Hello, world!</Text>
);
};

export default App;

View

The View component is used to create a container that can hold other components. You can use it like this:
import React from 'react';
import { View, Text } from 'react-native';

const App = () => {
return (
<View>
<Text>Hello, world!</Text>
</View>
);
};

export default App;

Image

The Image component is used to display images on the screen. You can use it like this:
import React from 'react';
import { Image } from 'react-native';

const App = () => {
return (
<Image
source={{ uri: 'https://via.placeholder.com/150' }}
style={{ width: 150, height: 150 }}
/>
);
};

export default App;

Button

The Button component is used to create a button that the user can interact with. You can use it like this:
import React from 'react';
import { Button, View } from 'react-native';

const App = () => {
return (
<View>
<Button
title="Press me"
onPress={() => alert('Button pressed')}
/>
</View>
);
};

export default App;

Styling and Layout

In addition to creating UI components, you can also style and layout them to create visually appealing and responsive apps.

Styling

You can style components using the style prop. The style prop takes an object with CSS-like properties. For example:
import React from 'react';
import { View, Text } from 'react-native';

const App = () => {
return (
<View style={{ backgroundColor: 'red', padding: 10 }}>
<Text style={{ color: 'white' }}>Hello, world!</Text>
</View>
);
};

export default App;

Layout

You can layout components using the flex property. The flex property takes a number that determines how much space the component should take up relative to its siblings. For example:
import React from 'react';
import { View } from 'react-native';

const App = () => {
return (
<View style={{ flex: 1, flexDirection: 'row' }}>
<View style={{ flex: 1, backgroundColor: 'red' }} />
<View style={{ flex: 2, backgroundColor: 'green' }} />
<View style={{ flex: 3, backgroundColor: 'blue' }} />
</View>
);
};

export default App;

This will create a row with three boxes, where the first box takes up 1/6 of the available space, the second box takes up 2/6, and the third box takes up 3/6.

Conclusion

In this lab, you learned how to create REACT Native apps using the full spectrum of UI components available. You also learned how to use styling and layout to create visually appealing and responsive apps. With these skills, you can create apps for both iOS and Android devices. Good luck!

Want to print your doc?
This is not the way.
Try clicking the ⋯ next to your doc name or using a keyboard shortcut (
CtrlP
) instead.