Share
Explore

Lab: JSON and API client and server
Make our own small scale Toy Version of Mongo DB Server:
An API Server which can read/write JSON files.
Learning Outcomes:
Lab Activities:
Step 1: Initialize a Node.js Project
Step 2: Create Joke JSON Files
Step 3: Create the Express Server

Step 4: Create the Web Client
Step 5: Running the Server
Version Control (Optional)
Conclusion
Lab Part 2: Let user add new jokes:
To add the functionality for a user to submit a new joke to jokes1.json, we need to do the following:
Updated index.html:
<!DOCTYPE html>
<html lang="en">
<head>
<meta charset="UTF-8">
<meta http-equiv="X-UA-Compatible" content="IE=edge">
<meta name="viewport" content="width=device-width, initial-scale=1.0">
<title>Joke Service</title>
</head>
<body>
<h1>Random Joke Generator</h1>
<button id="getJokeBtn">Get Random Joke</button>
<p id="jokeDisplay"></p>
<!-- New joke submission form -->
<h2>Submit a New Joke</h2>
<form id="jokeForm">
<input type="text" id="newJoke" placeholder="Enter your joke" required>
<button type="submit">Submit Joke</button>
</form>
<script>
// Existing joke fetching functionality
document.getElementById('getJokeBtn').addEventListener('click', function() {
fetch('/joke')
.then(response => response.json())
.then(data => {
document.getElementById('jokeDisplay').textContent = data.joke;
})
.catch(error => {
console.error('Error fetching joke:', error);
document.getElementById('jokeDisplay').textContent = 'Sorry, a joke could not be fetched at this time.';
});
});
// New joke submission functionality
document.getElementById('jokeForm').addEventListener('submit', function(event) {
event.preventDefault();
const jokeText = document.getElementById('newJoke').value;
fetch('/jokes', {
method: 'POST',
headers: {
'Content-Type': 'application/json',
},
body: JSON.stringify({ joke: jokeText }),
})
.then(response => response.json())
.then(data => {
alert(data.message);
document.getElementById('newJoke').value = ''; // Clear input field
})
.catch(error => {
console.error('Error submitting new joke:', error);
alert('Failed to submit new joke');
});
});
</script>
</body>
</html>
Updated server.js:
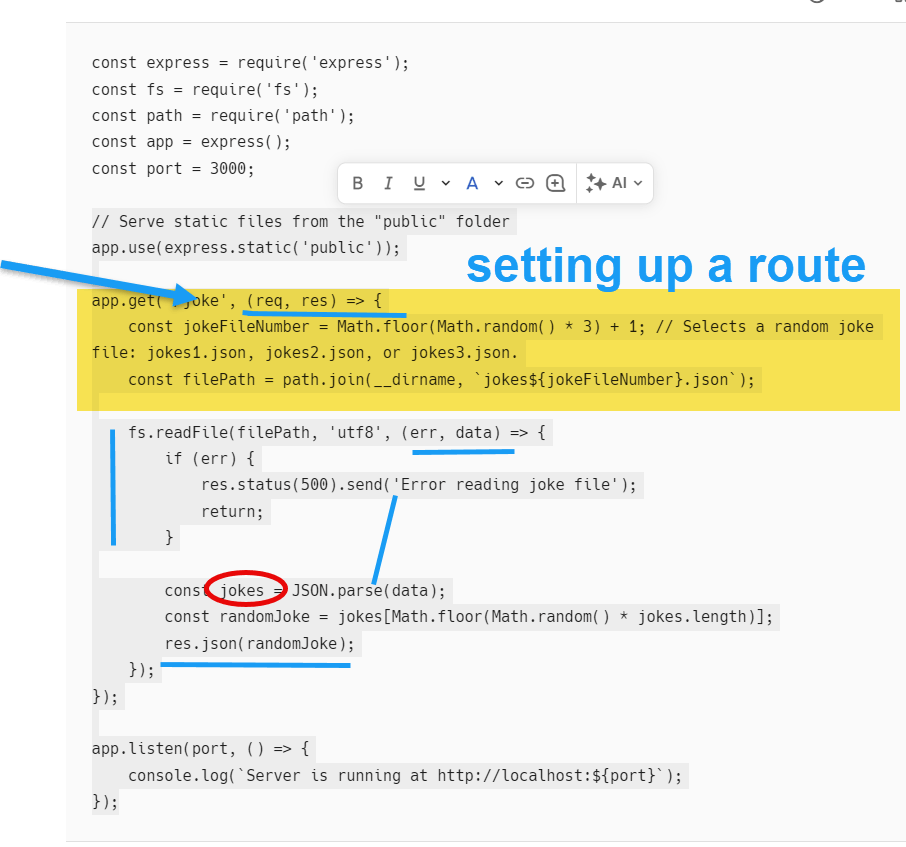
const express = require('express');
const fs = require('fs');
const path = require('path');
const app = express();
const port = 3000;
app.use(express.json()); // To parse JSON bodies
app.use(express.static('public')); // Serve static files from the "public" folder
// Existing GET joke endpoint
// ...
// New POST joke endpoint
app.post('/jokes', (req, res) => {
const newJoke = req.body;
const filePath = path.join(__dirname, 'jokes1.json');
fs.readFile(filePath, 'utf8', (err, data) => {
if (err) {
res.status(500).send('Error reading joke file');
return;
}
const jokes = JSON.parse(data);
const newId = jokes.length > 0 ? Math.max(...jokes.map(joke => joke.id)) + 1 : 1;
const jokeToAdd = { id: newId, joke: newJoke.joke };
jokes.push(jokeToAdd);
fs.writeFile(filePath, JSON.stringify(jokes, null, 2), (err) => {
if (err) {
res.status(500).send('Error writing to joke file');
return;
}
res.json({ message: 'Joke added successfully' });
});
});
});
app.listen(port, () => {
console.log(`Server is running at http://localhost:${port}`);
});
Lab Exercise 3:
server.js file using Express that allows users to enter jokes, persists them in a "joke1.json" file, and retrieves jokes from the same file:
To display an HTML page at the root URL () that includes a button to fetch all jokes and a form to add a new joke, you can modify your Express server code as follows:
<!DOCTYPE html> <html lang="en"> <head> <meta charset="UTF-8"> <meta http-equiv="X-UA-Compatible" content="IE=edge"> <meta name="viewport" content="width=device-width, initial-scale=1.0"> <title>Joke Service</title> <style> body { font-family: Arial, sans-serif; padding: 20px; transition: background-color 1s ease, color 1s ease; } #jokeDisplay { margin: 20px 0; padding: 10px; border: 1px solid #ddd; transition: border-color 1s ease; } #getJokeBtn { padding: 10px 15px; background-color: #007bff; border: none; border-radius: 5px; color: white; transition: background-color 1s ease; cursor: pointer; } #getJokeBtn:hover { background-color: #0056b3; } </style> </head> <body> <h1>Random Joke Generator</h1> <button id="getJokeBtn">Get Random Joke</button> <p id="jokeDisplay"></p>
<!-- New joke submission form --> <!-- ... (same as before) -->
<script> const colorSchemes = [ { bgColor: '#fefbd8', textColor: '#5d478b', borderColor: '#5d478b' }, { bgColor: '#d1f2a5', textColor: '#f56991', borderColor: '#f56991' }, { bgColor: '#ffcccb', textColor: '#6b5b95', borderColor: '#6b5b95' }, { bgColor: '#d2b4de', textColor: '#ffaf7b', borderColor: '#ffaf7b' } ];
function changeColorScheme() { const index = Math.floor(Math.random() * colorSchemes.length); const scheme = colorSchemes[index]; document.body.style.backgroundColor = scheme.bgColor; document.body.style.color = scheme.textColor; document.getElementById('jokeDisplay').style.borderColor = scheme.borderColor; }
document.getElementById('getJokeBtn').addEventListener('click', function() { fetch('/joke') .then(response => response.json()) .then(data => { document.getElementById('jokeDisplay').textContent = data.joke; changeColorScheme(); // Change color scheme with each new joke }) .catch(error => { console.error('Error fetching joke:', error); document.getElementById('jokeDisplay').textContent = 'Sorry, a joke could not be fetched at this time.'; }); });
// New joke submission functionality // ... (same as before) </script> </body> </html>
const express = require('express'); const fs = require('fs'); const bodyParser = require('body-parser');
const app = express(); const port = 3000;
app.use(bodyParser.json());
// Serve static files from a directory (e.g., public) app.use(express.static('public'));
Want to print your doc?
This is not the way.
This is not the way.

Try clicking the ⋯ next to your doc name or using a keyboard shortcut (
CtrlP
) instead.