Skip to content
Deck screwsTimber/wood screwsCircular saw Miter sawTable sawTape measureCedar boardsLandscaping fabric
Share
Explore

Why We Decided to Build a Sandbox
We recently moved from San Francisco to Mill Valley so that our kids could grow up a bit closer to nature and have an abundance of the play area. With the recent stay-at-home orders in place, we had plenty of free weekend time for home improvement projects. Plus, we could all use a little more play in our lives these days 🤗.
As a starting point, most backyard sandboxes aren't very good-looking. Most are parents’ DIY projects that tend to break easily. So we took a little time to think about what makes a good sandbox and built one. Below is a guide on how we built a DIY sandbox frame, some of the thinking that went into it, and a few pictures of the process.
Sandbox Design Principles
I never thought I'd write design principles for a sandbox, but this was kinda fun.
A Sandbox Should Be Durable
Most sandboxes break after a year or so. By contrast, the structure should be durable enough to withstand two rambunctious boys and their friends. The last thing I want to do is make a play space that breaks a year from now. Hopefully, the sandbox lives up to this principle but time will tell just how good our woodworking skills really are :)
A Sandbox Should Create Communal Experience
One simple observation from years of watching my kids play in sandboxes is that size plays a key role in how kids play together or don't.
If the structure is too small, kids don't convene and play together in the sandbox. In contrast to small mail-order sandboxes, one example that I had in mind was the gravel pit area at the . My kids love this area. It is huge and draws kids into the communal experience of moving gravel in a striking and almost comedic way.
So the idea was to build the sandbox large enough to be communal for kids, but not too large that it didn't fit the context of the yard.
A Sandbox Should Fit the Context of Its Environment
Let me explain… one thing that always strikes me about plastic sandboxes in backyards is how they stand out from the nature around them. Often there are lots of trees and grass, and then, 💥 a giant piece of plastic.
So it was important to me that the structure of the sandbox I built fits with the context of the house and surrounding yard. In practice, this meant making it out of redwood and painting it the same color as the trim on our house.
Sandbox Measurements
Dimensions (in cubic feet)
A 6-foot by 6-foot square. Large enough to fit 2-3 small kids at one time.
Sand
A -6foot by -6foot sandbox requires 24 bags of 50-pound playsand.
Adult Seating
The 3-inch rim serves as tiny corner seats provides a place for adults to sit on the side of the sandbox.
Sandbox Building Materials
List of Materials
There are no rows in this table
How to Build a Simple Sandbox in 6 Steps
1. Build a square structure
2. Add interior posts for stability
3. Add the top rim
4. Use filler putty for the screw holes
5. Paint the outer (and inner) side of the box
6. Fill the sandbox with playsand
Step-by-Step Process
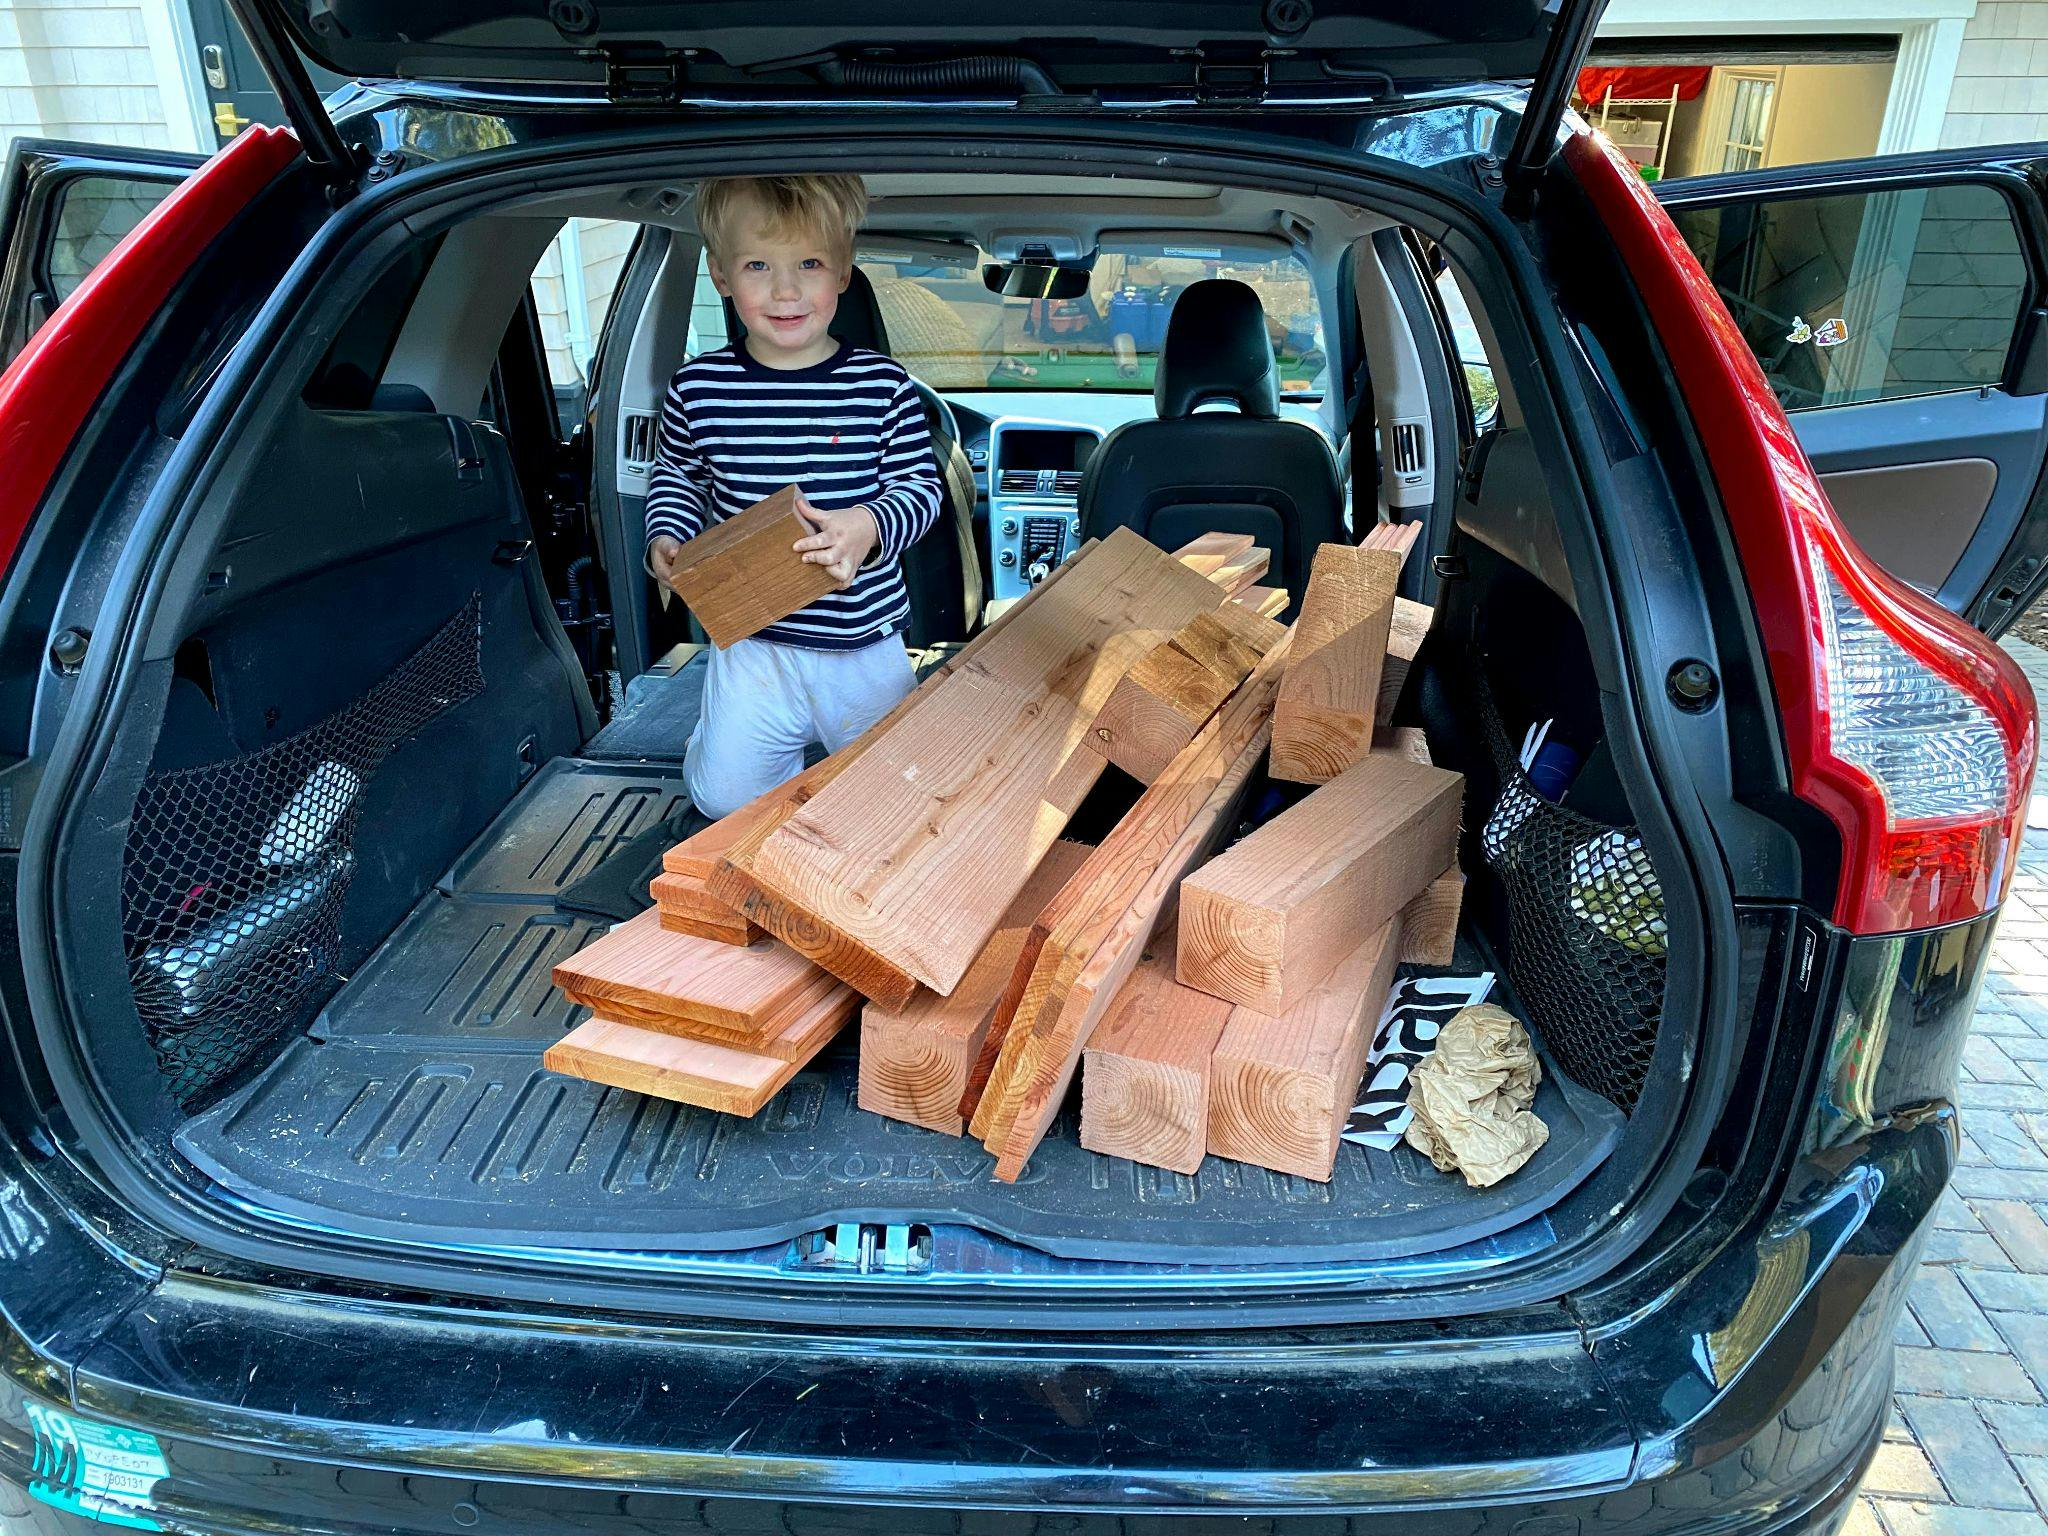
Kal bringing home the wood to make his sandbox. Stoked.
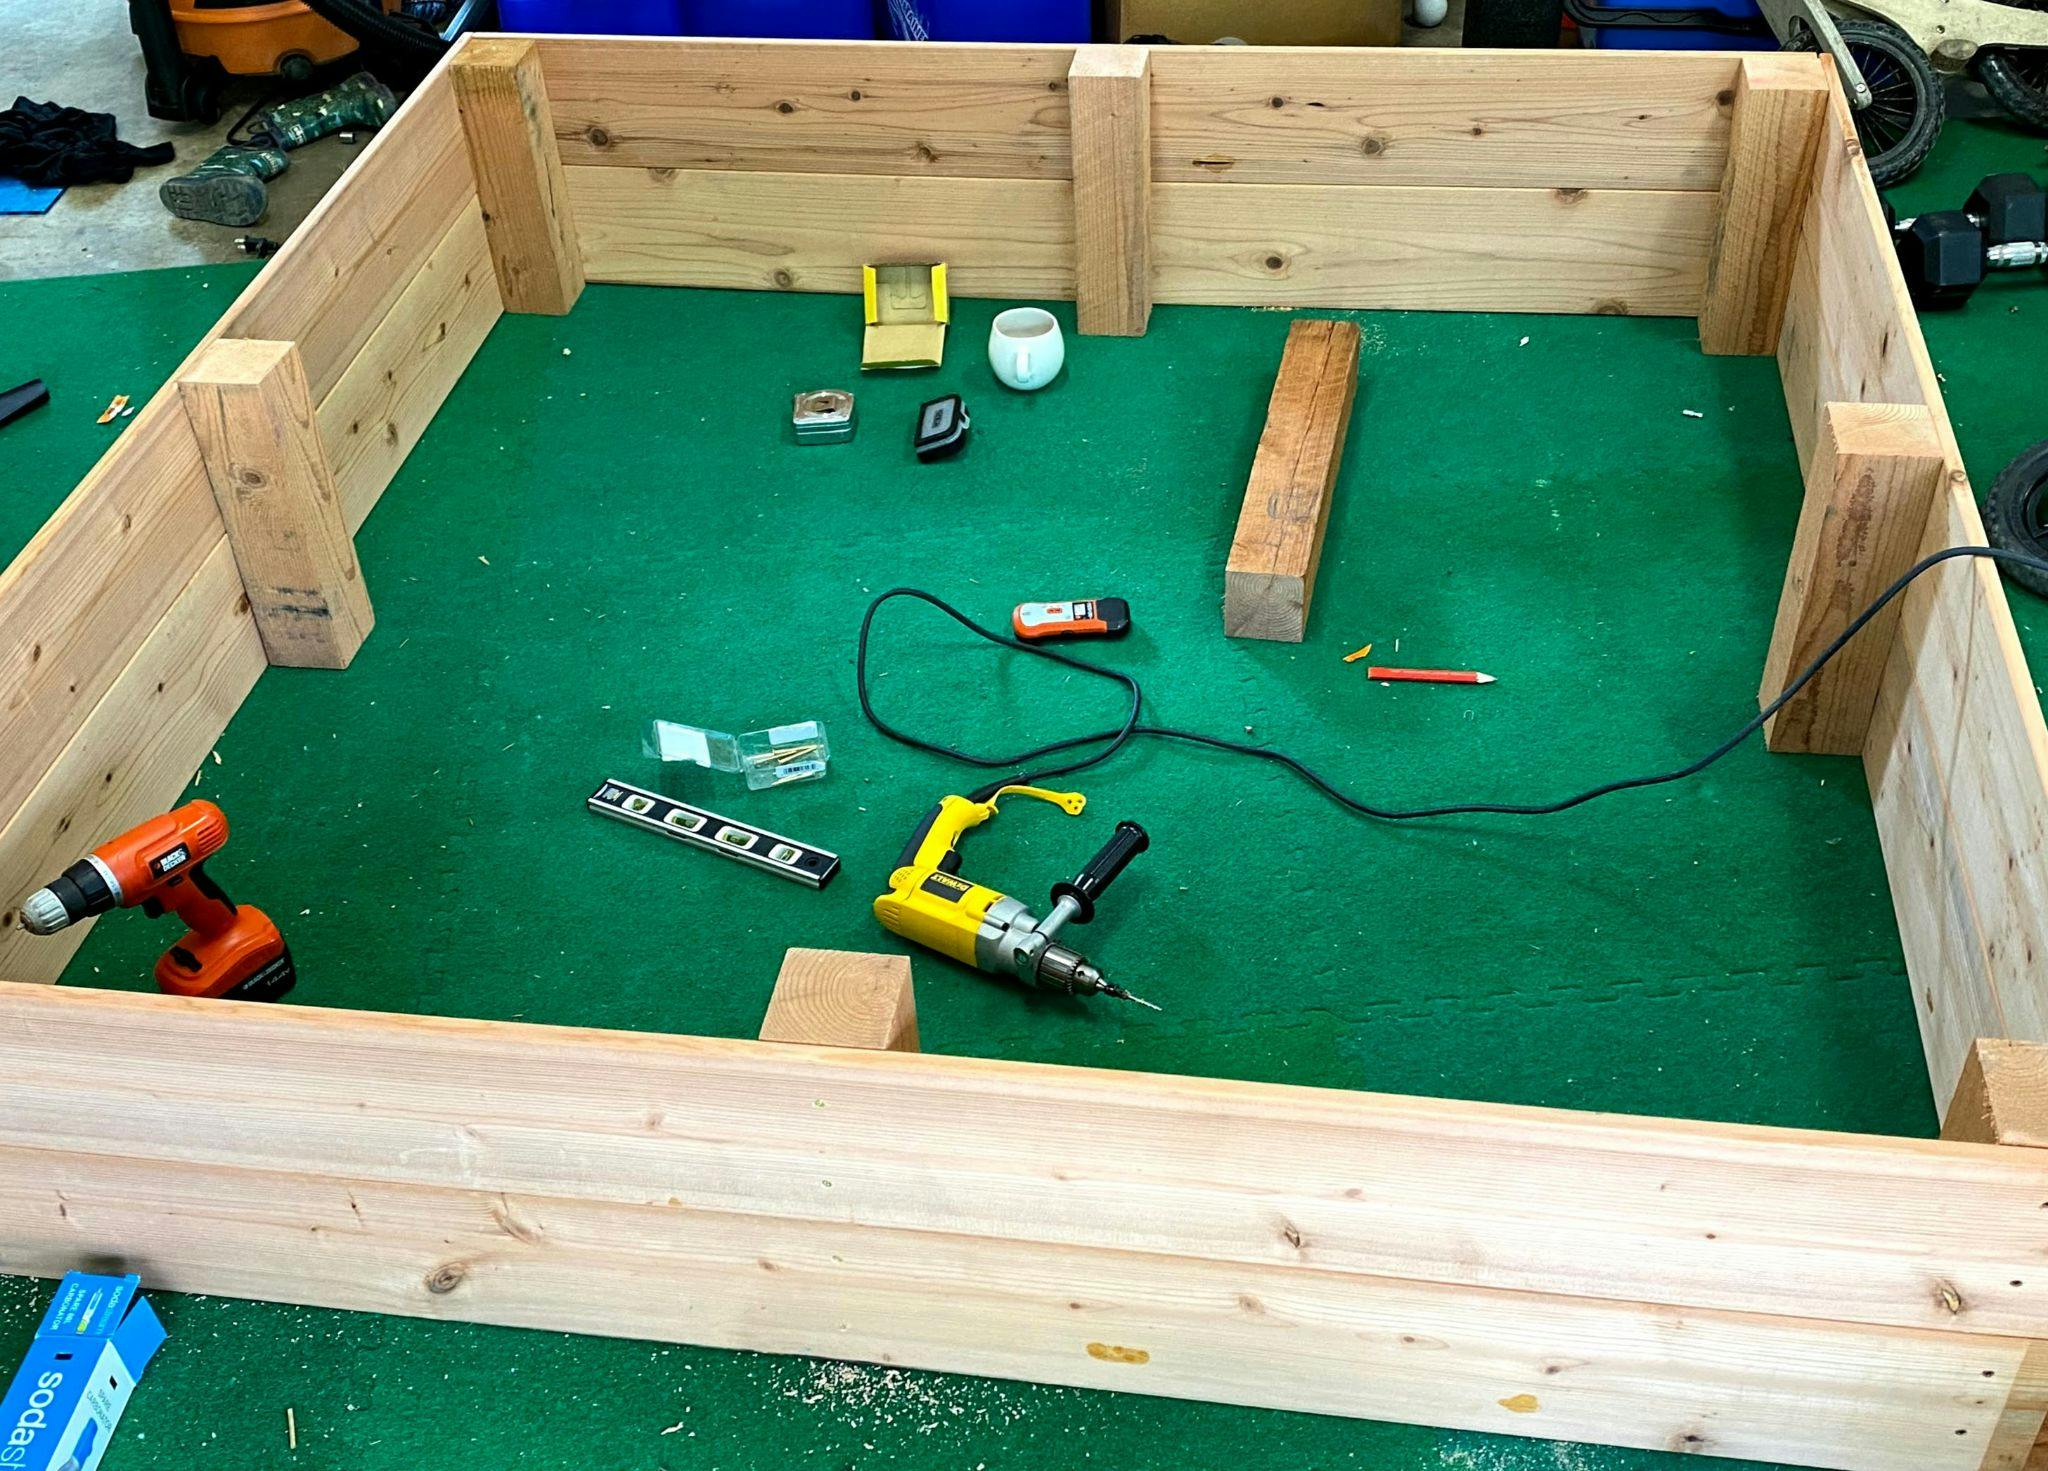
Build the simple square structure by affixing to .
@Side boards (Redwood)
@Interior posts (Redwood)

Add to the middle to make it more durable and support the sitting rim.
@Interior posts (Redwood)
Adding the so that adults can comfortably sit on the edge while kids play.
@Top rim (Redwood)


Painting the outside with an , intentionally leaving the inside to reveal the redwood.
@Outdoor primer

Painting the outside with (Benjamin Moore Black Knight) to fit w/ trim paint on the house.
@Outdoor paint

Kal helping me fill the sandbox with 24 bags of 50-pound .
@Sandbox sand

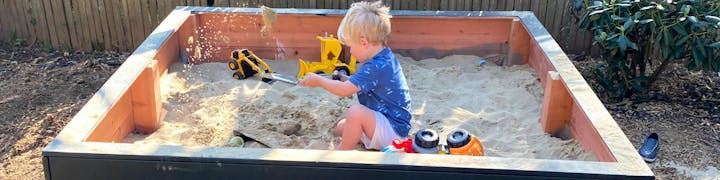
That's it. Here's Kal firing up his new sand toys in his new sandbox.

Hope you have fun building yours, and let me know if you have any questions!
Not Pictured in this Tutorial
How to Build a Sandbox FAQs
What tools do you need to build a sandbox?
Most homeowners already own the tools to build a backyard sandbox in their garage toolkits. So before you start, make sure you have:
Does a sandpit need drainage?
To prevent the sandpit from filling with water over time, build it in an area that is not naturally wet or at risk of flooding. Find a place in your backyard with good drainage that gets at least some sunlight during the day to keep the sand dry.
Should a sandbox have a bottom?
No, a sandbox doesn't necessarily need a bottom. However, we advise building one to keep the frame from pulling apart or warping. Choose pre-treated lumber for the bottom of the sandbox to avoid damping and rotting.
Want to print your doc?
This is not the way.
This is not the way.

Try clicking the ··· in the right corner or using a keyboard shortcut (
CtrlP
) instead.