Chapter: 10. More On Internet
10. More on Internet
Chapter Profile: Advanced Internet Features
This chapter explores some exciting and advanced features of the Internet beyond just communication. You’ll learn how the internet helps us store and share information, buy and sell things, share our thoughts, and even listen to digital recordings!
Cloud Storage: Upload, organize, and share data online from anywhere. E-commerce: Buy and sell goods and services online. Blogging: Create and share your own online journals or articles. Podcasting: Access and create digital audio or video recordings.
GOOGLE DRIVE: Your Online Storage Locker
Google Drive is a super popular cloud storage service. Think of it as a virtual locker where you can keep your important documents, pictures, and videos safe online.
What it does: Allows you to create, edit, and save documents, spreadsheets, and presentations. Requirement: You must have a Gmail account to use Google Drive. Free Storage: Google Drive gives you 15 GB of free storage space. More Space: If you need more space, you can buy additional storage through Google One plans. How to Use Google Drive
To start using Google Drive, follow these simple steps:
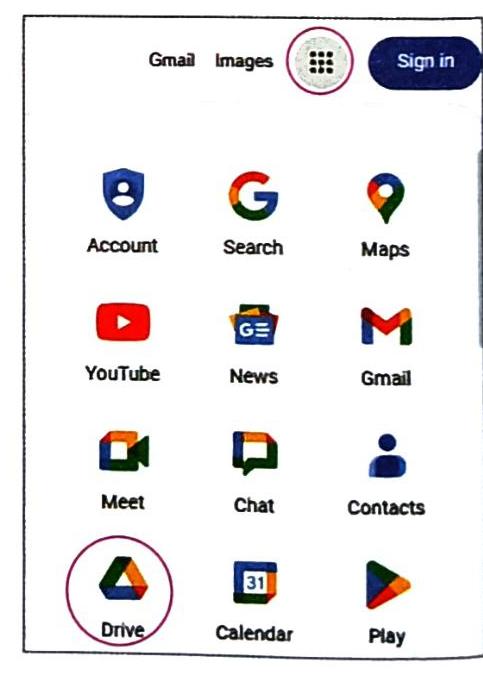
Visit: Go to www.google.com. Google App Launcher: Click on the Google App Launcher button, usually located at the top-right corner of the page. This will show you a list of Google apps. Select Drive: Click on the ‘Drive’ app icon.
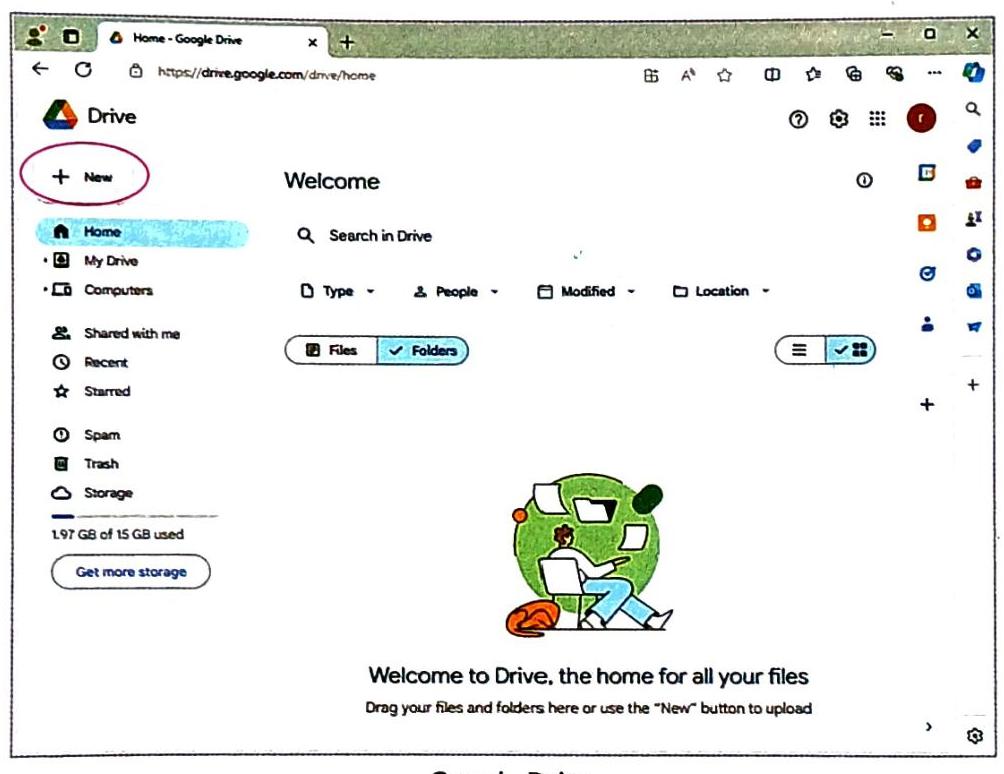
Sign In: If you’re not already signed in, Google’s Sign-in page will appear. Enter your Gmail account’s username. Access Your Drive: This will open your Google Drive web page. The ‘New’ Button: Click on the + New button. This button is very important as it opens a list of options for what you can do next.
Folder: To create a new folder to organize your files. Folder Upload: To upload an entire folder from your computer to Google Drive. File upload: To upload a single file from your computer to Google Drive. Google Docs: To create a new document, similar to a Microsoft Word document, directly on Google Drive. Google Sheets: To create a new spreadsheet, similar to an Excel workbook, directly on Google Drive. Google Slides: To create a new presentation, similar to a PowerPoint presentation, directly on Google Drive. More: To create other Google tools like Google Forms, Google Drawings, etc.
Uploading a File to Google Drive
Uploading files is easy!
Select Upload: From the options after clicking the + New button, select File upload.
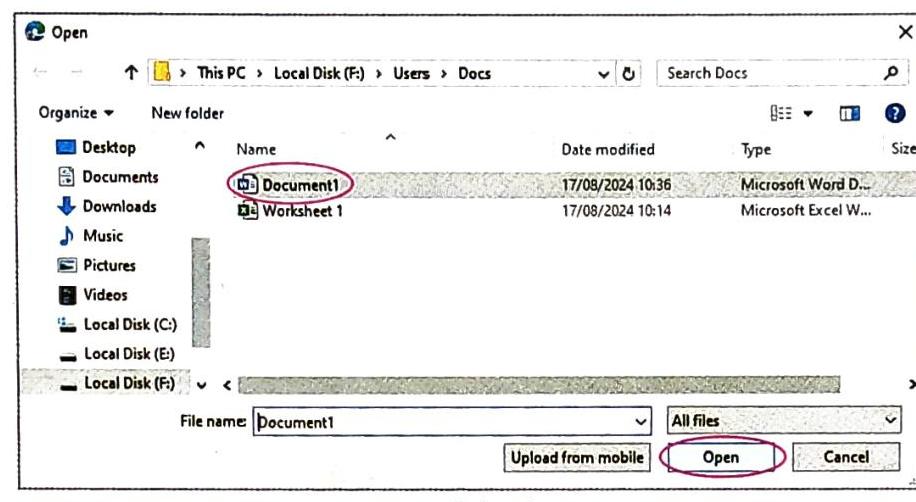
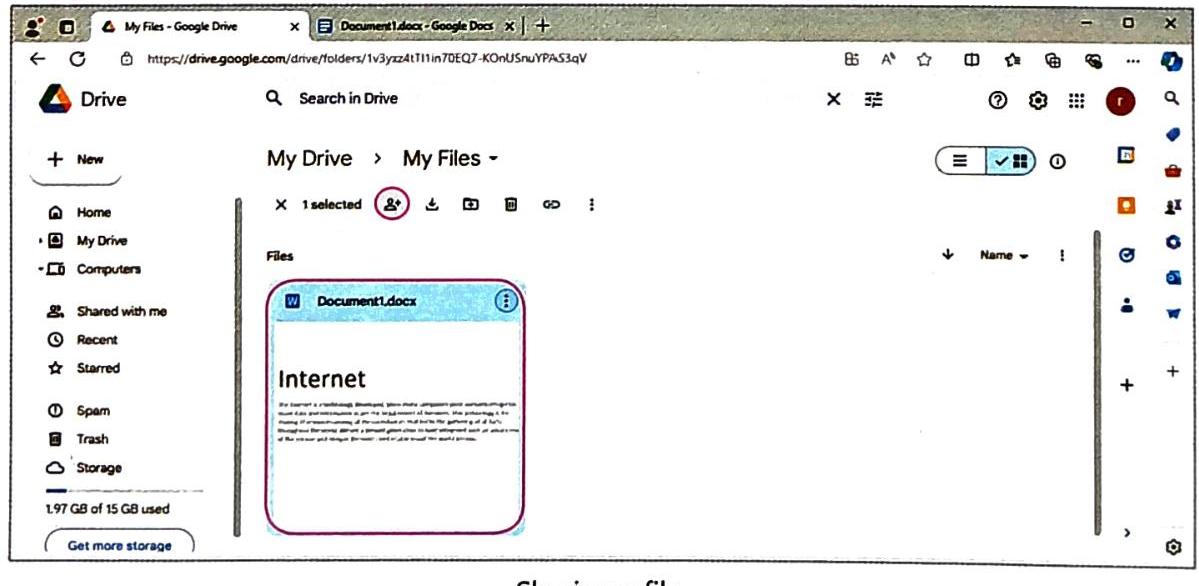
Open Dialog Box: An ‘Open’ dialog box will appear, showing files on your computer. Choose File: Select the file you want to upload. For example, Document1.
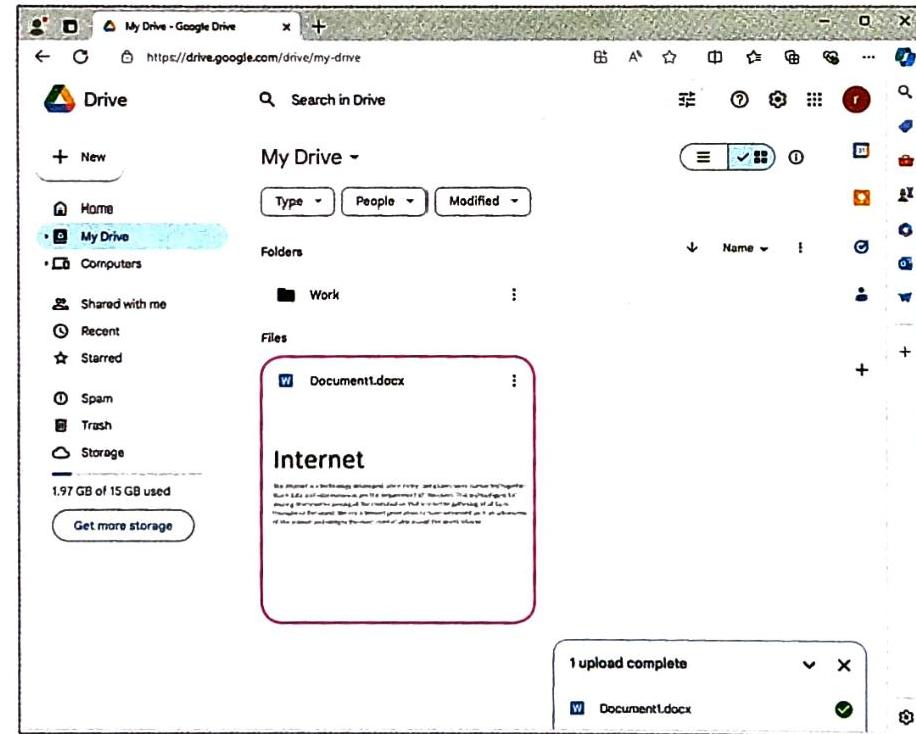
Click Open: Click on the ‘Open’ button. Upload Complete: The selected file will be successfully uploaded and appear in your Google Drive, usually as a thumbnail in the Grid layout under the ‘My Drive’ section. You can switch between Grid and List layouts.
Tip: You can upload multiple files at once by selecting them all from the ‘Open’ dialog box! TECH FUNDA
You can also use the ‘My Drive’ button (often located in the left sidebar) to upload files, which offers similar options.
Organising Files and Folders
Keeping your files and folders neat on Google Drive is important, just like organizing your physical belongings! You can move files into folders, delete old ones, and view your files easily. First, you’ll often need to create a folder.
Creating a Folder
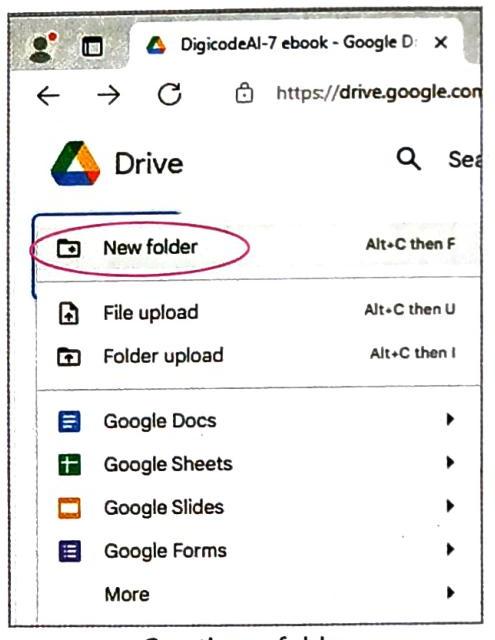
Click New: Click on the + New button. A drop-down menu will appear. New Folder Option: Select the New Folder option.
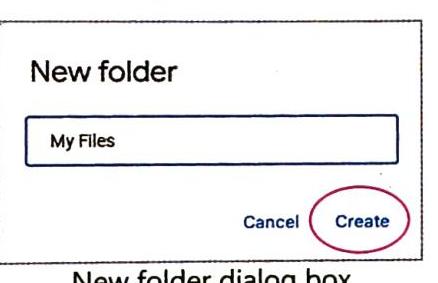
New Folder Dialog: The ‘New folder’ dialog box appears. Type Name: Type a name for your new folder, for example, My Files. Click Create: Click on the ‘Create’ button.
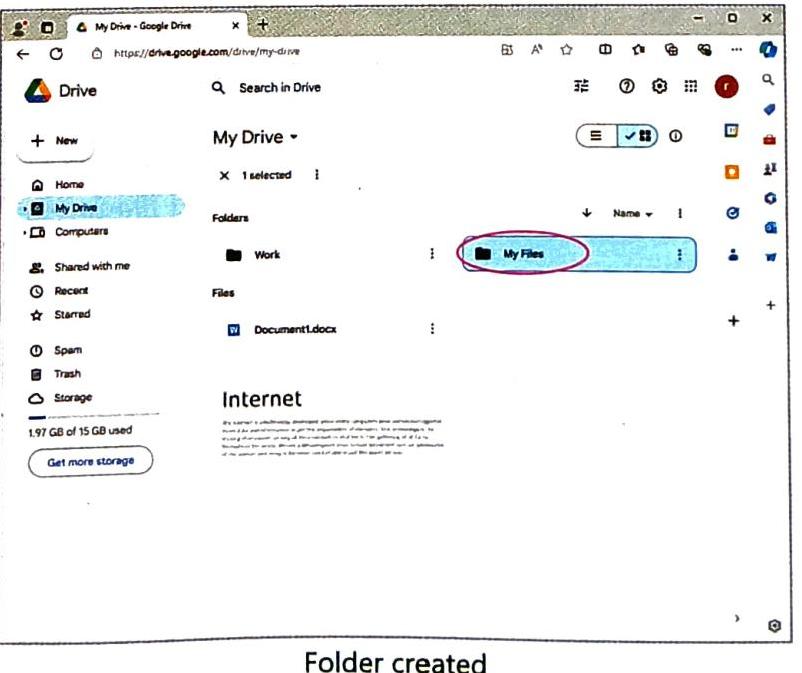
Folder Created: A new folder with the name you typed will be created and highlighted under the ‘Folders’ section of your Drive.
Moving a File to a Folder
Once you have folders, you can move your files into them to keep things organized.
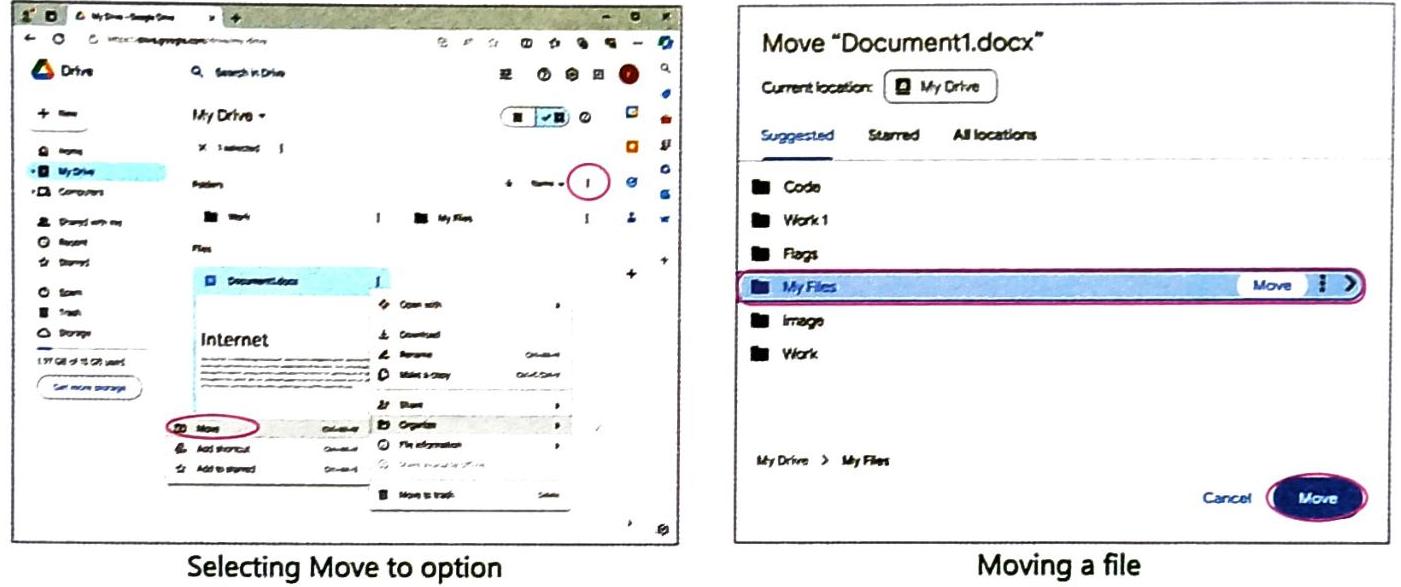
Select File: Select the file you want to move. More Actions Button: Click on the ‘More actions’ button (often represented by three vertical dots). A drop-down menu will appear. Organize: Select Organize. Another sub-menu will appear. Move Option: Select the Move option. Pop-up Box: A pop-up box will appear showing a list of folders in your Google Drive. Select Destination Folder: Select the folder where you want to move your file (e.g., My Files). Click Move: Click on the ‘Move’ button.
File Moved: The file will now be moved to the selected folder.
Duplicating a File
If you want to have a copy of a file without changing the original, you can duplicate it.
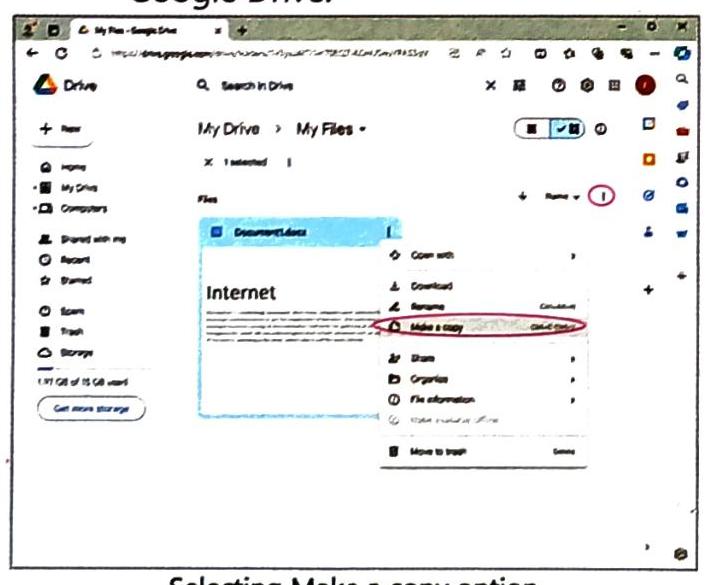
Select File: Select the file you want to copy. More Actions Button: Click on the ‘More actions’ button (three vertical dots). A drop-down menu will appear. Make a Copy: Select the Make a copy option.
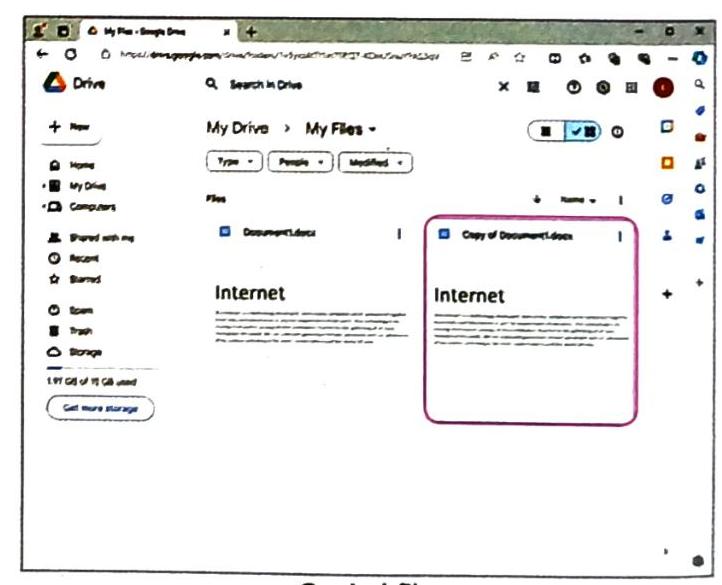
Copy Created: A copy of the selected file will be created and appear in your Google Drive, usually named “Copy of [Original File Name]”.
Removing a File (Deleting)
If you no longer need a file, you can remove it from your Google Drive.
Select File: Select the file you want to delete. Move to Trash Button: Click on the Move to Trash (Delete) button. This button usually looks like a trash can icon.
File Removed: The selected file will be removed from your Google Drive and moved to the Trash.
Opening a File to Work on It
One of the great things about Google Drive is that you can work on your uploaded files directly.
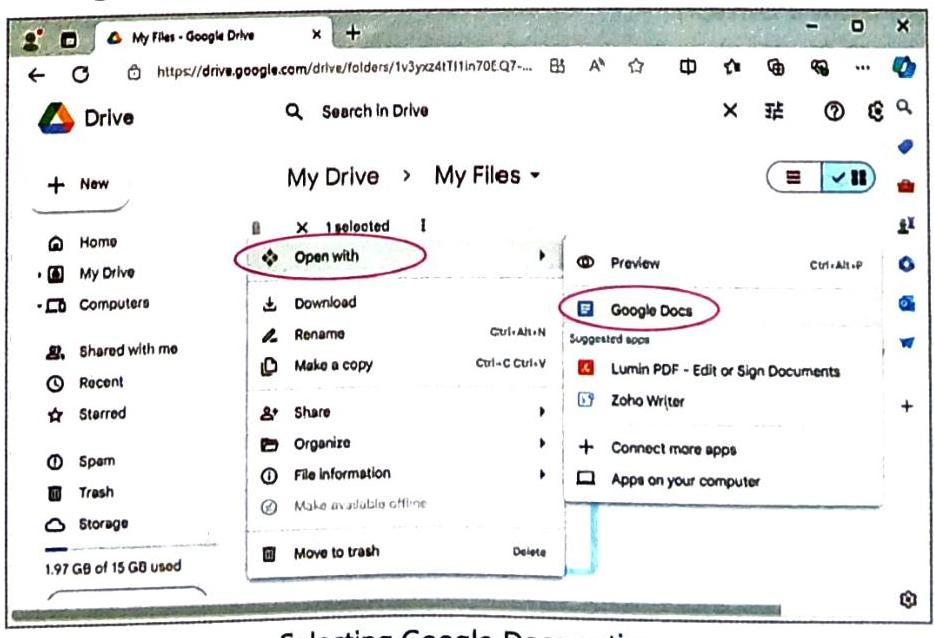
Select File: Select the file you want to open. For example, Document1. More Actions Button: Click on the ‘More actions’ button. A drop-down menu appears. Open with: Move your mouse pointer over the Open with option. Another drop-down menu will appear showing suggested applications. Select Google Docs (or other app): Select the Google Docs option if it’s a document.
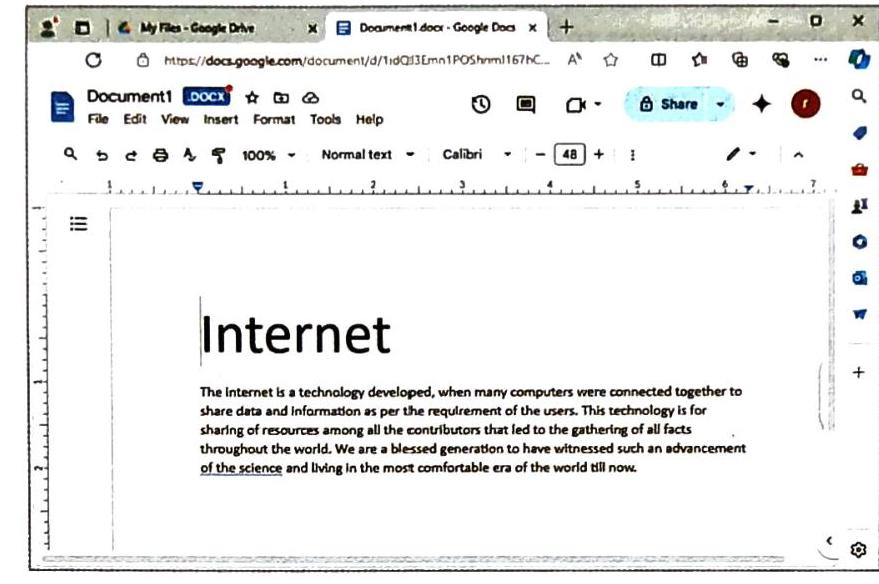
Edit File: Your file will open in the chosen Google application (e.g., Google Docs), where you can edit it.
Save Changes: All your changes are automatically saved on Google Drive as you work. TECH FUNDA
A file gets saved automatically in Google Drive. There is no manual ‘Save’ option available because changes are continuously saved.
Sharing a File or Folder
Google Drive makes it easy to share your files with others so they can view, comment on, or even edit them.
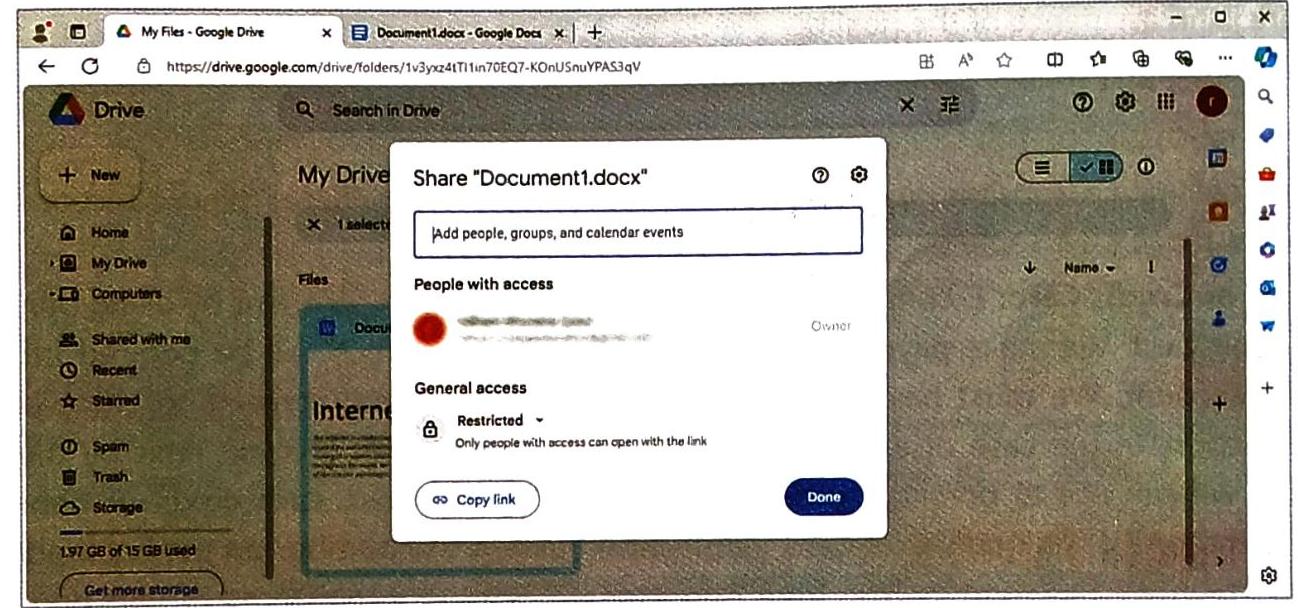
Select File/Folder: Select the file or folder you want to share. Share Button: Click on the Share button. This button often looks like a person icon with a plus sign.
Share Dialog Box: The ‘Share’ dialog box will appear. Add People: In the “Add people, groups and calendar events” textbox, type the email addresses or names of the people you want to share with. Click Done: Click on the ‘Done’ button.
TECH FUNDA
You can set different permissions for the people you share with! In the ‘General access’ section of the ‘Share’ dialog box, you can choose if they can be a:
Viewer: Can only see the file. Editor: Can make changes to the file. Commenter: Can add comments to the file.
E-COMMERCE: Shopping and Selling Online
E-commerce, also known as electronic commerce, is the process of buying and selling goods or services using the Internet. It’s not just about shopping; it also includes the online transaction of money, funds, and data.
How it works: People can buy and sell goods and services from their homes. Requirement: An Internet connection is essential. You can also use e-commerce services on smartphones. Common Websites: Some popular e-commerce websites include www.amazon.com, www.flipkart.com, www.paytm.com, and www.olx.in.
Advantages of E-commerce
E-commerce offers many benefits:
Global Reach: Allows you to sell or buy products and services across your country and around the world. Wide Choice: Provides a broad range of products to choose from. Saves Time and Money: Often saves you time (no travel) and sometimes money (deals, less impulse buying). Anytime Access: You can buy or sell products and services at any time, 24/7.
Disadvantages of E-commerce
While e-commerce has many advantages, there are some drawbacks to be aware of:
No Quality Assurance: You cannot physically inspect the product before buying, so there’s no assurance of quality until it arrives. Online Fraud Possibilities: There are higher risks of online fraud, such as fake websites or insecure payment gateways.
Modes of Payment
E-commerce websites offer various ways to pay for your purchases:
Debit Card: Money is directly debited (taken) from your bank account. You need enough balance. Credit Card: You’re provided with a credit limit by the bank, which you can use to purchase. Security: To prevent fraud, cards have a three-digit Card Verification Value (CVV) number on the back. Banks also send a One-Time Password (OTP) to your registered mobile number for extra verification. Allows direct payment from your bank account online. You use a unique Customer ID or Net Banking ID and a PIN provided by your bank. Similar to cards, an OTP is often sent to your registered mobile number for verification. Also called an Electronic wallet, it’s a digital wallet used for online payments. You need to add money to your e-wallet from your bank account before using it. Many e-commerce websites have their own e-wallets. Some banks and third-party organizations also provide them. Common E-Wallets/PSPs: GooglePay, Paytm, PayPal, Bhim, PhonePe, and Airtel Money. Most e-commerce websites allow you to pay in cash when you receive the product at your home. This is often preferred if you’re cautious about online payments.
Online Shopping
Online shopping is simply the process of buying products online. You can buy almost anything online, from clothes to electronics, books, and groceries! To shop online, you usually need to register with the e-commerce website you want to use.
Here’s how to purchase products from an e-commerce website, using Flipkart as an example:
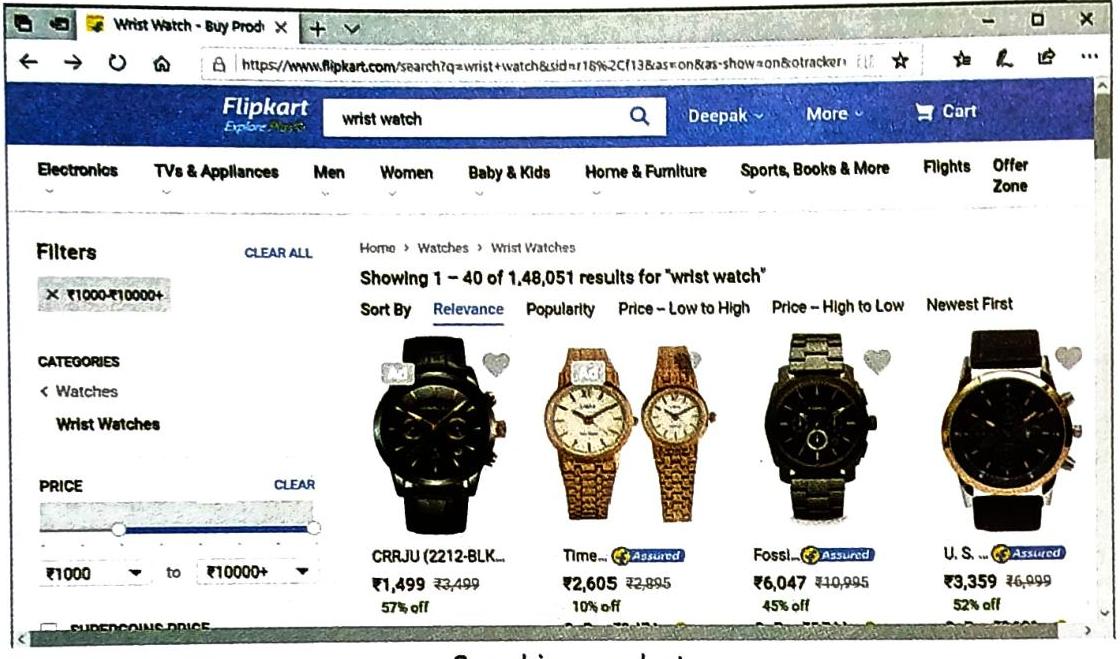
Open Web Browser: Open a web browser like Microsoft Edge. Type URL: In the address bar, type the Uniform Resource Locator (URL) of the website (e.g., www.flipkart.com) and press Enter. The website’s home page will appear. You will usually need to Sign In with your username and password first. Search Product: Enter the product you’re looking for (e.g., “wrist watch”) in the search textbox and press Enter or click the Search button. A list of related products will appear.
Choose Product & Check Details: Select the product you like and click on it to see detailed information. If you want to buy more items later, click ADD TO CART. If you want to complete your purchase immediately, click BUY NOW.
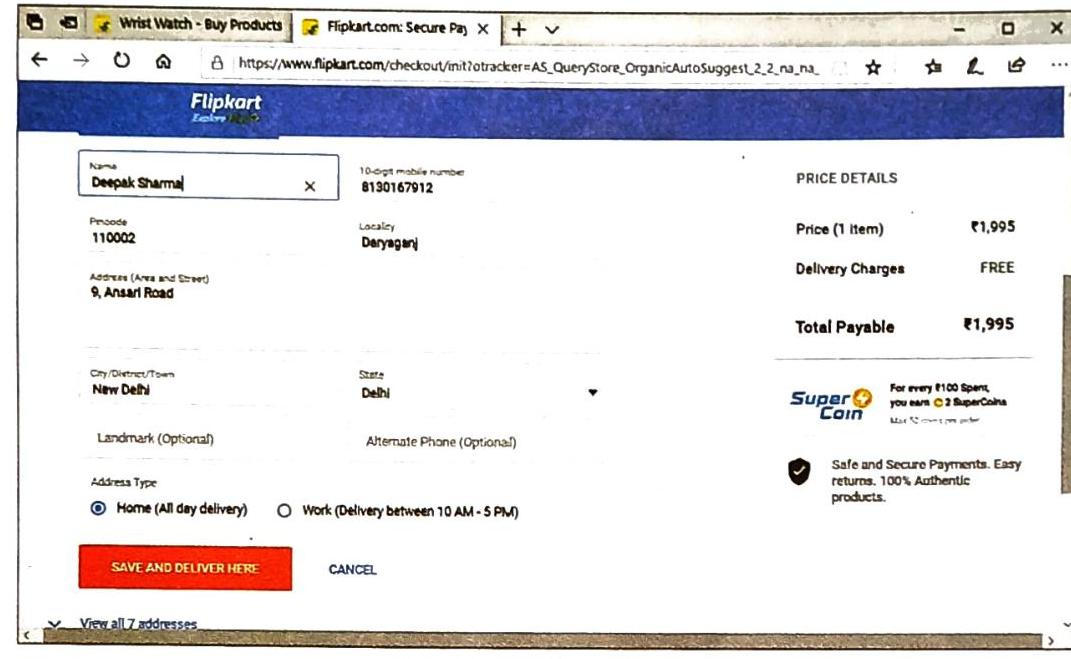
Enter Personal Information: The next page will ask for your personal details like name, delivery address, and mobile number. Fill in the required information. Click on the SAVE AND DELIVER HERE button.
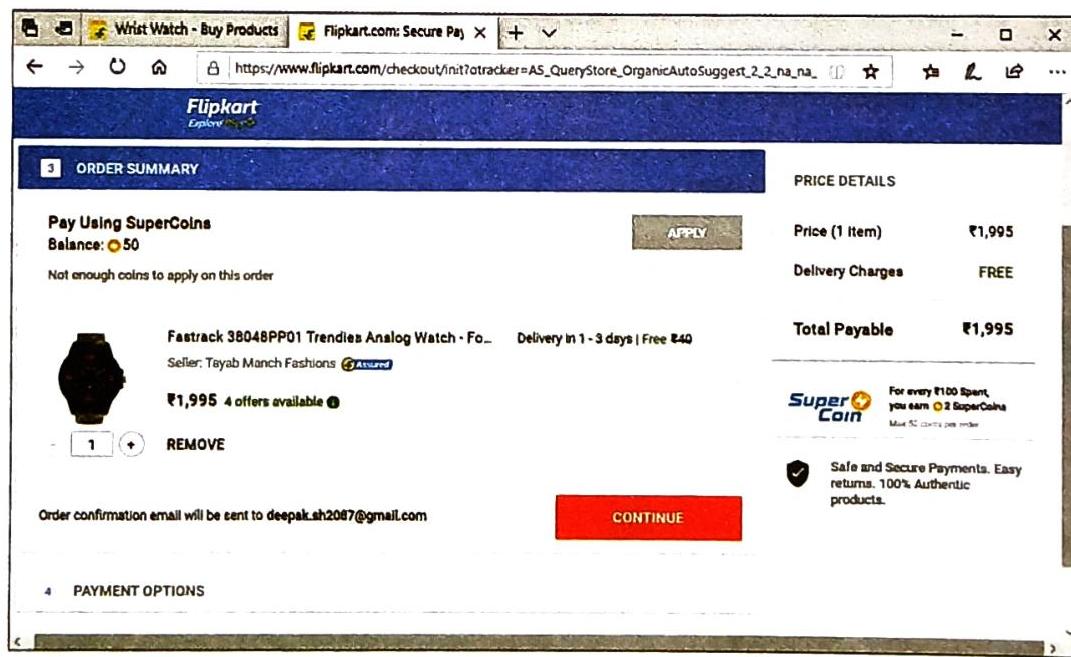
Review Order: The next page allows you to review your order details. After checking everything and entering your email ID, click on the CONTINUE button.
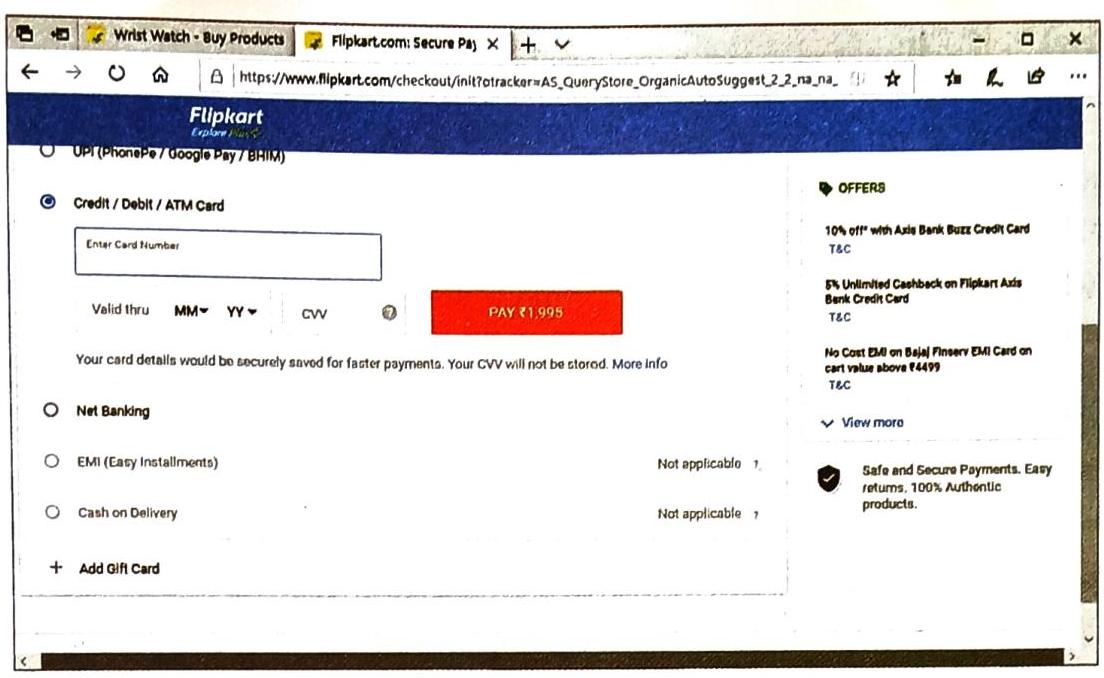
Select Payment Mode: You’ll be asked to choose how you want to pay. If you select Credit / Debit / ATM Card, enter the 16-digit card number, validity date, and CVV number (found on the back of your card). Click on the PAY button.
Enter OTP/Password: The next page will typically ask for a One-Time Password (OTP) or a Verified by Visa Password. This is sent to your mobile number registered with the bank.  Self Study