Chapter: 06. Scratch Programming Game Creation
Scratch Programming: Game Creation
Welcome to your self-study guide for Scratch Programming! In this chapter, you will learn how to use Scratch, an easy and fun programming language, to create your own games, animated stories, and interactive art. We will explore how to add characters (called Sprites), change backgrounds (Backdrops), draw shapes, and use different types of programming blocks to bring your ideas to life.
A computer needs instructions in a language it understands. Scratch provides these instructions as visual “blocks” that you can drag and connect, like puzzle pieces, to build your projects. Let’s begin our journey into the world of Scratch!
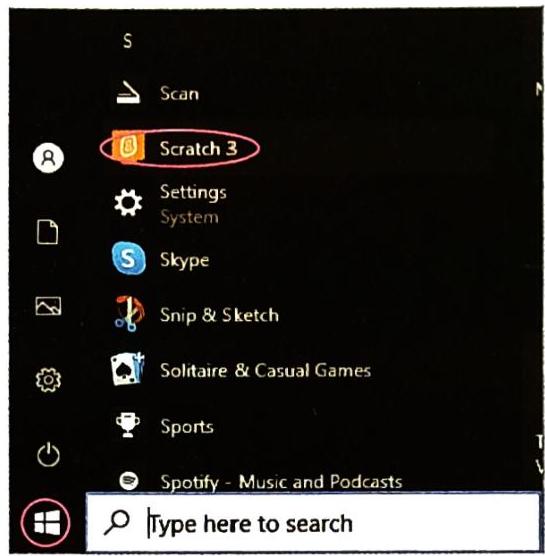
Starting Scratch
To begin your Scratch adventure, you need to open the program. Here’s how:
Step 1: Click on the Start button on your computer. Step 2: Look for and click on Scratch 3 to open the Scratch program. Once you follow these steps, the Scratch window will open, ready for you to start creating!
Clickipedia: Scratch Website
The official website of Scratch is . Clickipedia: Scratch Creation
Scratch was created by Mitchel Resnick and his team at the MIT Media Lab in 2007. 
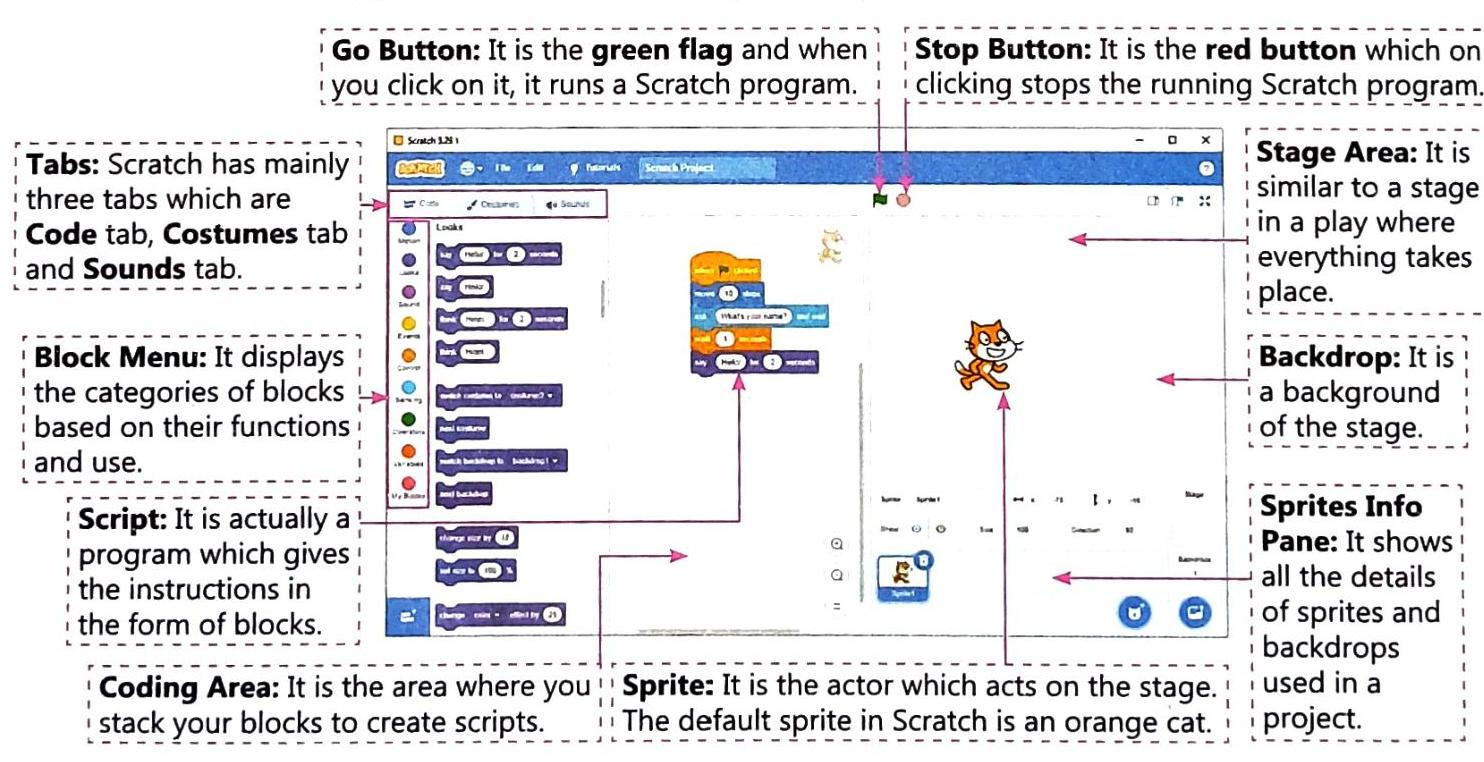
Understanding the Scratch Window Components
The Scratch window is organized into several key areas that help you build your projects. Familiarize yourself with these components:
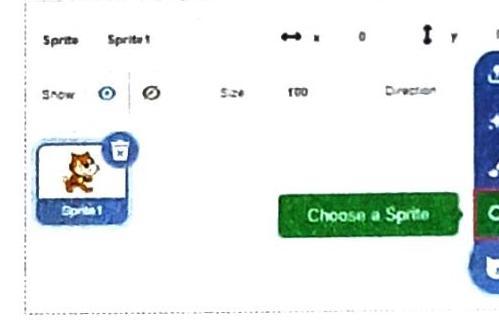
Go Button (Green Flag): This button starts your program or script. Stop Button (Red Button): This button stops your running program. Code: Where you find and arrange your programming blocks. Costumes: Where you can edit the appearance of your sprites. Sounds: Where you can manage and add sounds to your project. Block Menu: This area displays different categories of blocks (like Motion, Looks, Sound, etc.). Script Area: This is where you drag and snap blocks together to form scripts (your program). Coding Area: The main workspace where you assemble your blocks into instructions. Stage Area: This is where you see your project in action; your sprites move and interact here. Backdrop: The background image or scene on the Stage. Sprite: The characters or objects in your project (default is a cat). Sprites Info Pane: Displays information about the selected sprite and backdrop, including their name, position, size, and direction. Choosing a Sprite
When you open Scratch, the first sprite you see is usually the cat sprite, located at the center of the stage. You can easily change this and choose a different sprite that fits your project. Scratch gives you four main ways to add a sprite:
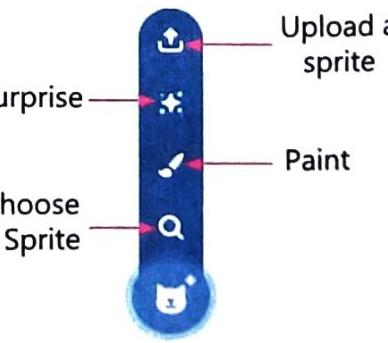
Adding a Sprite from Library
The Scratch Library has a wide variety of pre-made sprites you can use.
To add a sprite from the library, follow these steps:
Step 1: Hover your mouse over the Choose a Sprite tool in the Sprites Info Pane (it looks like a cat head with a plus sign).
Step 2: Click on the Choose a Sprite option from the four sub-menu options that appear. The “Choose a Sprite” window will open, showing many sprite thumbnails. You can browse by categories like Animals, Fantasy, People, etc.
Step 3: Click on the sprite you want to add to your project. For example, if you click on the mouse sprite, it will appear on your stage, and its thumbnail will show up in the Sprites Info Pane alongside the default cat sprite. Painting a New Sprite
If you want to create a unique character that isn’t in the library, you can draw your own!
To paint a new sprite, follow these steps:
Step 1: Hover over the Choose a Sprite tool in the Sprites Info Pane. Step 2: Click on the Paint option in the sub-menu. This will open the Drawing area under the Costumes tab. Step 3: Use the drawing tools provided to create your own sprite. As you draw, your creation will appear on the stage. Other Options for Choosing a Sprite
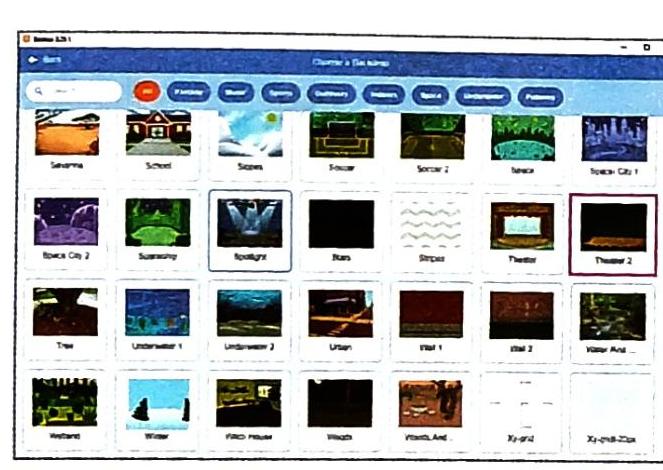
Surprise: If you’re feeling adventurous, click the Surprise option in the Choose a Sprite tool sub-menu to add a random sprite to your project. Upload Sprite: If you have an image file saved on your computer that you want to use as a sprite, click the Upload Sprite option in the Choose a Sprite tool sub-menu.
Choosing a Backdrop
A backdrop is the background of your stage. Changing the backdrop sets the scene for your project. You can choose backdrops from Scratch’s built-in Library.
To choose a backdrop, follow these steps:
Step 1: Hover over the Choose a Backdrop tool in the Sprites Info Pane (it looks like a landscape icon with a plus sign). Step 2: Click on the Choose a Backdrop option from the four sub-menu options.
A “Choose a Backdrop” window will open, displaying thumbnails of available backdrops.
Step 3: Click on a backdrop to add it to your project. For example, if you choose “Theater 2”, it will become your stage background, and its thumbnail will appear in the Sprites Info Pane. Clickipedia: Stage Dimensions
The stage in Scratch is 360 pixels tall and 480 pixels wide.
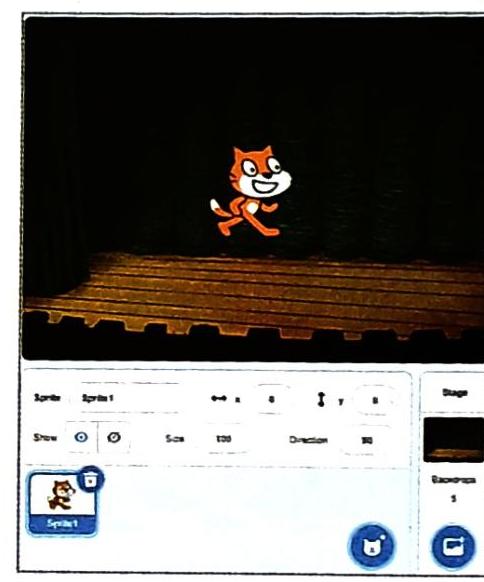
Setting the Sprite Position
The Scratch stage is like a grid, divided into different x and y values.
The x value determines the horizontal position (left to right) of the sprite. The y value determines the vertical position (top to bottom) of the sprite. The center of the stage has x and y values of 0 (zero). The go to x: ( ) y: ( ) block, found under the Motion block category, is very useful. It allows you to set the sprite’s exact position on the stage. If your sprite accidentally moves off-screen due to other scripts, this block can bring it back to a desired location.
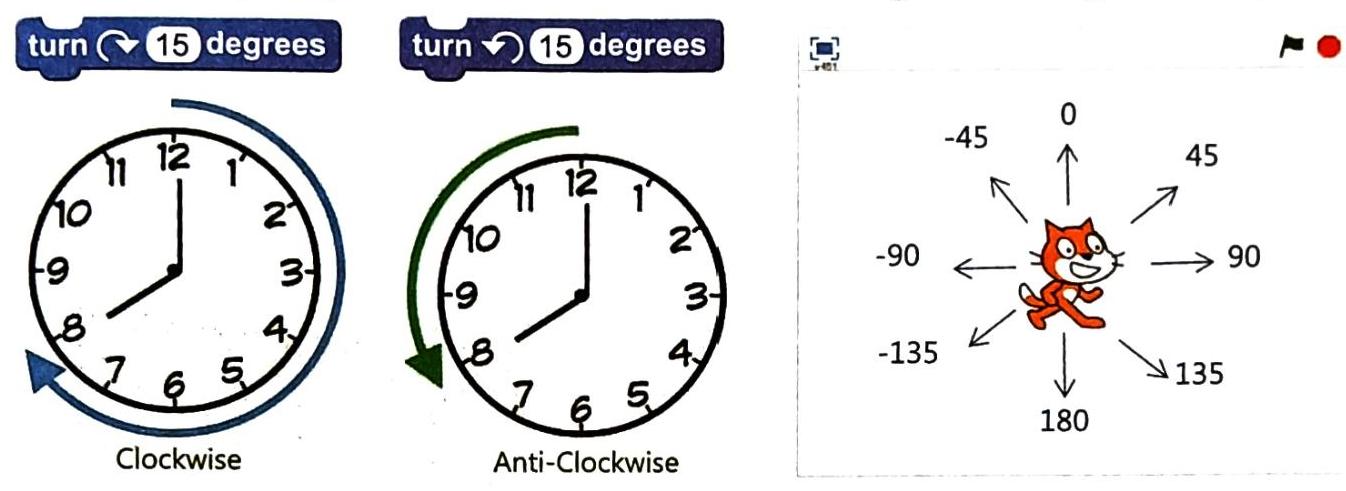
Sprite’s Direction
You can control the direction your sprite faces using the Turn blocks in the Motion block menu.
The turn ( ) degrees block will turn the sprite in a clockwise direction by the specified number of degrees. The turn ( ) degrees block will turn the sprite in an anti-clockwise direction by the specified number of degrees. You can change the number of degrees in the Turn block to suit your specific movement requirements.
Understanding Blocks
Blocks are the fundamental building blocks of Scratch. They are puzzle-piece shapes that you drag and connect to give instructions to the computer.
A script is a collection of inter-locked blocks that together form a code in Scratch. When you double-click on a script, Scratch runs the blocks from top to bottom, executing the instructions in order.
Working with Blocks:
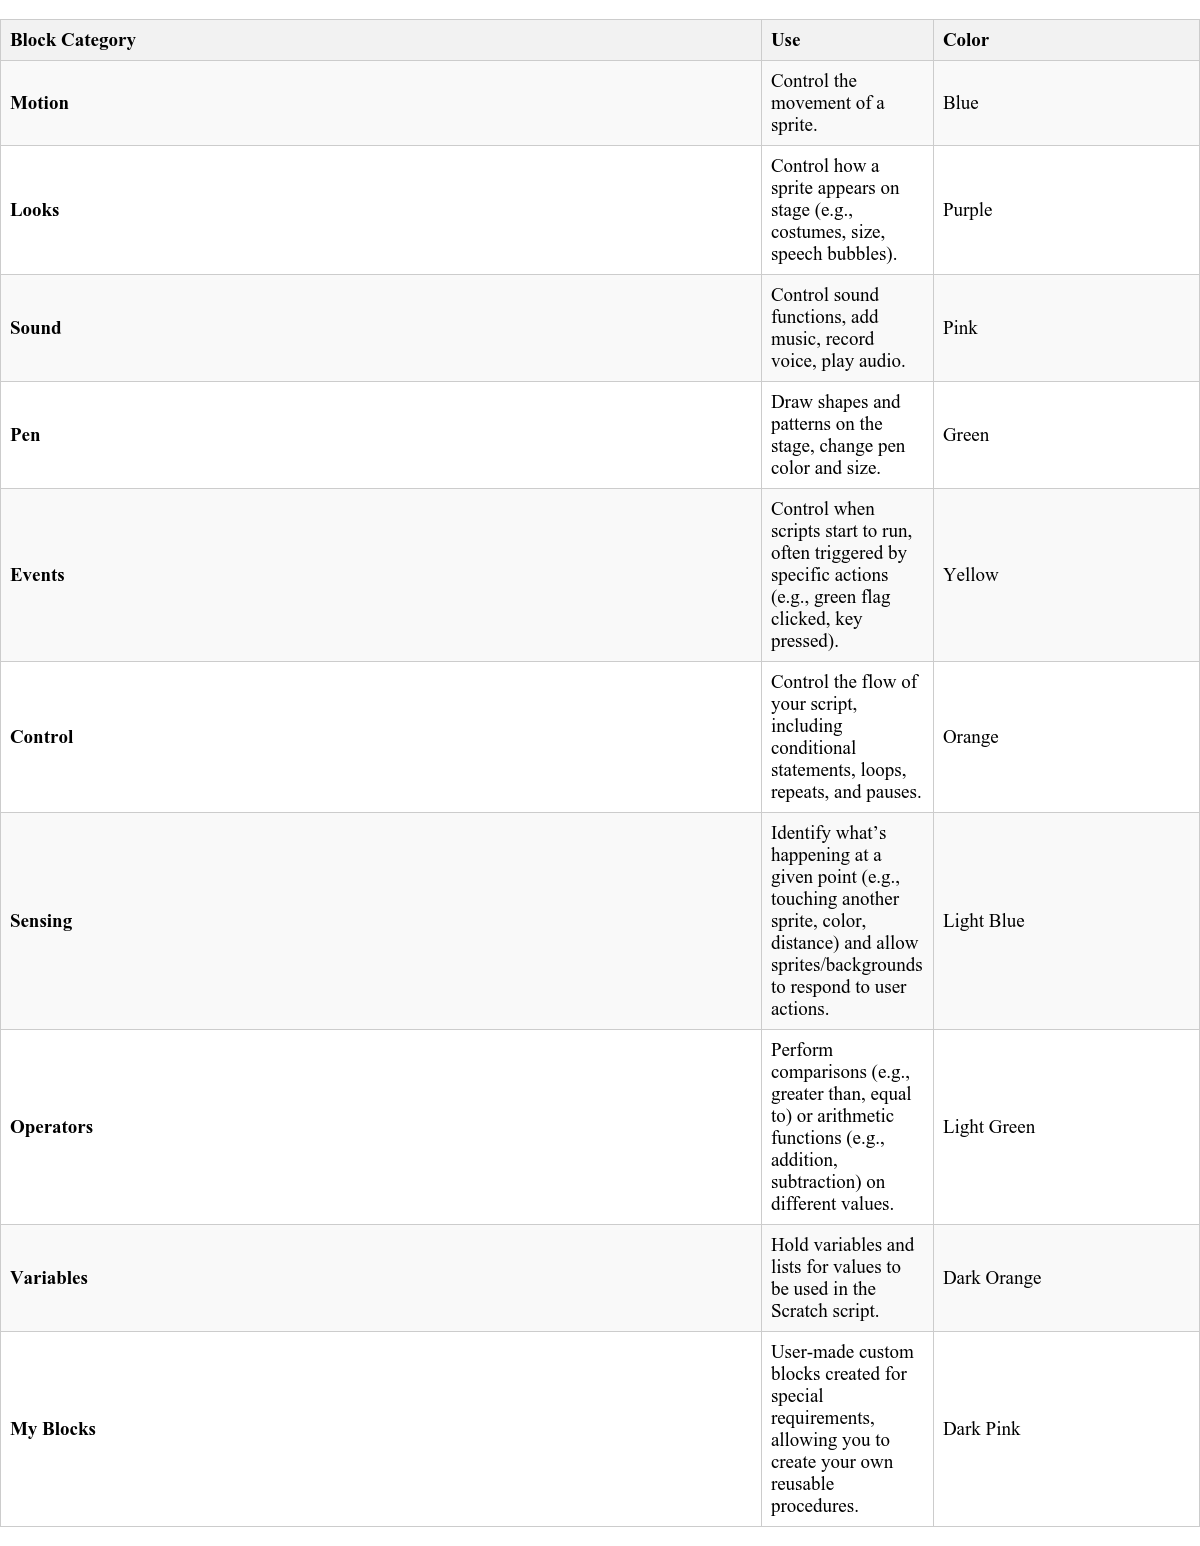
To use a block: Simply drag it from the Block Menu onto the Coding Area. To remove a block: Drag it to the left, away from the Coding Area (it will disappear). Block Categories
Scratch blocks are organized into different categories based on their function. Most blocks allow you to change the default value within them to customize your script.
Clickipedia: Loop
A loop is a process that instructs a computer to repeat a set of commands a specified number of times.
Pen Block
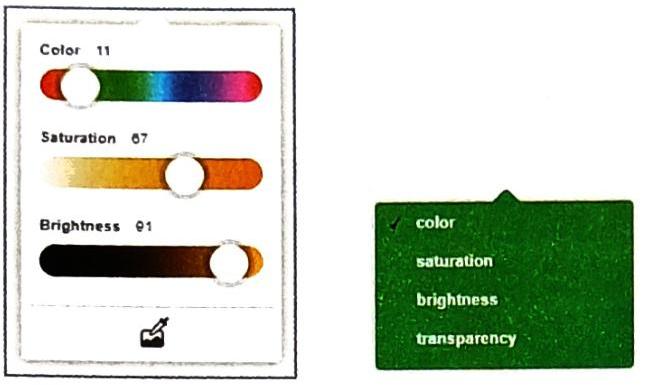
The Pen blocks are green in color. These blocks allow your sprite to draw a trail as it moves on the stage. You can even change the color of this trail!
In Scratch 3.0, Pen blocks are not automatically in the Block Menu. You need to add them as an extension.
To add Pen blocks:
Step 1: Click on the Add Extension button (it looks like a block with a plus sign) at the bottom left corner of the Code tab. The “Choose an Extension” window will open.
Step 2: Click on the Pen option. The Pen blocks will then be added to your Code tab, ready to use. 
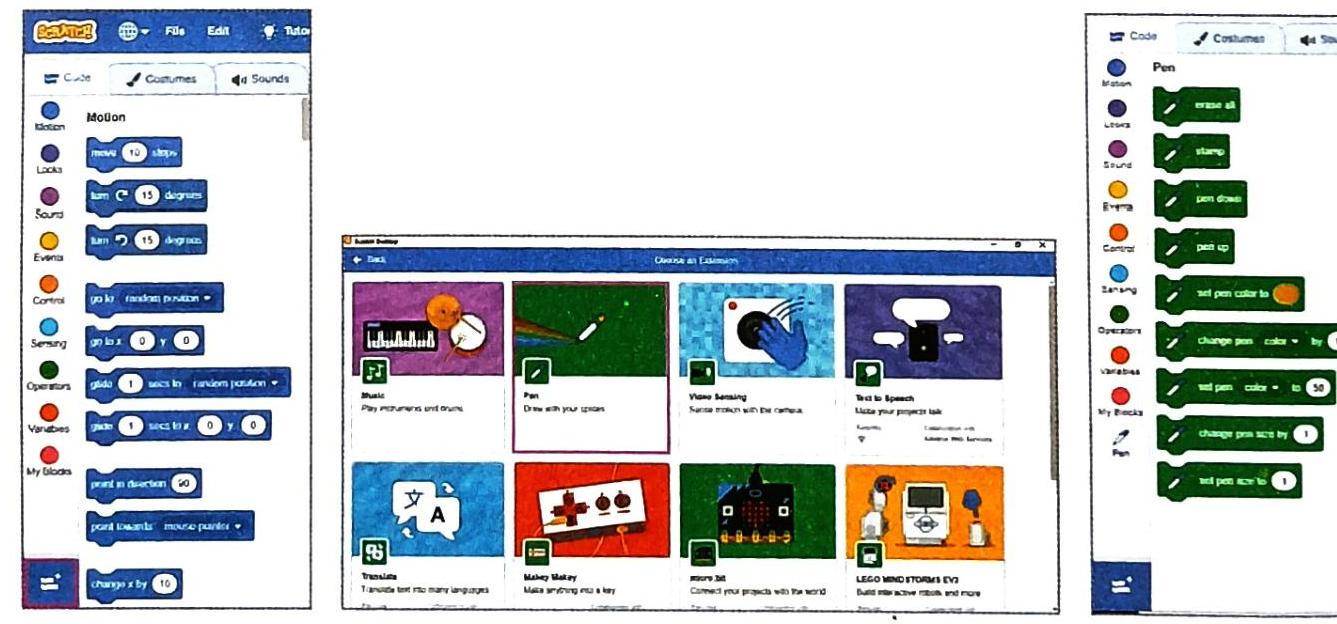
Common Pen Blocks and Their Uses:
erase all: Erases everything that has been drawn by the pen on the stage. stamp: Creates a duplicate image of the current sprite on the stage. To see the duplicate, you might need to drag the sprite, and the stamped image will appear behind it. pen up: Lifts the pen, stopping the sprite from drawing anything as it moves. pen down: Puts the pen down, causing the sprite to draw a continuous line wherever it moves. set pen color to ( ): Allows you to choose a specific color for the pen from a color picker or by clicking on a color dot. change pen color by ( ): Changes the pen’s color, saturation, brightness, or transparency by a specified value. You click the first text box to select the effect (color, saturation, brightness, transparency) and the second text box to give the value.
set pen color to ( ): Similar to change pen color by, but it sets the pen’s color, saturation, brightness, or transparency to an exact given value.
Variables
A program (also called a Script in Scratch) is a set of commands and instructions that tell the computer to perform a task. These instructions are built using individual blocks.
Any numbers, text, dates, or pictures you use in a program are called data. Computers store this data in their memory so it can be used later. This data is stored in variables.
A variable is called variable because its value can change during the program’s execution. It doesn’t have a fixed value. For example, in a move ( ) steps block, the default value might be 10 steps, but you can change this value to 5, 100, or any other number depending on your script.
Types of Variables
Variables can store different kinds of data:
Numeric Variable: A variable that stores numbers. These numbers can be used in calculations (e.g., 48, -986, 12345). String Variable: A variable that stores letters, words, sentences, or characters. These are often enclosed in quotation marks (e.g., “Kavita”, “I am 12 years old”, “12345”). String variables are typically not used in calculations. Even if they contain numbers (like “12345”), they are treated as text, not numerical values. Creating Variables in Scratch
To create your own variables in Scratch:
Step 1: Click on the Variables block category in the Block Menu. A set of blocks related to variables will appear. Step 2: Click on the Make a Variable block. A “New Variable” dialog box will appear. Step 3: Type a name for your variable in the “New variable name” box (e.g., “fruit”). Step 4: Choose the scope of your variable by clicking one of the radio buttons: For all sprites: If you want this variable to be accessible and change its value for all sprites in your project. For this sprite only: If you want this variable to only exist and be usable for the currently selected sprite.
Step 5: Click the Ok button. 
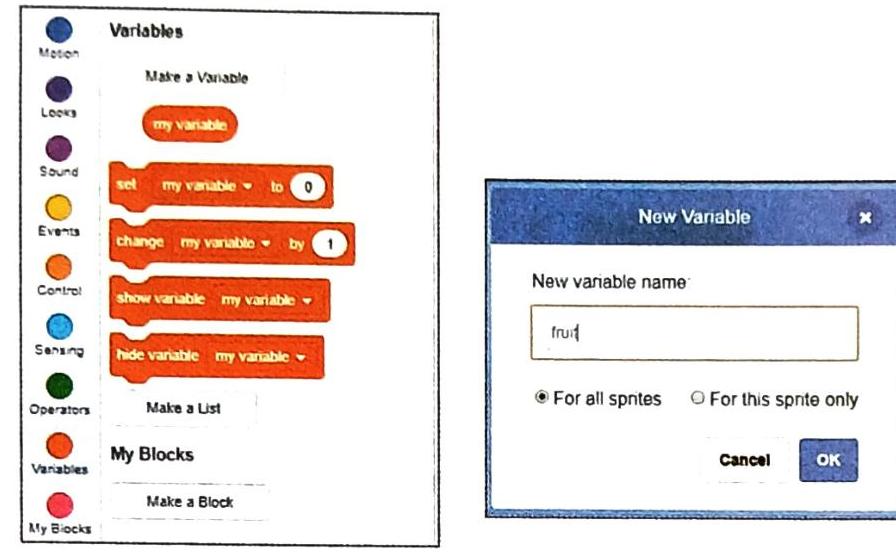
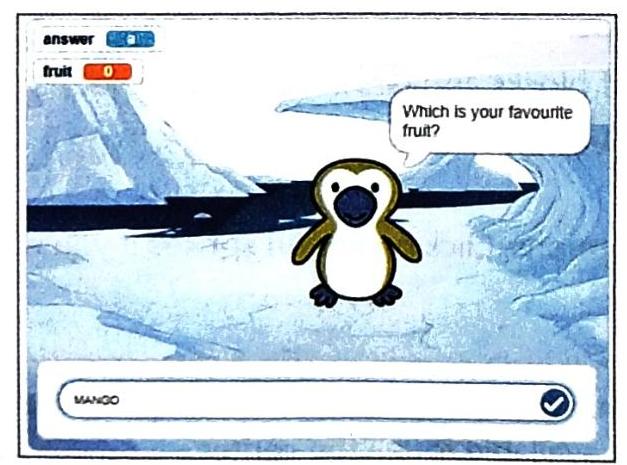
The new variable will now appear in the list of Variables blocks. Notice that the variable name you chose (e.g., “fruit”) will also appear in the other variable-related blocks like set (variable) to ( ) or change (variable) by ( ).
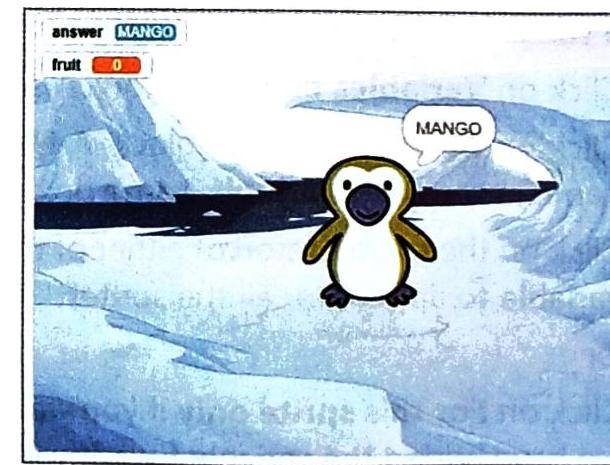
Let’s look at an example script using a variable:
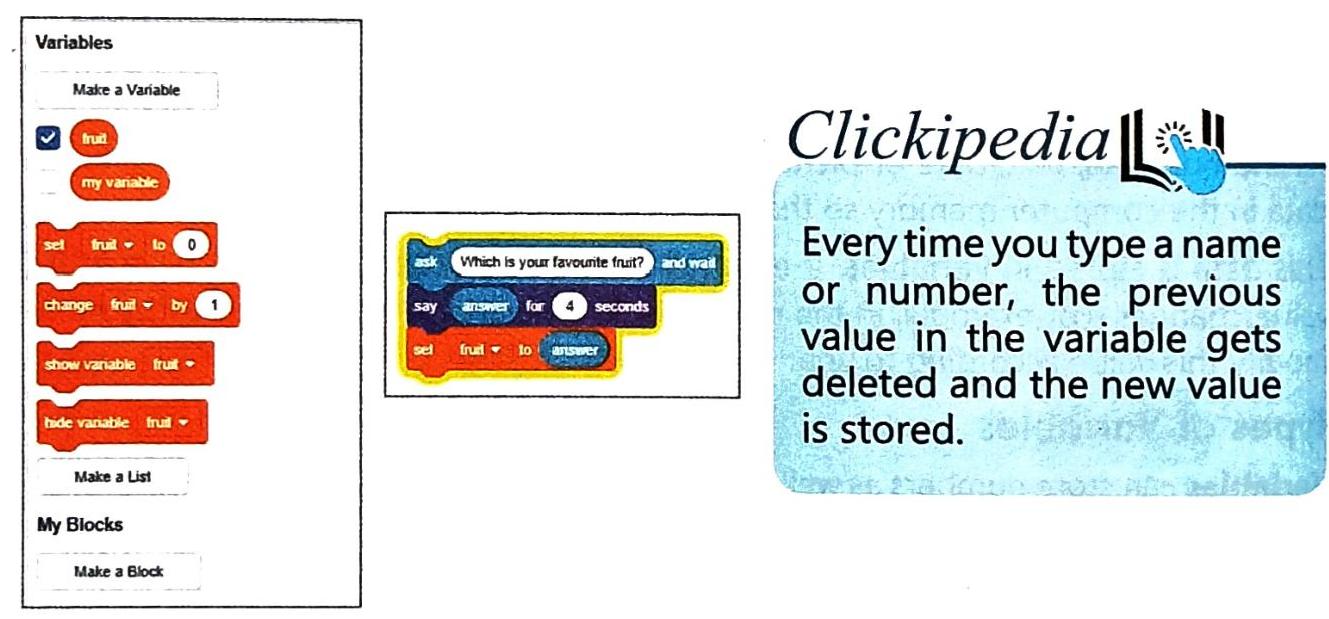
In this example:
The sprite will ask you, “Which is your favourite fruit?” When you type your answer and press Enter, the name of the fruit (e.g., “MANGO”) will appear in the sprite’s speech bubble.
The answer block stores what the user types. The set fruit to answer block takes the user’s input (the answer) and stores it in the variable named “fruit”. This “fruit” variable is a string variable because it stores text (names of fruits). If you were to store numbers (like set score to 10), it would be a numeric variable. Clickipedia: Variable Overwrite
Typing a new value into a variable overwrites the previous value. Think Tank
Consider how you could use Scratch to create a sports competition game. What sports would be included, and how would players train and compete to become champions? (This section is for thought and brainstorming, not direct factual content to be reproduced.)
Operators
Operators Blocks are used to perform arithmetic calculations and logical comparisons. These blocks are easily identifiable by their light green color and distinct oval or hexagon shapes.
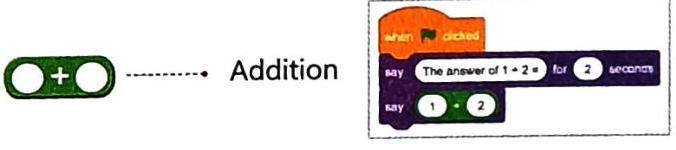
Arithmetic Operators
Scratch provides four basic arithmetic operators: addition, subtraction, multiplication, and division.
Addition: ( ) + ( )
You can use this block to add two numbers or variables. Multiplication: ( ) * ( ) 
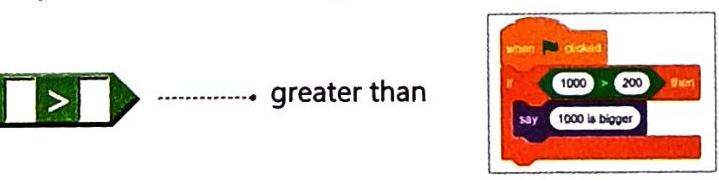
Relational Operators
Relational operators allow you to compare two values or variables and determine if a relationship between them is true or false.
Greater than: ( ) > ( )
This block checks if the first value is greater than the second. It returns true or false. Logical Operators
Logical operators combine two or more relational operator results (true/false) to produce a single true/false outcome. They help you create more complex conditions.
and: True if both expressions or conditions are true. or: True if either expression or condition is true. not: True if the expression or condition is false. Conditional Blocks
Often in programming, you need to perform actions that depend on whether certain conditions are met. For example, if you want to make mango shake, the action (making shake) depends on the condition (availability of mangoes).
This kind of logic can be written in two main ways:
If a condition is true, then do something.