Skip to content


Tasker and AutoRemote Setup: is free for 7 days ($3.5 after that) , and has both a Configuring Coda.io with AutoRemote Pack: We'll add and set up the AutoRemote (Tasker) pack in your Coda.io document.Linking and Messaging: You'll learn how to link Coda.io to AutoRemote with a personal key, and how to send and receive messages between them using webhooks and Tasker tasks.
Tasker: Install/buy tasker on your phone on your phone, you can read everything about it on In authentication set your personal key. Pack settings > account, add an account and set your personal key as the API key. < Right click to see formula e.g. Send message(”test=:=testmessage”)Configuring Tasker/AutoRemote: In Tasker under PROFILES add a new one (+) and select: Event > Plugin > AutoRemote > AutoRemoteFor this test you can skip configuration, but here you can set up filters and other config, for more details on how AutoRemote works see the Add a task, for example ‘CmdFromCoda’ in this task you can get the whole message from the %armessage variable or a part for example using %arcomm. In the Example task below I’ve added an if to match for the arpar to be ‘test’ (the left part of the message) and to flash the right part (%arccomm) on screen.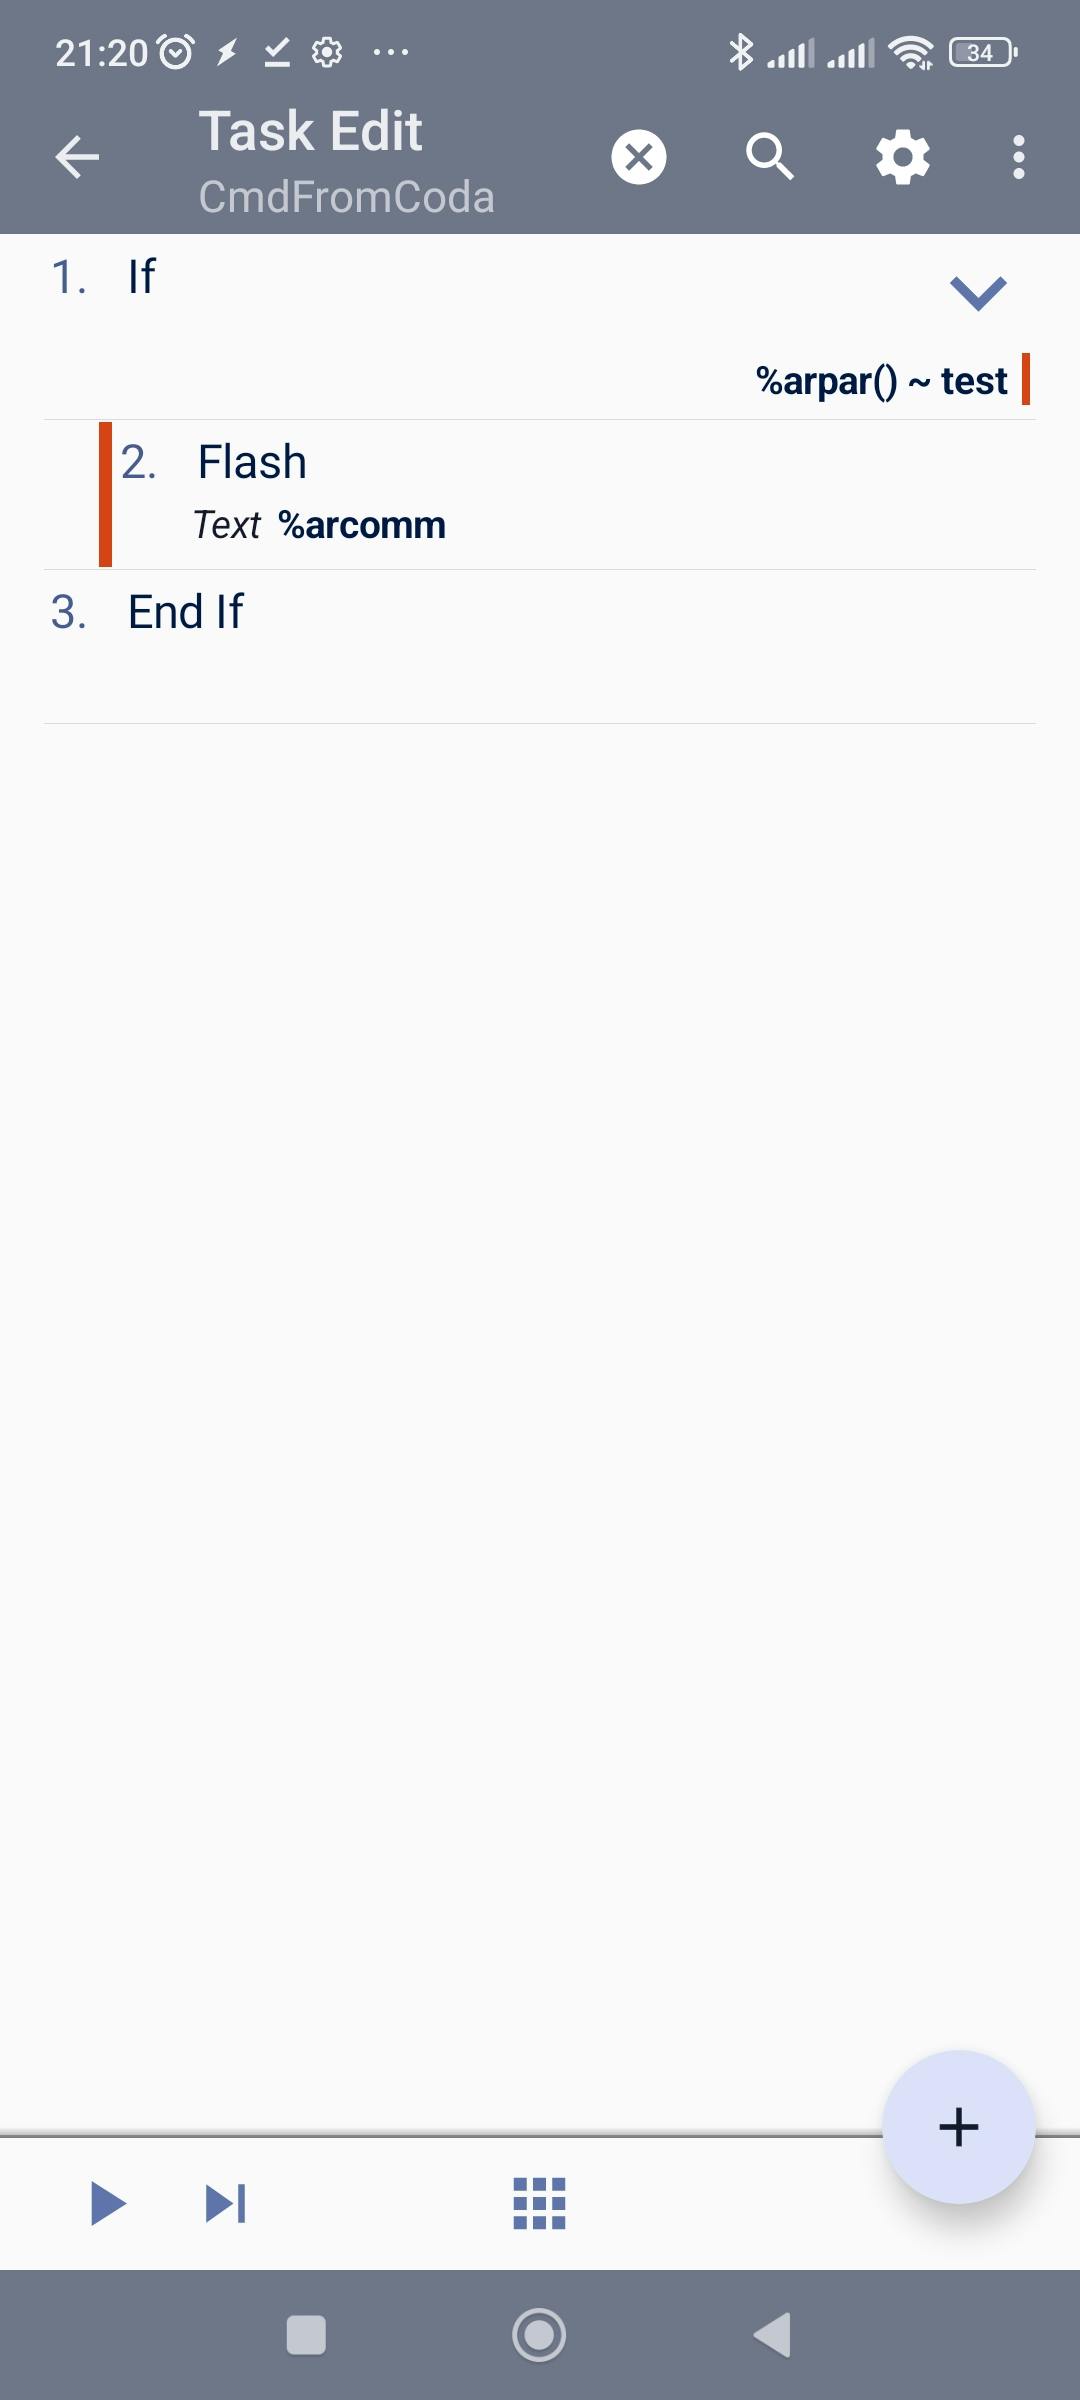 Setting up a Webhook: In coda add an automation(Under document settings (gear icon top right) > Automations > + Add rule)Select Rule > When > Webhook invokedHere you can copy the URL and the Token we will need to trigger this webhook.We wil come back later on configuring this ruleTriggering a webhookIn tasker, within the task that has received the command add a Net > ‘HTTP Request’ or HTTP PostConfigure it with the URL and bearer token in the header you can get from the webhook rule set in step 5. See the example below. In this example the command sent was something like, getCoords=:={rowID}, the tasker task gets the Location with get location v2, stores the coordinates in %gl_latitude and %gl_longitude and passes them and also the rowID from the command as JSON in the body of the request.
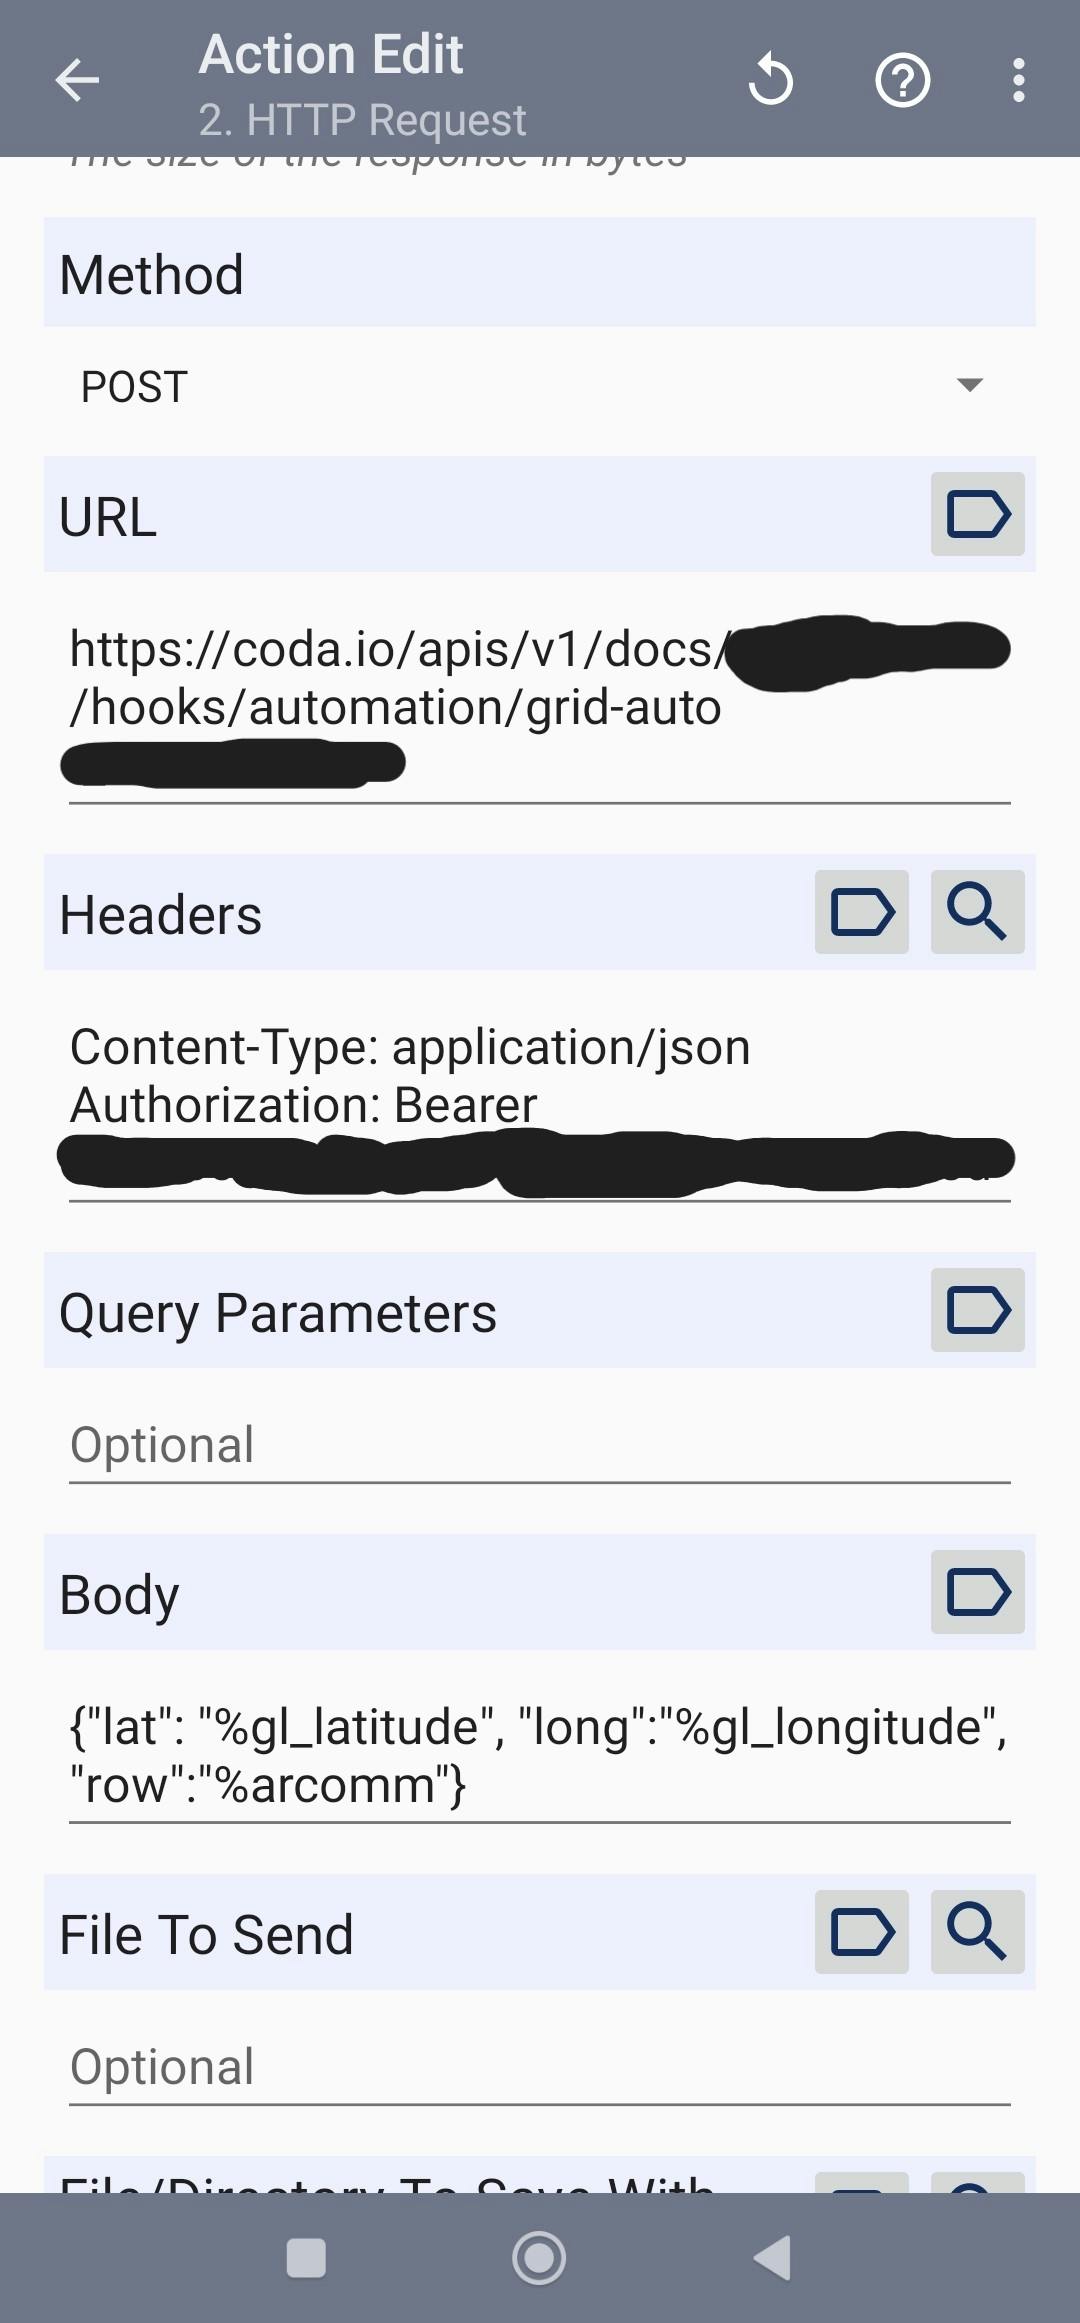 Recieving a webhookBack in our coda rule we can now store and parse the result from Tasker, for example by updating the row the request might have originated from.
 Don’t forget to turn on your rule

Share
Explore
 Setup Guide
I use the pack to get GPS coordinates from my phone and send them back to my Coda doc, in general the pack can be used to give your docs capabilities more like a native app
Pack overview
With this Pack you can link Coda docs to your Android phone using the Tasker app with the AutoRemote plugin. Imagine the possibilities of sending sending commands and messages from Coda your phone and back.
It's useful for anyone who wants send commands to their phone and to pull live data from their phone into a Coda doc.
Note: I didn’t make AutoRemote, but it’s a key part of making this work. Check out the AutoRemote details at
Introduction to the Setup
In this quick guide, we're setting up an integration between Coda.io and Android using Tasker and the AutoRemote extension. We’ll cover:
free and a
paid version (about $3.5).Setup Steps
Send a test message
That should be all, you now know how to send messages and commands and how te get results back
Want to print your doc?
This is not the way.
This is not the way.
Try clicking the ··· in the right corner or using a keyboard shortcut (
CtrlP
) instead.