Skip to content
Day 2 with Webflow
Getting to grips with my layout design concept before firing up Webflow, will no doubt save plenty of time. I'll create wireframes to find a basic layout that works across all page types; pages, posts, collections, authors, archives and 404s.

10/19/2019
One of the biggest challenges when starting a new project in Webflow is figuring out how to set out all the various elements you need on your web page.
Before you even get into the Webflow designer, it's a good idea to have a roughed out idea of the layout design you would like to achieve. Using , or a wireframe layout tool will help to organise your pages and develop a hierarchy of elements that you'll use throughout your site. Using the box model, start to block off major areas in your design; header, footer, content area for instance.
Because of my own background, I tend to think in a / Wordpress way, laying out my pages in a top down, desktop first fashion - probably not the best way, but it works for me. I think about the header, the page body, content, sidebars and footer.
Once I have a concept sketched out in box form, I start adding the top level blocks in the Webflow designer that will be placeholders for my content. I start with adding the very top level areas onto the canvas; webpage sections. This is then fleshed out with webpage wrappers and further detailed by adding webpage elements. You can even deeper than this but for this exercise, these three levels offer the structure you'll need for the basic components of your site.
Ran Segall published a super helpful video tutorial on this topic and it’s helped me a lot in understanding the importance of proper layout. Check it out here:
Using Ran‘s advice I’m going to set out my pages in their respective sections and containers and this will help to organise a consistent structure for my site.
Let’s get started...
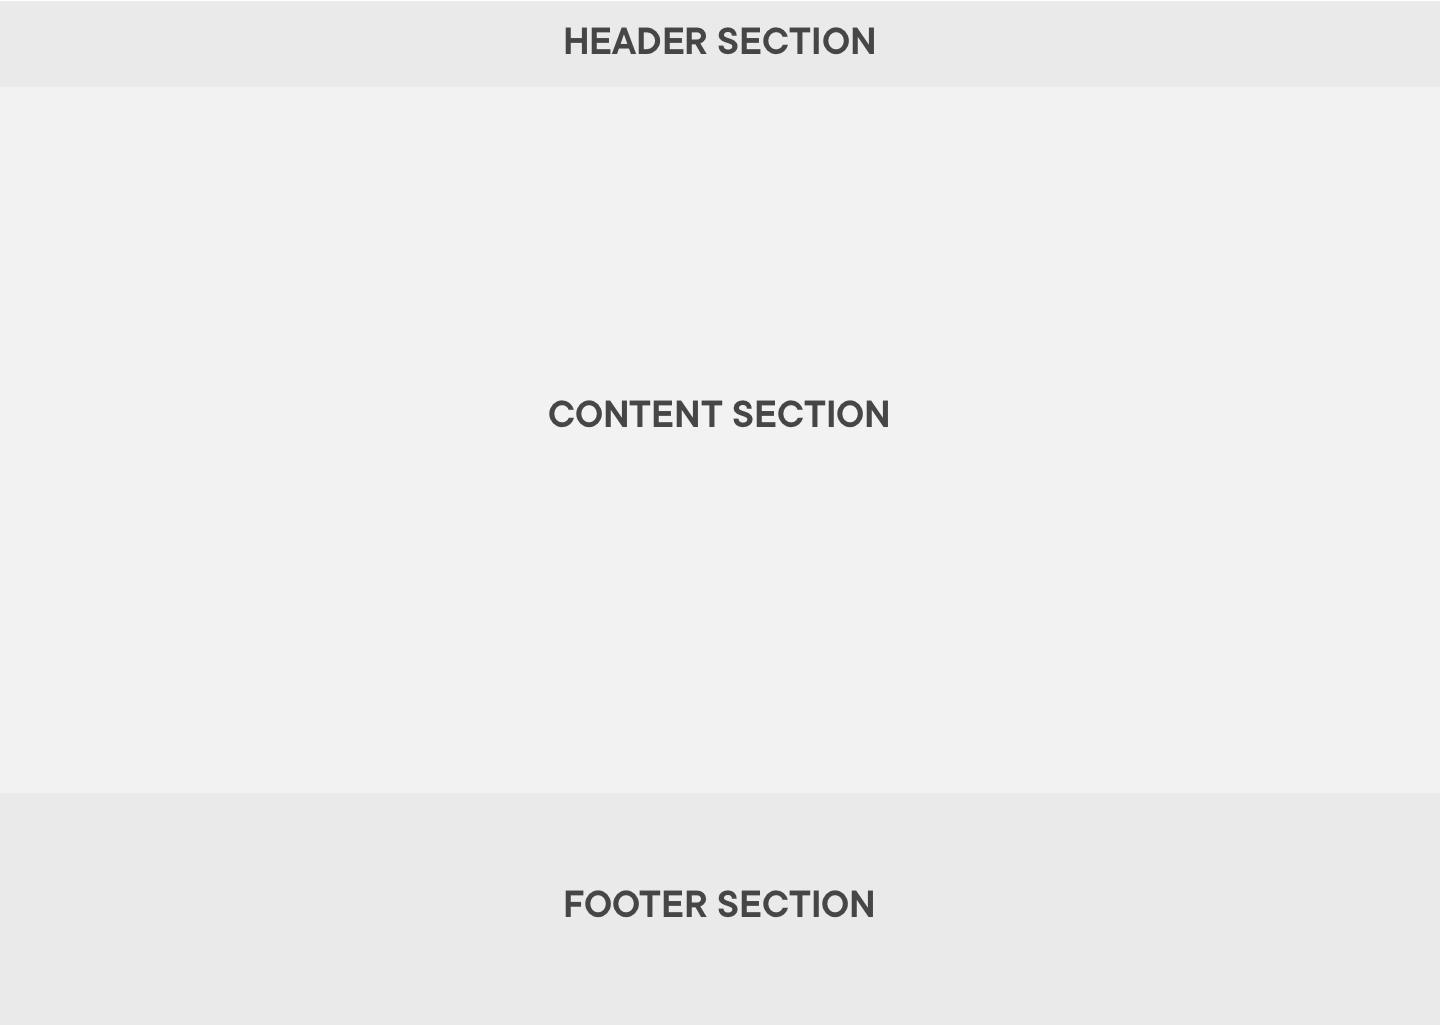
Webpage sections
These are very basic illustrations showing how I figure out what blocks I'll need for my layouts. So starting with the top level blocks, I add a header, content and footer section to the body of my page. These don't necessarily reflect the layout design, but rather the building blocks that I will use to contain all the elements I need.
It's important to use Webflow's "Section" element for this level as it also allows you to define the section tag; nav, header, footer etc. This adds the necessary info for search engines to understand the layout on your page.
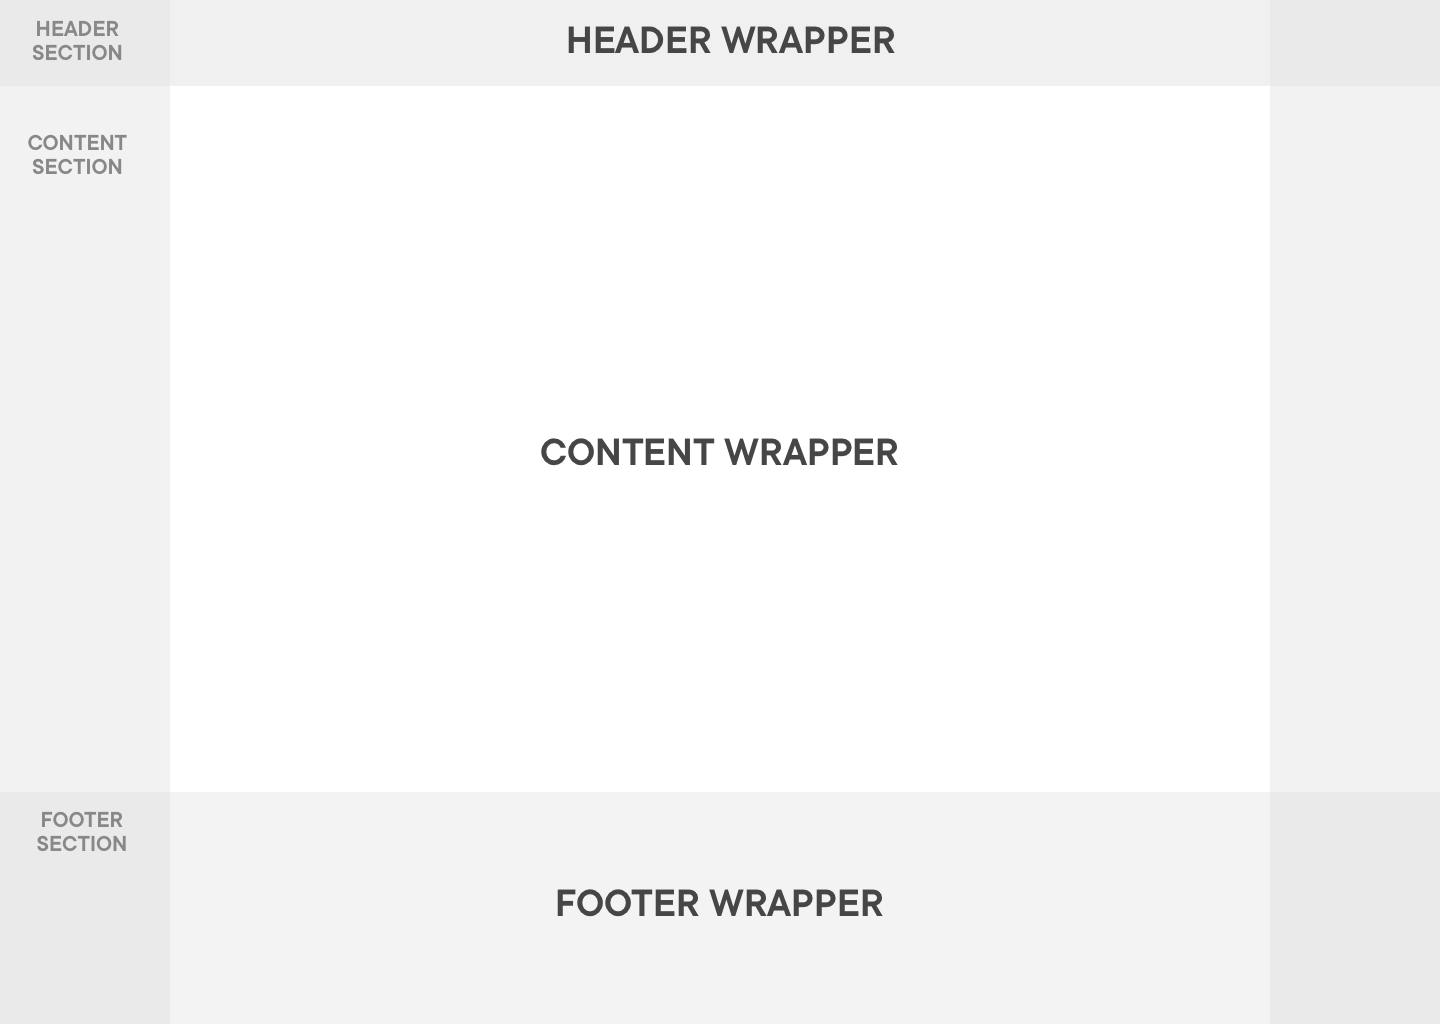
Webpage wrappers
Once I have the page sections set up, I add nested content wrappers. Within each of the main page sections I add various wrappers that will hold groups of page elements, like the navbar, content and footer areas. These wrappers will have position and size associated with them. So each could be 100%, max width 1100px and centred in their respective sections.
You can use Webflow's "" for these blocks however I find it better just to add DIVs as containers are limited to 940px wide. If you use standard DIV blocks you can set the width as you like.
Webpage elements
Once you start delving deeper into the layout, you'll need boxes to represent the areas where your content will finally find a home. Again, the image below isn't completely reflective of the layout design but a hierarchical diagram of the boxes you'll need for your content.
Once you head into styling, you may want to overlap these boxes, have them animate or only show up under certain circumstances. Once you have all the container areas accounted for, you can then start to add meat to your layout design.
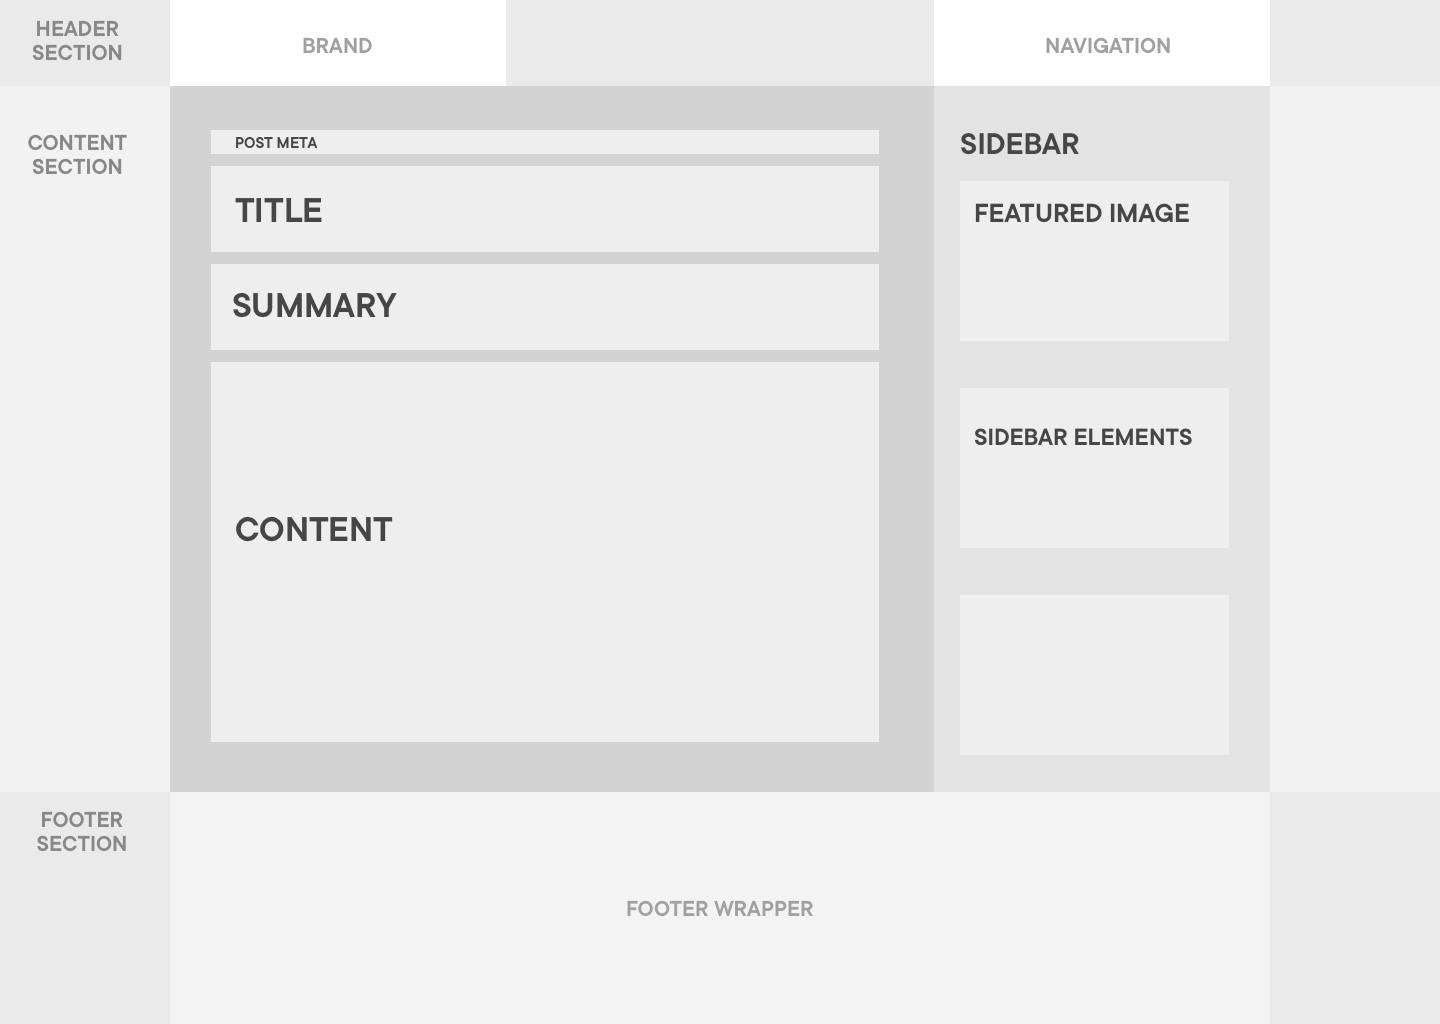
Webpage DIV elements are nested in the wrappers and form the blocks for adding content
I accept that this process is probably more intuitive to experienced developers. For me it's been fundamental in understanding the complex hierarchy in box model layouts. Webflow makes it reasonably easy to make fundamental changes quite far into the layout process so don't worry about losing too much time going back and forth.
In the next post I'll take a deeper look into the box model to see how components are collected together to enable more granular control of elements. I'll also look at how classes and combo classes can be created to enable a consistent design throughout the site.
Want to print your doc?
This is not the way.
This is not the way.

Try clicking the ··· in the right corner or using a keyboard shortcut (
CtrlP
) instead.