Skip to content

Share
Explore

 Designing the new doc header & toolbar
How we changed our interface to give you even more space to make
Over the last few years, we’ve worked to make Coda’s UI cleaner and simpler, following the principle . Now we’re taking that a step further, with a new doc header.
Putting your cover photo first
Our previous doc header put text editing controls front-and-center. These controls are handy for me when I first open up a blank doc and start typing. But when I’m sharing a writeup for feedback, managing a task tracker, or publishing a blog post, I don’t want readers thinking about bold, italics, and undo. Now, the first thing they see is the content of the doc.


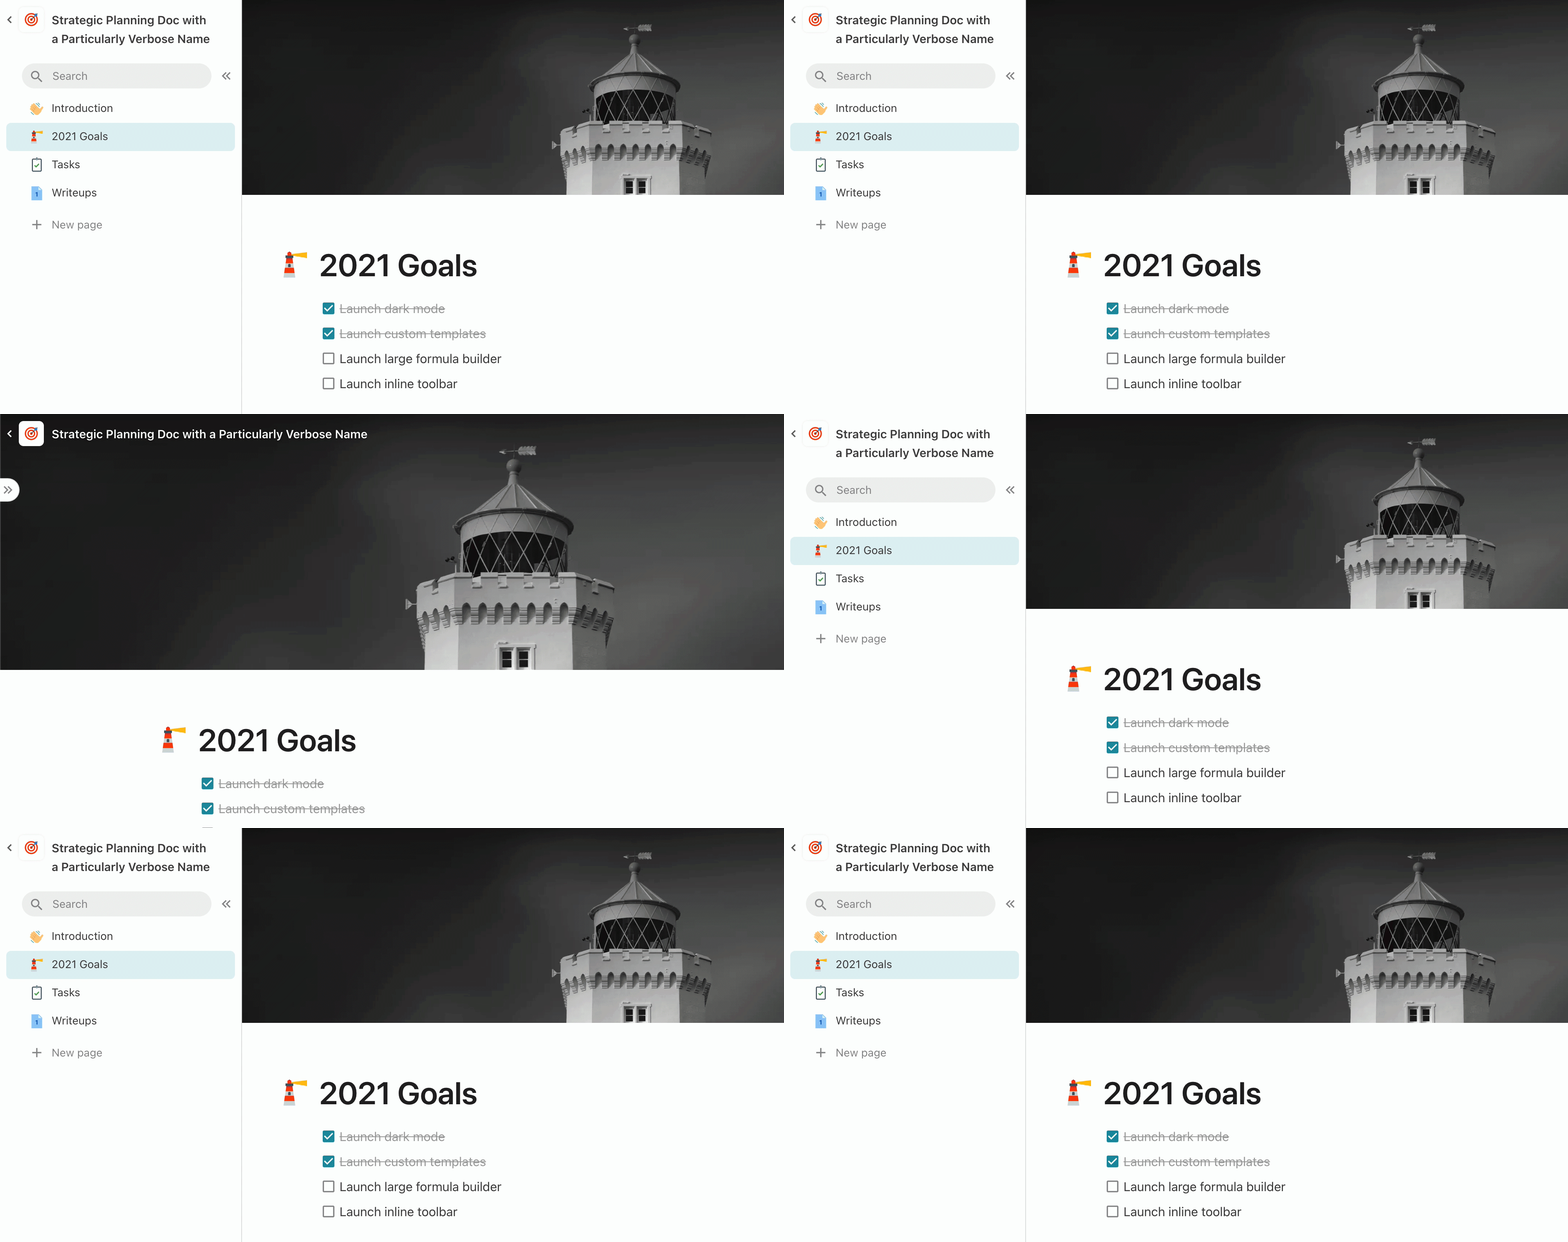
To make the cover photo feel edge-to-edge, we needed to address sidebars. With a long doc name, or lots of collaborators in the doc, UI elements could be partially over the photo and partially over the sidebar. Truncating would be simplest, but you named your doc that way for a reason. So instead, we reconfigured the UI—for the left sidebar, we wrapped the doc name onto multiple lines, and for the right sidebar, we adjust the spacing between controls to keep them from overlapping the edges.


Overlaying text on an image is also a challenge—we know there are a huge variety of header images. If the controls are white, they might be readable on a solid color image or a relatively dark image with no extra treatment. Here’s a sneak peek at my Figma, exploring different overlay effects across different photos—stripes are especially difficult.


We found that a 40% black overlay struck a reasonable balance between preserving the color and feel of the photo and maintaining adequate contrast for controls. Although the overlay is only necessary at the very top, we extended the gradient further onto the photo to make sure it tapers off gradually.


Showing the right controls at the right time
With a contextual toolbar, any time you select text, the formatting controls are close at hand. For simple editing, the inline toolbar works just as you’d expect.
Making the toolbar more contextual presented a few interesting opportunities and challenges. With a static toolbar, all the controls are visible at once, and some are grayed out when they are disabled. But since the toolbar itself now appears and disappears, we can show just the most relevant controls and hide the others. For example, when you’re in a list item, you see indent/de-dent icons, and in a heading, you see text alignment.


However, there are some tricky cases, where you want the toolbar, but might find it in the way. One example is with a single cell in a table selected—you’re probably navigating, so always showing the toolbar would be disruptive. But we also wanted to make sure you could quickly format that cell, even if you don’t remember all those keyboard shortcuts.
Now, no matter where you are or what you have selected, you can always tap ⌘ on a Mac or Ctrl on Windows to show or hide the toolbar. (And if you forget, you can right-click on the cell and select Format > Text formatting).


Beyond the header
The static toolbar addressed some scenarios that a contextual toolbar doesn’t. For example, undo and redo aren’t related to what you have selected, so we’ve tucked those into the doc menu.
Another example is creating a heading. Keyboard shortcut aficionados might already know about markdown or our /slash commands. For those who use their mouse, we updated the three-dot menu next to every line, so you can still easily switch between any paragraph style without selecting text first.


· · ·
We hope this new header helps you make docs that look the best they possibly can, and the new toolbar makes it even more convenient to format text. Let us know what you think—if you have ideas for making great Coda docs even easier to create, we’d love to hear from you in the . As always, we can’t wait to see what you make with Coda.
Want to print your doc?
This is not the way.
This is not the way.

Try clicking the ··· in the right corner or using a keyboard shortcut (
CtrlP
) instead.