


17 min read
Coda for Enterprise: A guide for admins.
Unlock enhanced customizability for administration, security, provisioning, and beyond.

You'll get...
- How to provision users in your workspace
- How to manage workspace and sharing settings

You'll use...
- Organization settings
- Workspace settings
- Admin API
1. Understanding Admin types on Enterprise
Coda offers two types of admin roles for our customers: Workspace admins—also known as Doc Maker (admin)—and org admins. Workspace admins are available across all tiers, and they're responsible for managing users/roles in the workspace, AI usage, and billing. They can be business owners or IT admins, and would need to be Doc Makers. Org admin is short for organization admin. To understand what an org admin is, it’s helpful to first know what an “organization” is within Coda. You can think of an organization as the top of the hierarchy for Enterprise customers. Within the organization, we have workspaces, within workspaces we have folders, within folders we have docs, and so on. An organization is an Enterprise-only feature, and org admins have control over all workspaces within their organization. Org admins are typically IT admins/ chief information security officers (CISO) who are responsible for managing the overall security and compliance of an organization's use of SaaS tools. They can set security policies to govern how users can authenticate with Coda, how docs can be shared, how Packs can be used, and more.Below is a quick overview of what workspace and org admins can do. Tip: For more details on what workspace and org admins are, read our help article here.
Accessing org settings
To access organization settings, navigate to coda.io/docs. In the bottom left corner, click on More options. Then select Organization settings. The policies set in org settings will apply to all workspaces within the organization.Set up authentication and SSO
As an Enterprise org admin, you can manage how members of your organization authenticate and log in to Coda. This is the first step in deploying Coda across your organization, and allows you to have a greater degree of control and security over your Coda org.

Sign-in Option Note
Once you’ve enabled SSO or specific sign-in option, all users from your owned domain will be required to authenticate using that sign-in option, and everyone else will need to be explicitly invited to the workspace. You can see your owned domains under Organization settings > Domain and Access.
2. User provisioning
As an org admin, you can provision and de-provision users and groups in Coda programmatically from your identity management provider using SCIM. This means that when a new user is added to or removed from the identity provider, they can be automatically provisioned or de-provisioned in Coda. Learn more about how to provision users here. Note: You only pay for Doc Makers on Coda. Editors are free. If you have user groups configured in your identity provider, you can also sync user groups to Coda via SCIM for easy policy configuration and seamless sharing of docs or folders among org members. Learn how to push SCIM groups to Coda. If your organization uses Google Groups, you can go to Organization settings > Groups, and enable Allow sharing with Google Groups. Doing so will allow org members to use their OAuth credentials to sync and share docs or folders with Google Groups.Assign roles and manage members
Once you’ve configured authentication methods and set up provisioning, you can now manage members and their roles on Coda. We have three types of roles:- Doc Maker
- Doc Maker (Admin)
- Editor

Note on moving Makers to Editors
Downgrading a Doc Maker to an Editor will cause the docs they created to become read-only. They will have to request Doc Maker access for their docs to become editable again - or transfer ownership of their docs to another Doc Maker in the workspace.
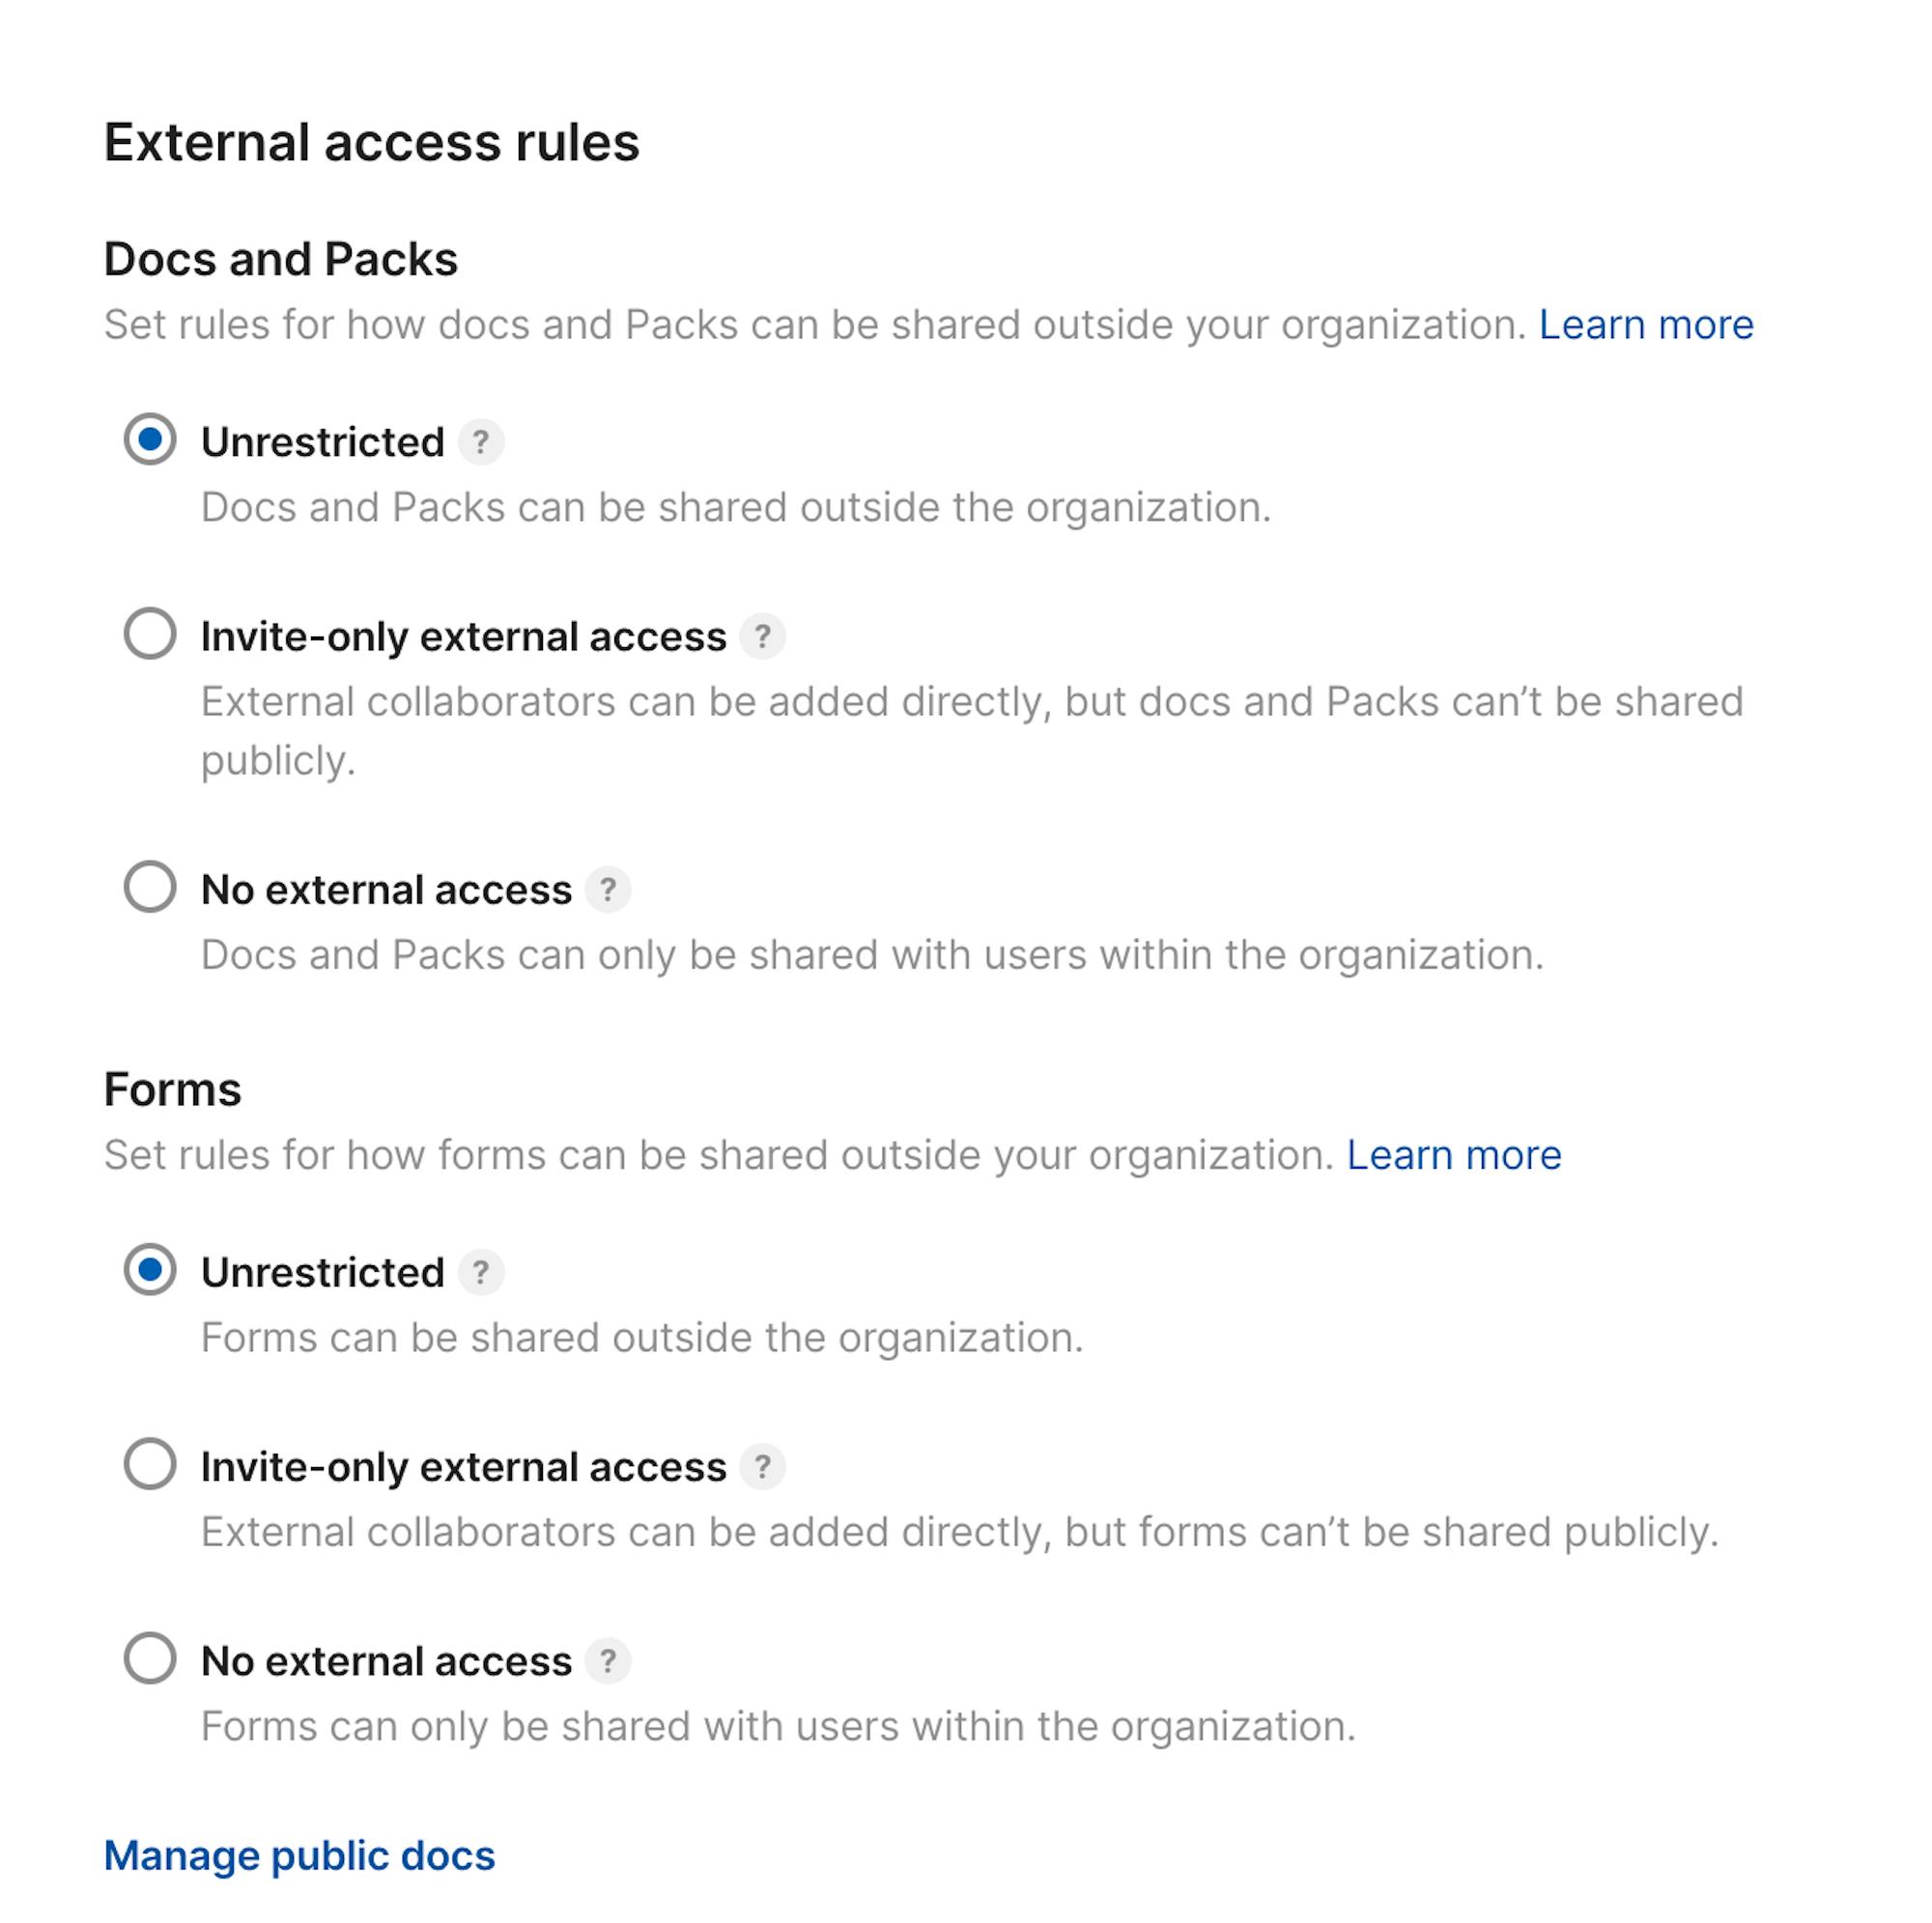
3. Set sharing policies and manage docs
To start, jump back to Organization settings > Domains and Access. Disable the option to Allow new workspaces if you want all org members to create docs and collaborate within a single workspace, providing full administrative oversight.If you expect your organization to require separate workspace for different teams, for billing or privacy reasons, you can enable Allow new workspaces. Here, you can also configure External access rules for policies on sharing docs, forms, and Packs outside your organization.
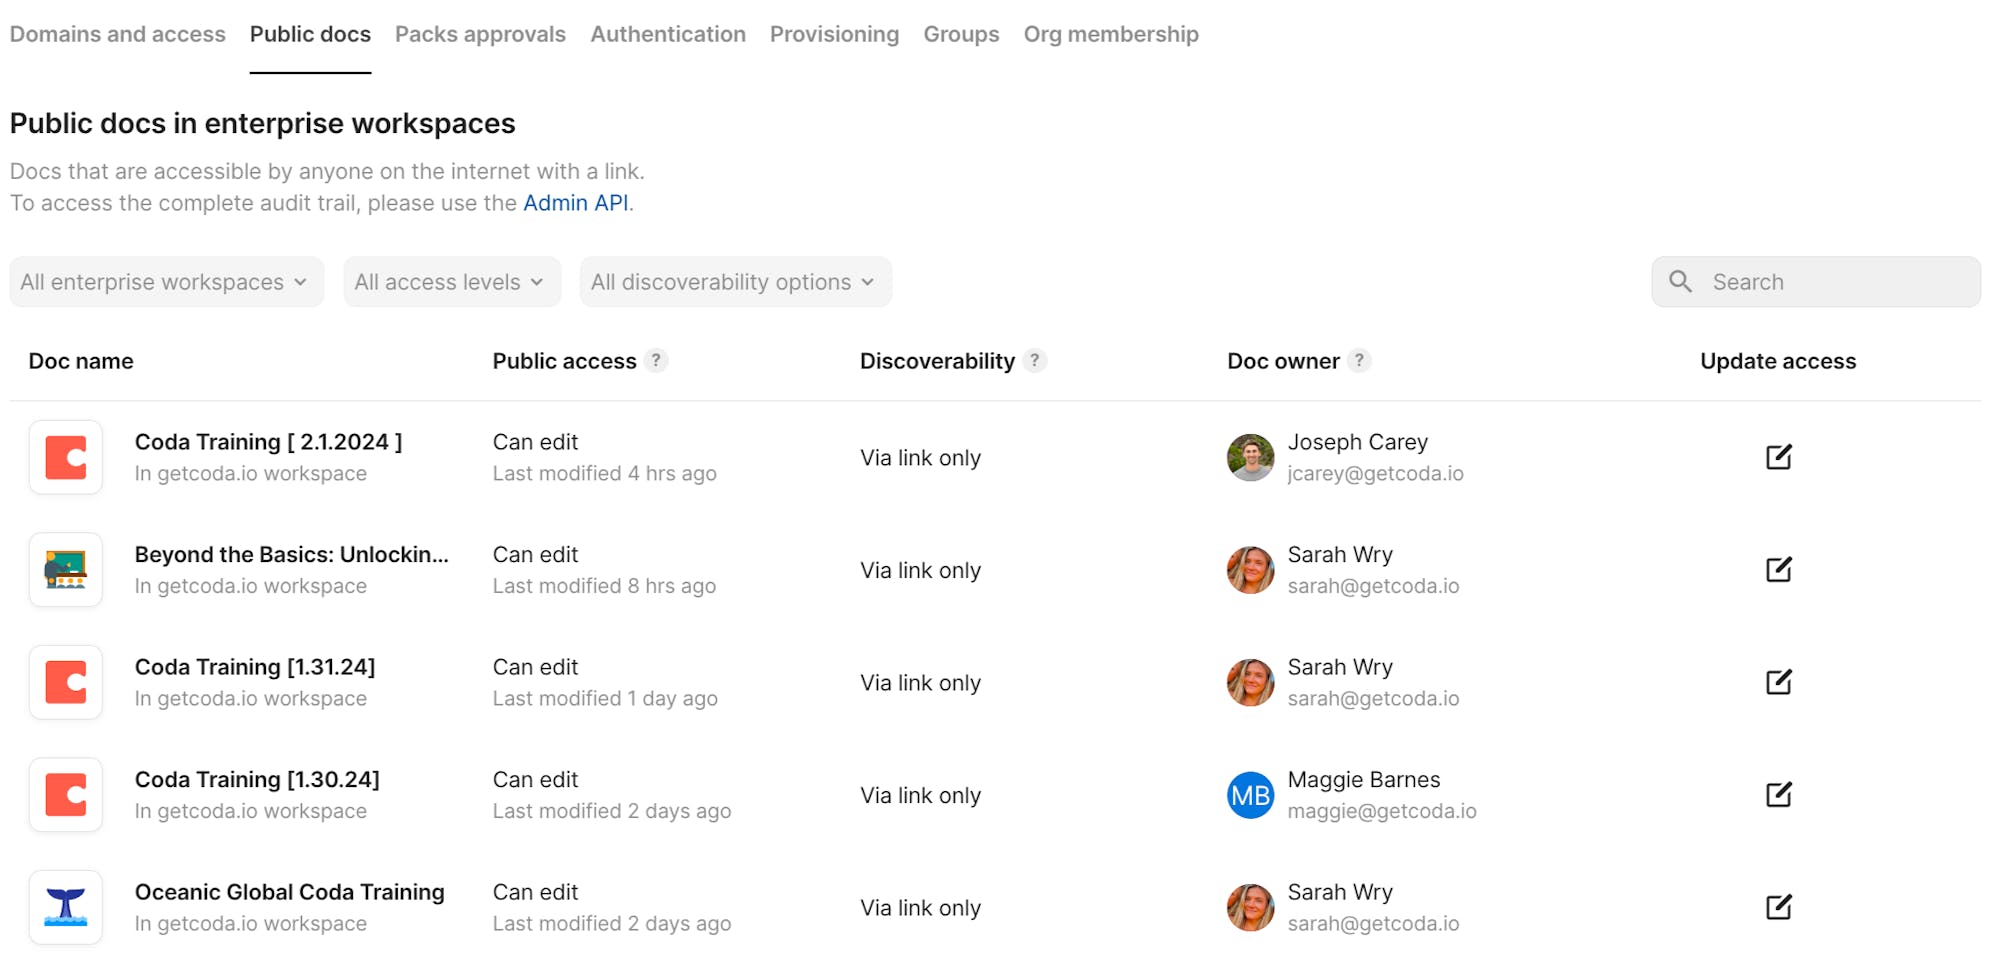
Admin privileges
If you are the central IT / CISO team responsible for managing Coda, and want to have admin privileges to access any doc (including the ones that aren’t shared directly with you) from the org docs dashboard, please contact us.
Optional custom Enterprise policies
Coda offers many other custom policies/settings Coda offers many other custom policies / settings on our Enterprise plan, such as the following:- The inbound sharing policy allows you to configure whether your employees can access docs owned by external organizations.
- The publishing policy allows you to configure whether your employees can publish docs on Coda.
- The shared folder creation policy allows you to configure whether your employees can create shared folders, which make docs accessible to all workspace users.
- The data export policy allows you to control whether your employees can export docs.
- The file uploads policy allows you to configure whether your employees can upload files (such as PDFs, CSVs, and JPGs) into Coda docs.
- Session duration allows you to set a limit on the duration of your employees’ sessions.
contact us
or reach out to your Customer Success Manager.4. Deactivating users and doc transfers
If you have SCIM enabled, users provisioned via SCIM will be automatically deactivated from Coda when they’re deactivated in your Identity management provider. When a Doc Maker is deactivated, their docs immediately become read-only and cannot be used for collaboration by other members of your organization. As an org admin, you can easily manage deactivated users and transfer their docs to new owners from Organization settings > Org membership and clicking on the Manage organization members button. Go to the deactivated users tab and transfer all their docs to a new owner.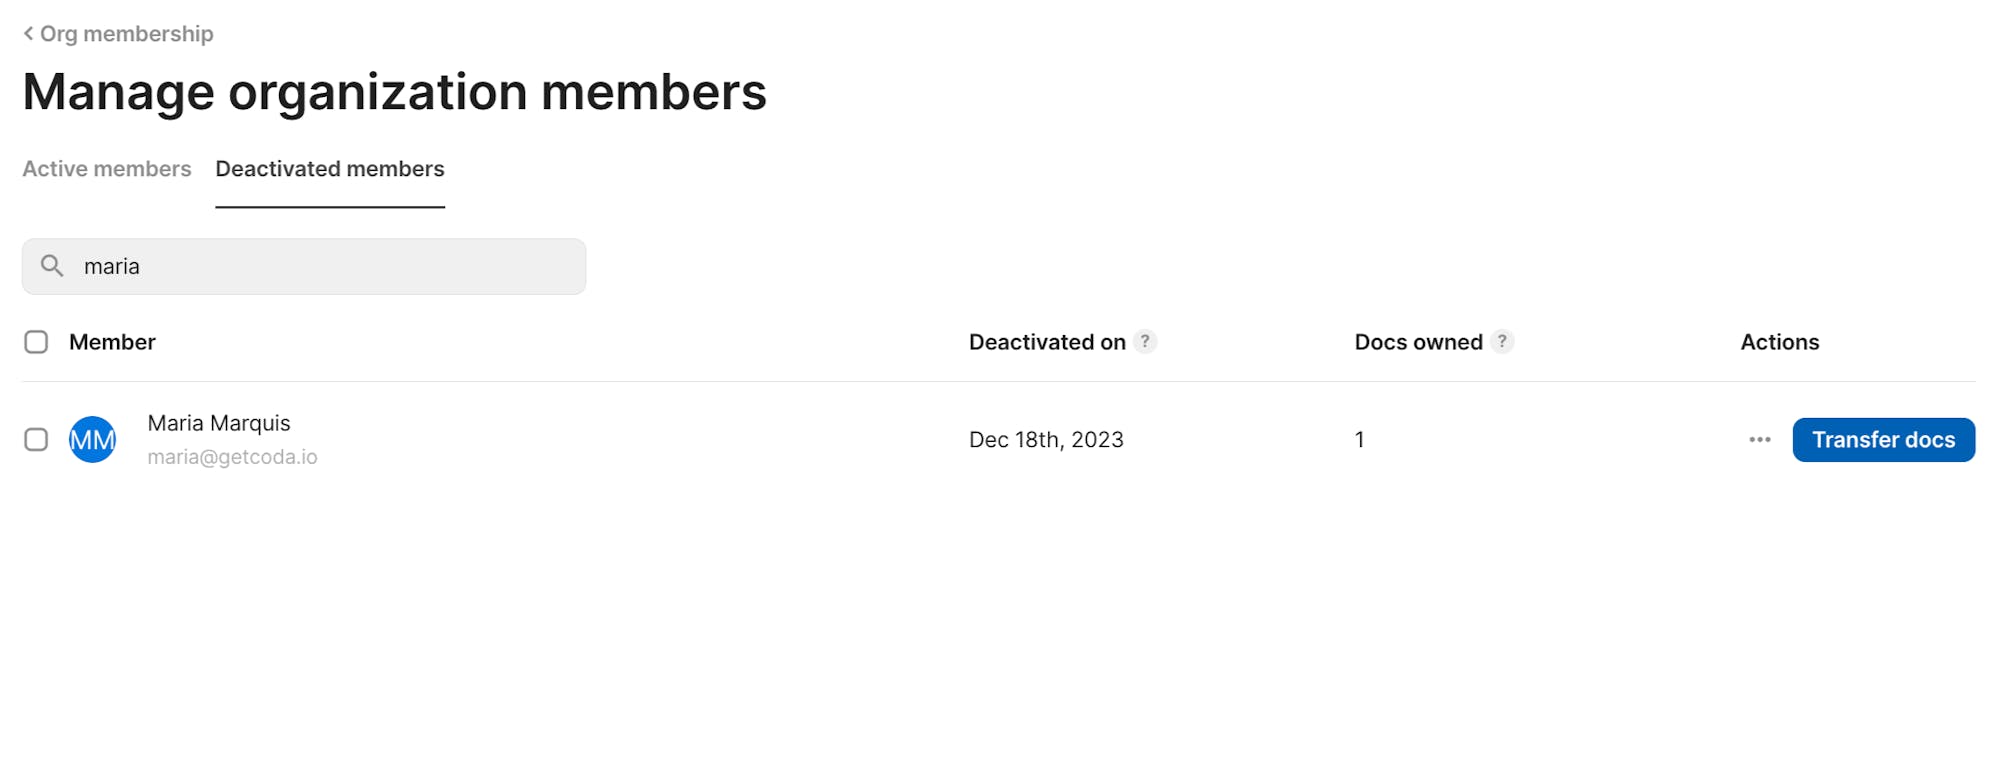

Remove non-organization members from workspaces
Some users may be invited to your workspace but may not belong to your organization. These users will not appear in the org members list on in the deactivated members list. To permanently remove a workspace member that isn’t part of your organization, you should remove and off-board them manually from Workspace settings. Learn more about offboarding members here.
5. Access management
Manage access to Packs
Packs are powerful building blocks that connect Coda docs to the SaaS apps you use everyday, like Jira, Salesforce or Asana, and often require additional authentication. Read more about the security of Packs here. To have additional control over who can use specific Packs, enable admin approval for Pack usage in Organization settings > Packs approvals. You can then review each user’s request to use a Pack and approve or deny access based on your organization’s policies. Learn more about Packs approvals and management here. If your organization has bespoke security requirements, or if you want to pre-configure Pack access to specific users/groups, you can create custom configurations for Packs using JSON configs, offering advanced control similar to AWS’ IAM configs for maximum flexibility. You can create JSON configs to restrict who can access Packs, what functionality of the Pack (OAuth scopes, buttons, etc.) can be accessed and even configure DLP-like policies to control how docs containing data from specific sensitive Packs are shared within Coda.Manage access to Coda AI
Every Doc Maker in your workspace is given a large number of AI credits that can help them save time and work smarter. To view and manage AI usage across your workspace, navigate to coda.io/docs, click on your workspace name in the left panel, and select Workspace settings. From there, select the Coda AI tab. Here, you can view AI usage by Doc Maker and by doc.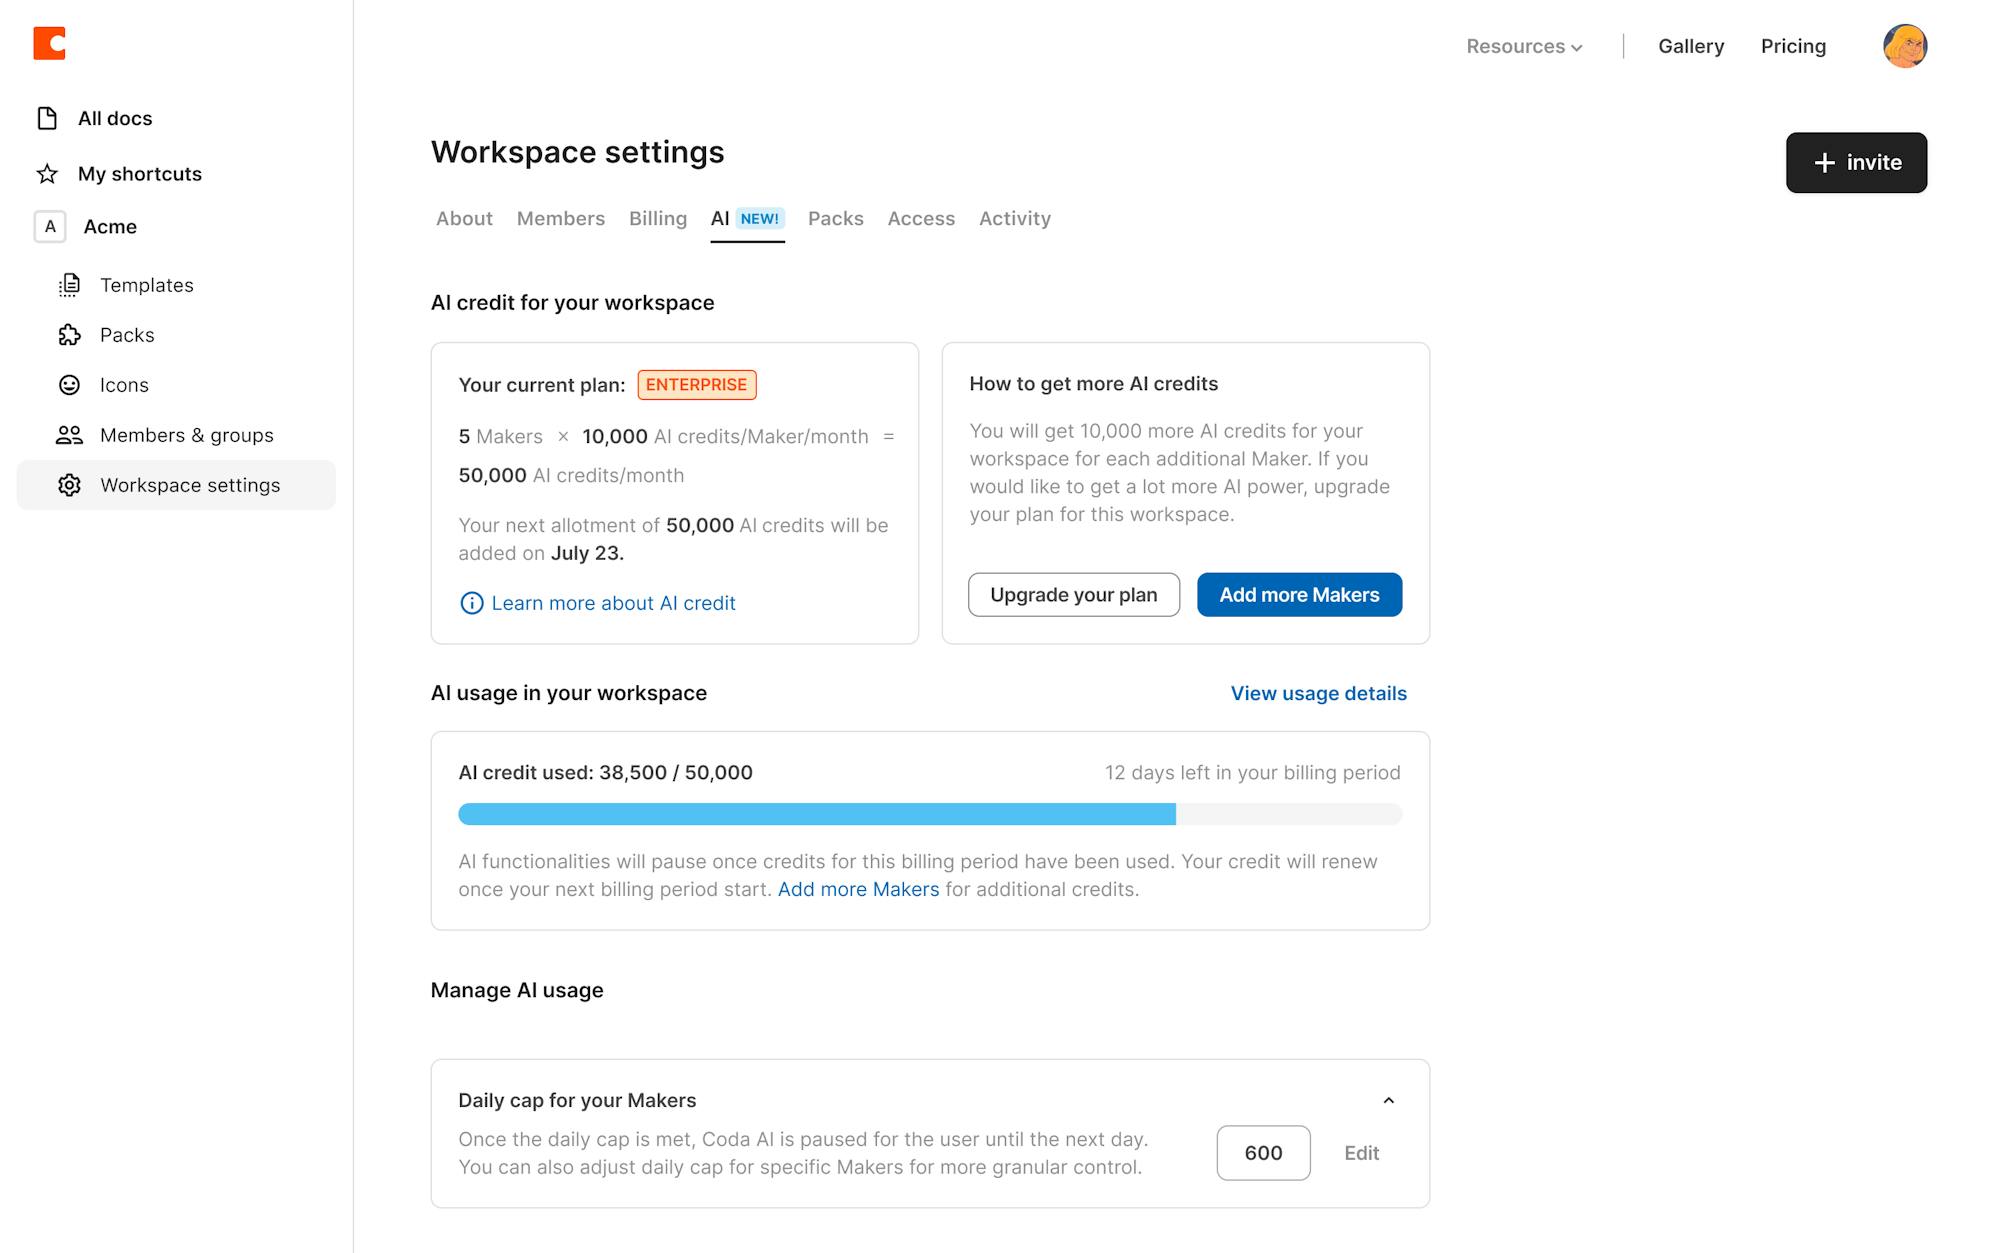
6. Admin Pack and API
Lastly, Enterprise org admins can use the Coda Admin API to have programmatic access to administrative reports and capabilities within Coda.
Audit events
An application of the Admin API is to audit user activities performed within your organization. You can gain insight into the following:- Docs have been created or shared
- Packs have been added or requested
- Users have interacted with Coda
- Workspace changes were made
- Folders were created or updated
- Role changes occurred
- and more!
DLP and e-discovery integration
You can also use the Admin API to integrate with a DLP or e-discovery tool your company may use. You can export the whole doc into PDF, HTML, or markdown. Or, use the page API to get text based output suitable for a search index.Coda Admin Pack
Coda also provides Enterprise org admins with an Admin Pack that acts like a UI layer to the Admin API, and gives admins realtime information on users, docs, folders, Packs, and activity in your organization. The Pack allows you to view all of this info and make changes - right from a Coda doc. Learn more about when to use the Admin Pack.Now what?
Check out our Ultimate Coda Handbook for IT Teams for more information about how IT teams use Coda. Want to learn more about what you can do with a Coda Enterprise plan? Browse some tips here: https://coda.io/@success. There are also plenty of other guides and resources throughout coda.io/resources.Was this helpful?
YesNo