Skip to content
Copy of Getting Started Guide: Coda API
Share
Explore
Guides 2

icon picker
Start Here

(also known as "Hello World from Space")
In this guide, we'll give you a quick tour of our API and teach you how to read and write to Coda tables programatically. You'll fill a Coda table with satellite images for your favorite places accessed through the .
As a reminder, when using the Coda API, the single most important resource you'll want to get familiar with is the . We recommend you have it open in a separate tab while working through this guide.

What you'll learn

Working with the Coda API in Google Apps Script
Using the API
How to access docs, tables and columns
How to create a doc
How to read from and write to a Coda table

Instructions

1. Set up your dev environment

We'll use for writing and hosting the code. Head over to and create a new script, calling it something like "Coda Starter Demo".
Next, go into Resources → Libraries... and add the latest version of the CodaAPI library via its library ID: 15IQuWOk8MqT50FDWomh57UqWGH23gjsWVWYFms3ton6L-UHmefYHS9Vl.
(We'll release updated versions of the library as we update or expand on our API. Use the drop down menu in the libraries config panel to update the version and use the latest features.)

Add the following headers into your script. As you progress through the guide, you'll add code into each of these sections.
// Setup and global variables

// Functions
To execute the script, hit the Run button (▶). As you add more functions, you can use the drop down menu to specify which function to run.

2. Generate an API Key for your Coda account

To connect with the API, head over to and create a new API key. Your API key allow code to access docs that you have access to so be sure to keep it safe. Copy the key to your clipboard.

3. Test your connection with the API

Let's write some simple code to test out the API:
// Setup and global variables

CodaAPI.authenticate('abcd1234-efgh-5678-ijkl-1234mnop5678'); // Replace with your token.


// Functions

function starterDemo() {
var me = CodaAPI.whoami();
Logger.log('Hello World! This code is running on behalf of %s', me.name);
}
Hit the Run button (▶) to execute the script. The first time you run it, you'll get prompted to grant your script access to the Internet (you may need to Run again after). After that, head into View → Logs to see the output:
Congrats! You've written your first Coda integration.

4. Create a new doc

Now, let's create a Coda doc to house our table of satellite images. You could create a doc manually from the /docs page but what's the fun in that? Let's use a Google Apps Script function to create a new doc.
ⓘ Going forward, we'll hide the solution so that you can take a stab at it yourself first, but you can reveal it by hitting the checkbox.
Show Solution
// Functions

// prettyPrint will be used throughout to make the API's output more readable.
function prettyPrint(value) {
return JSON.stringify(value, null, 2);
}

function createStarterDoc() {
// TODO(Anonymous): implement.
}
Now run the createStarterDoc() function. You can check the logs for more details, and your new doc should appear in :
Open that doc and add a simple table for our dashboard. Don't forget to configure the column type of the "Image URL" column.
What's the goal? Well, we'll want to query the Earth Imagery API and insert or update ("upsert") a row for each of the cities we're interested in.

5. Accessing the doc with the API

Externally, every Coda object, whether it's a doc, a table, or a column in a table, has a name. This name can change at any time, so internally, every object also has an ID. For instance, a table ID might look like this: grid-VfGrBHjKOv .
To access the doc, you'll have to get its ID. The easiest way is to copy the URL to your new doc and then paste it into the in the API reference. You can also use the API to list your docs and find the ID of the one you just created.
Now that you have the ID, we'll want to find the IDs of the new table you added as well as the City and Image URL columns.
ⓘ With the exception of the doc ID, the Coda API accepts names in addition to IDs. However, we recommend using IDs so that your integration won't break if you (or someone else) renames the item you're working with.
Show solution?
// Setup and global variables

DOC_ID = 'TO UPDATE'; // Replace with your new doc's ID.
TABLE_ID = 'TO UPDATE'; // Fill this in after running printDocTables() below


// Functions

function printDocTables() {
// TODO(Anonymous): implement.
}

You should see something like this:
Copy the corresponding "id" of your "Satellite Images" table into TABLE_ID . Now let's write a printSatelliteColumns() function to get the table's column IDs. Once you've done that, go ahead and fill in the "id" for CITY_COLUMN_ID and IMAGE_URL_COLUMN_ID.
Show solution?
// Setup and global variables

CITY_COLUMN_ID = 'TO UPDATE'; // Fill these out.
IMAGE_URL_COLUMN_ID = 'TO UPDATE';


// Functions

function printSatelliteColumns() {
var columns = CodaAPI.listColumns(DOC_ID, TABLE_ID); Logger.log('Columns are: %s', prettyPrint(columns, null, 2));
}

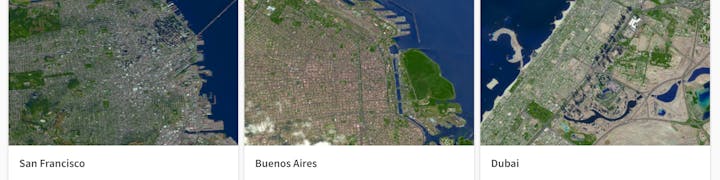
6. Getting the Satellite images

Working with is straightforward but we'll need to provide the latitude and longitude coordinates as query parameters.
In the code snippet below, we'll use the from Google Maps to convert city name to an approximate latitude and longitude. Then we can use these to query the to get the satellite image.
To help you get started, we've written two functions for you:
getCityLocation(city) returns a location object containing the coordinates for a specified location
getSatelliteImageUrl(city) uses the above to return an image URL for a specified location

// Functions

function getCityLocation(city) {
var geocoderResponse = Maps.newGeocoder().geocode(city);
return geocoderResponse.results[0].geometry.location;
}

function getSatelliteImageUrl(city) {
var location = getCityLocation(city);
var cityLat = location.lat;
var cityLong = location.lng;
var nasaUrl = 'https://api.nasa.gov/planetary/earth/assets/?api_key=DEMO_KEY&dim=0.1' +
"&lat=" + cityLat +
"&lon=" + cityLong;

var nasaResponse = JSON.parse(UrlFetchApp.fetch(nasaUrl));
return nasaResponse.url;
}

/** Run me to see the latest pic of Paris! */
function printImageUrlTest() {
var imgUrl = getSatelliteImageUrl('Paris');
Logger.log(imgUrl);
}

7. Fetching cities of interest

We've figured out how to pull a satellite image for a specific city, and have our getSatelliteImageUrl() function at our disposal. Now let's query the Coda API to list all the cities we want to fetch satellite images for.
ⓘ The API endpoint may be useful here. The CodaAPI library returns the same responses as documented in the reference.
Show solution?
// Functions

function getDesiredCities() {
// TODO(Anonymous): implement.
}
If all went well, you'll see something like this:

8. Putting it all together

At this point, we can choose to use to use one of two API endpoints to write the image url to Coda: the , or the . In this particular case, we want to update all the rows in the table with the images we fetched, and presumably all the cities are unique, so we can just go with the latter endpoint.
ⓘ Of particular interest is the keyColumns parameter, which will let us specify that we want to update rows based on the CITY_COLUMN_ID column, instead of always creating a new one.
Show solution?
function addImages() {
// TODO(Anonymous): implement.
}

If you did everything right and hit the Run button (▶), you should see some beautiful satellite images in your Coda doc! (Bonus: Switch to card view to make it prettier)

9. Conclusion

In this example, we learned how to set up a new Coda API token and use the Coda API library for Google Apps Script to read from and write to a Coda doc. If you've gotten this far, you're well on your way to becoming a Coda master and taking maximum advantage of its breadth of possibilities.

☑️ Mark the "Start Here" guide as complete!

No results from filter
Want to print your doc?
This is not the way.
Try clicking the ⋯ next to your doc name or using a keyboard shortcut (
CtrlP
) instead.