Character design
Share
Explore

Anatomy

Simplified shapes

The easiest way to start is with a stick figure, anybody can draw one and it also means they can draw a full body.

Most people find it easier to start by simplify the body into shapes without necessarily knowing the actual muscles and bones that compose the body.
There are many ways of organizing these shapes, here are some examples:
Screenshot_3.png
The important thing to know about these is that when muscles contract they change shape and bones can start poking under the skin, creating different bumps depending on the body’s position.
We don’t need to learn about each muscle’s name and place to know how to draw people in different poses, just knowing the muscle groups and the shape they take can do. Knowing how to draw a skeleton however is pretty helpful, and much easier than knowing about every muscle.
❗ In my opinion, sculpting is THE BEST way to learn anatomy, whether you’re learning simplified shapes, the skeleton, or the muscles. So open Zbrush or any other sculpting app and do your best with tutorials and references.
Be mindful to the differences in shapes and proportions between the male and female bodies.

Some tutorials & series covering the basics of figure drawing:
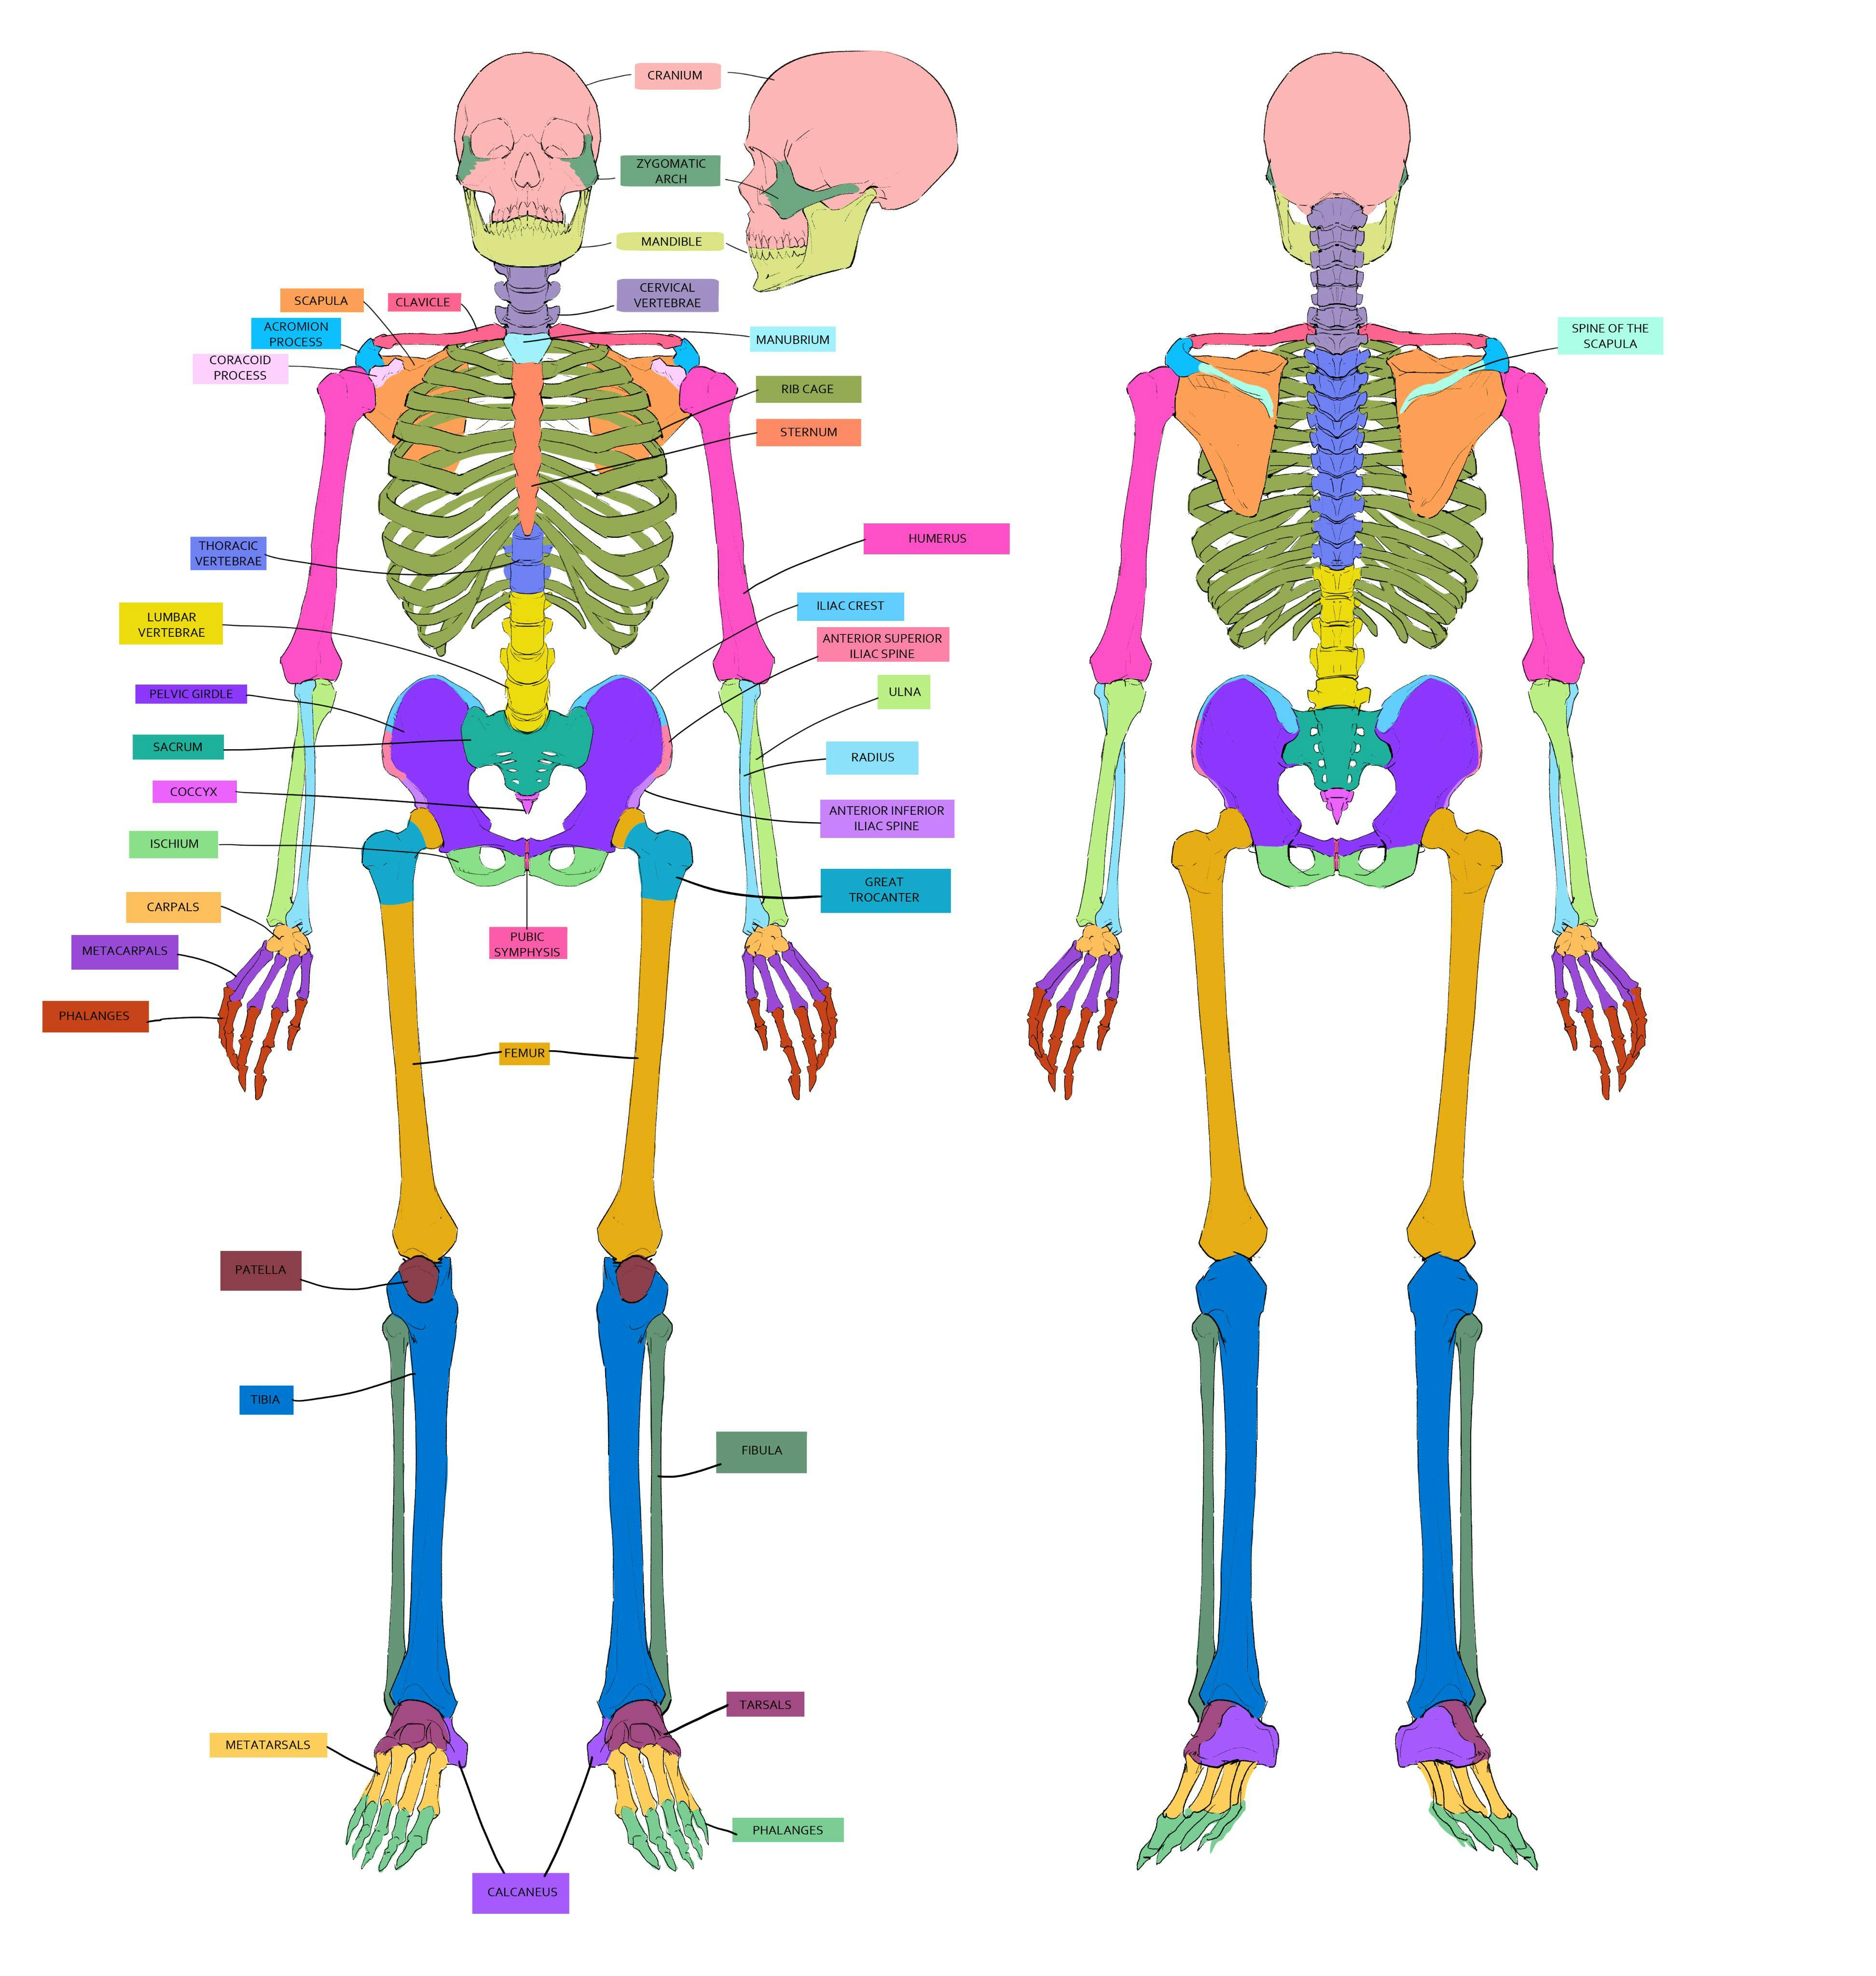
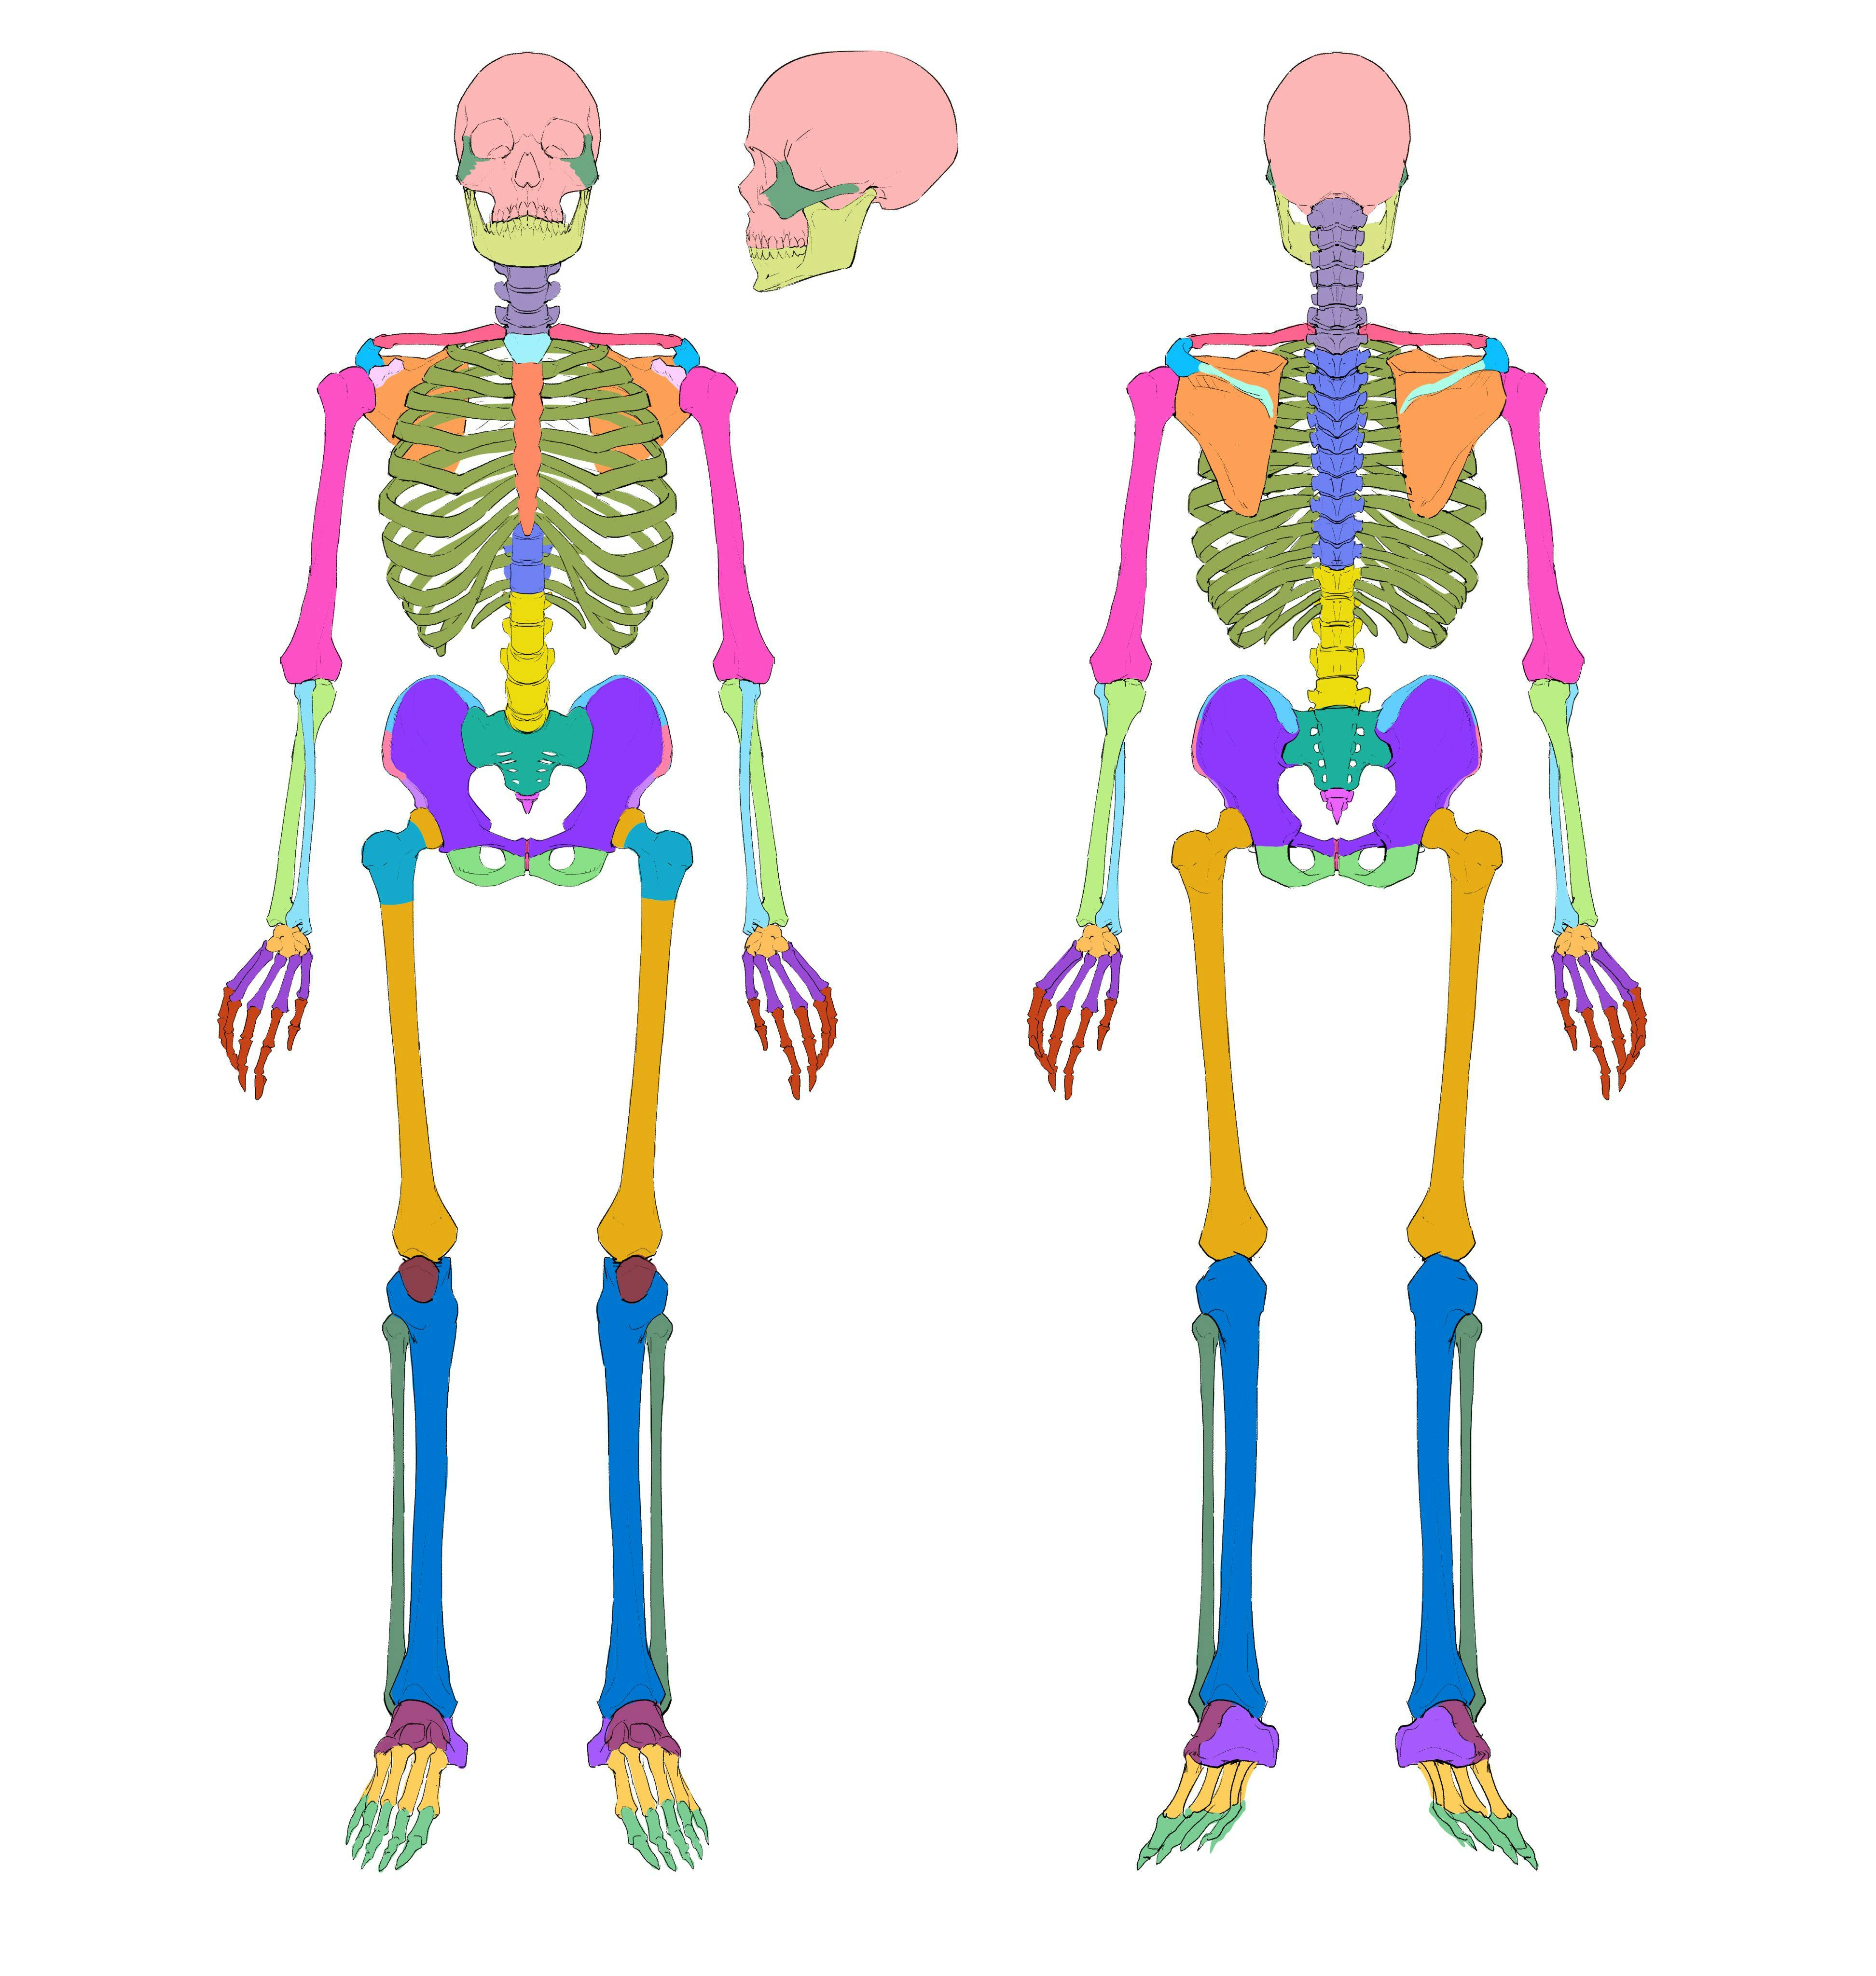
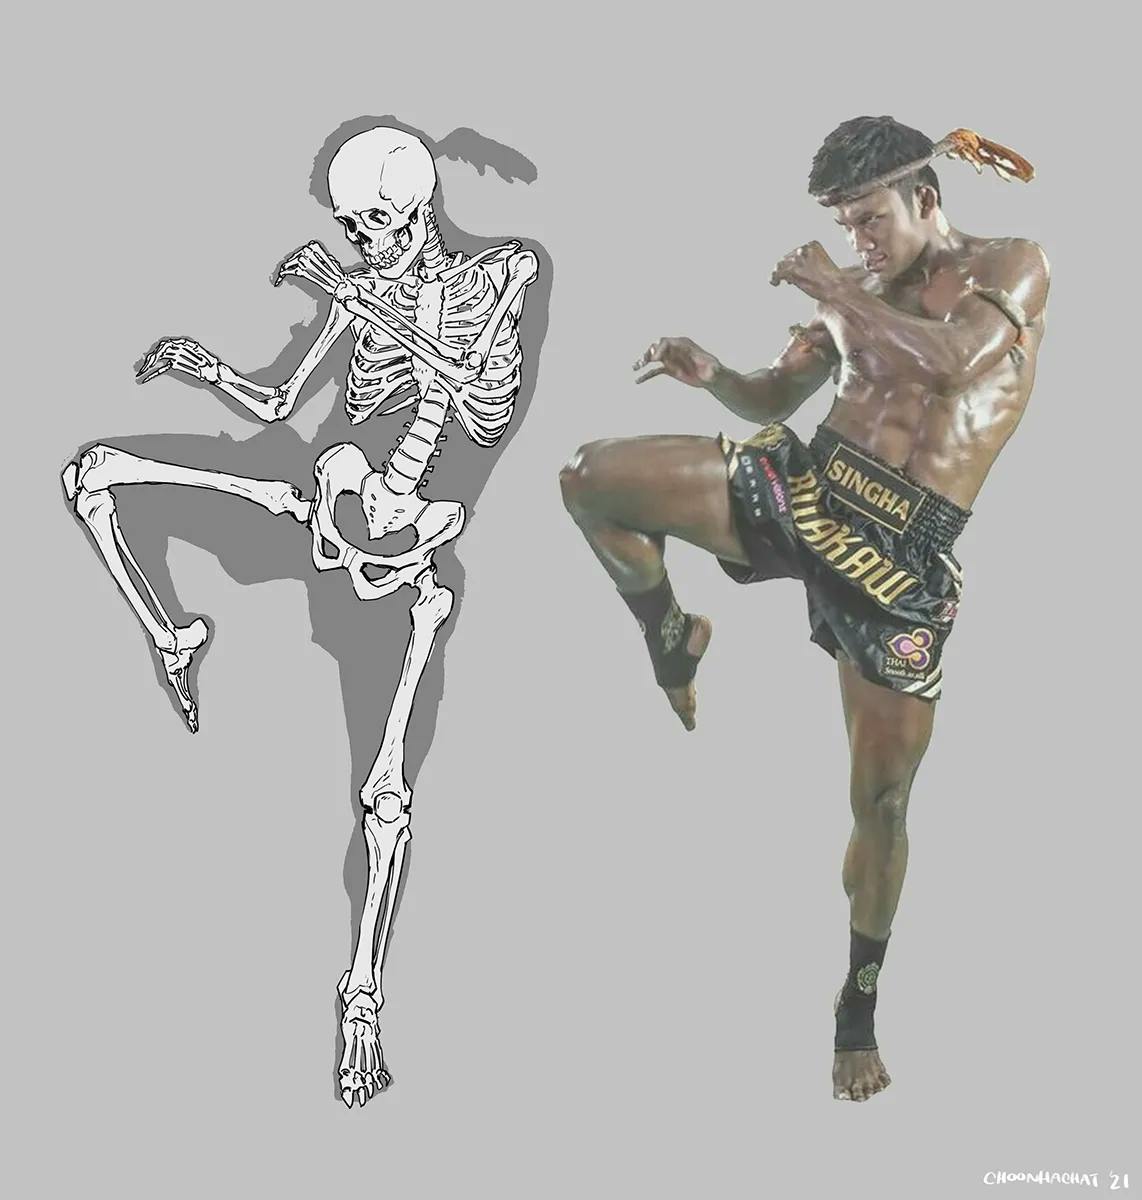
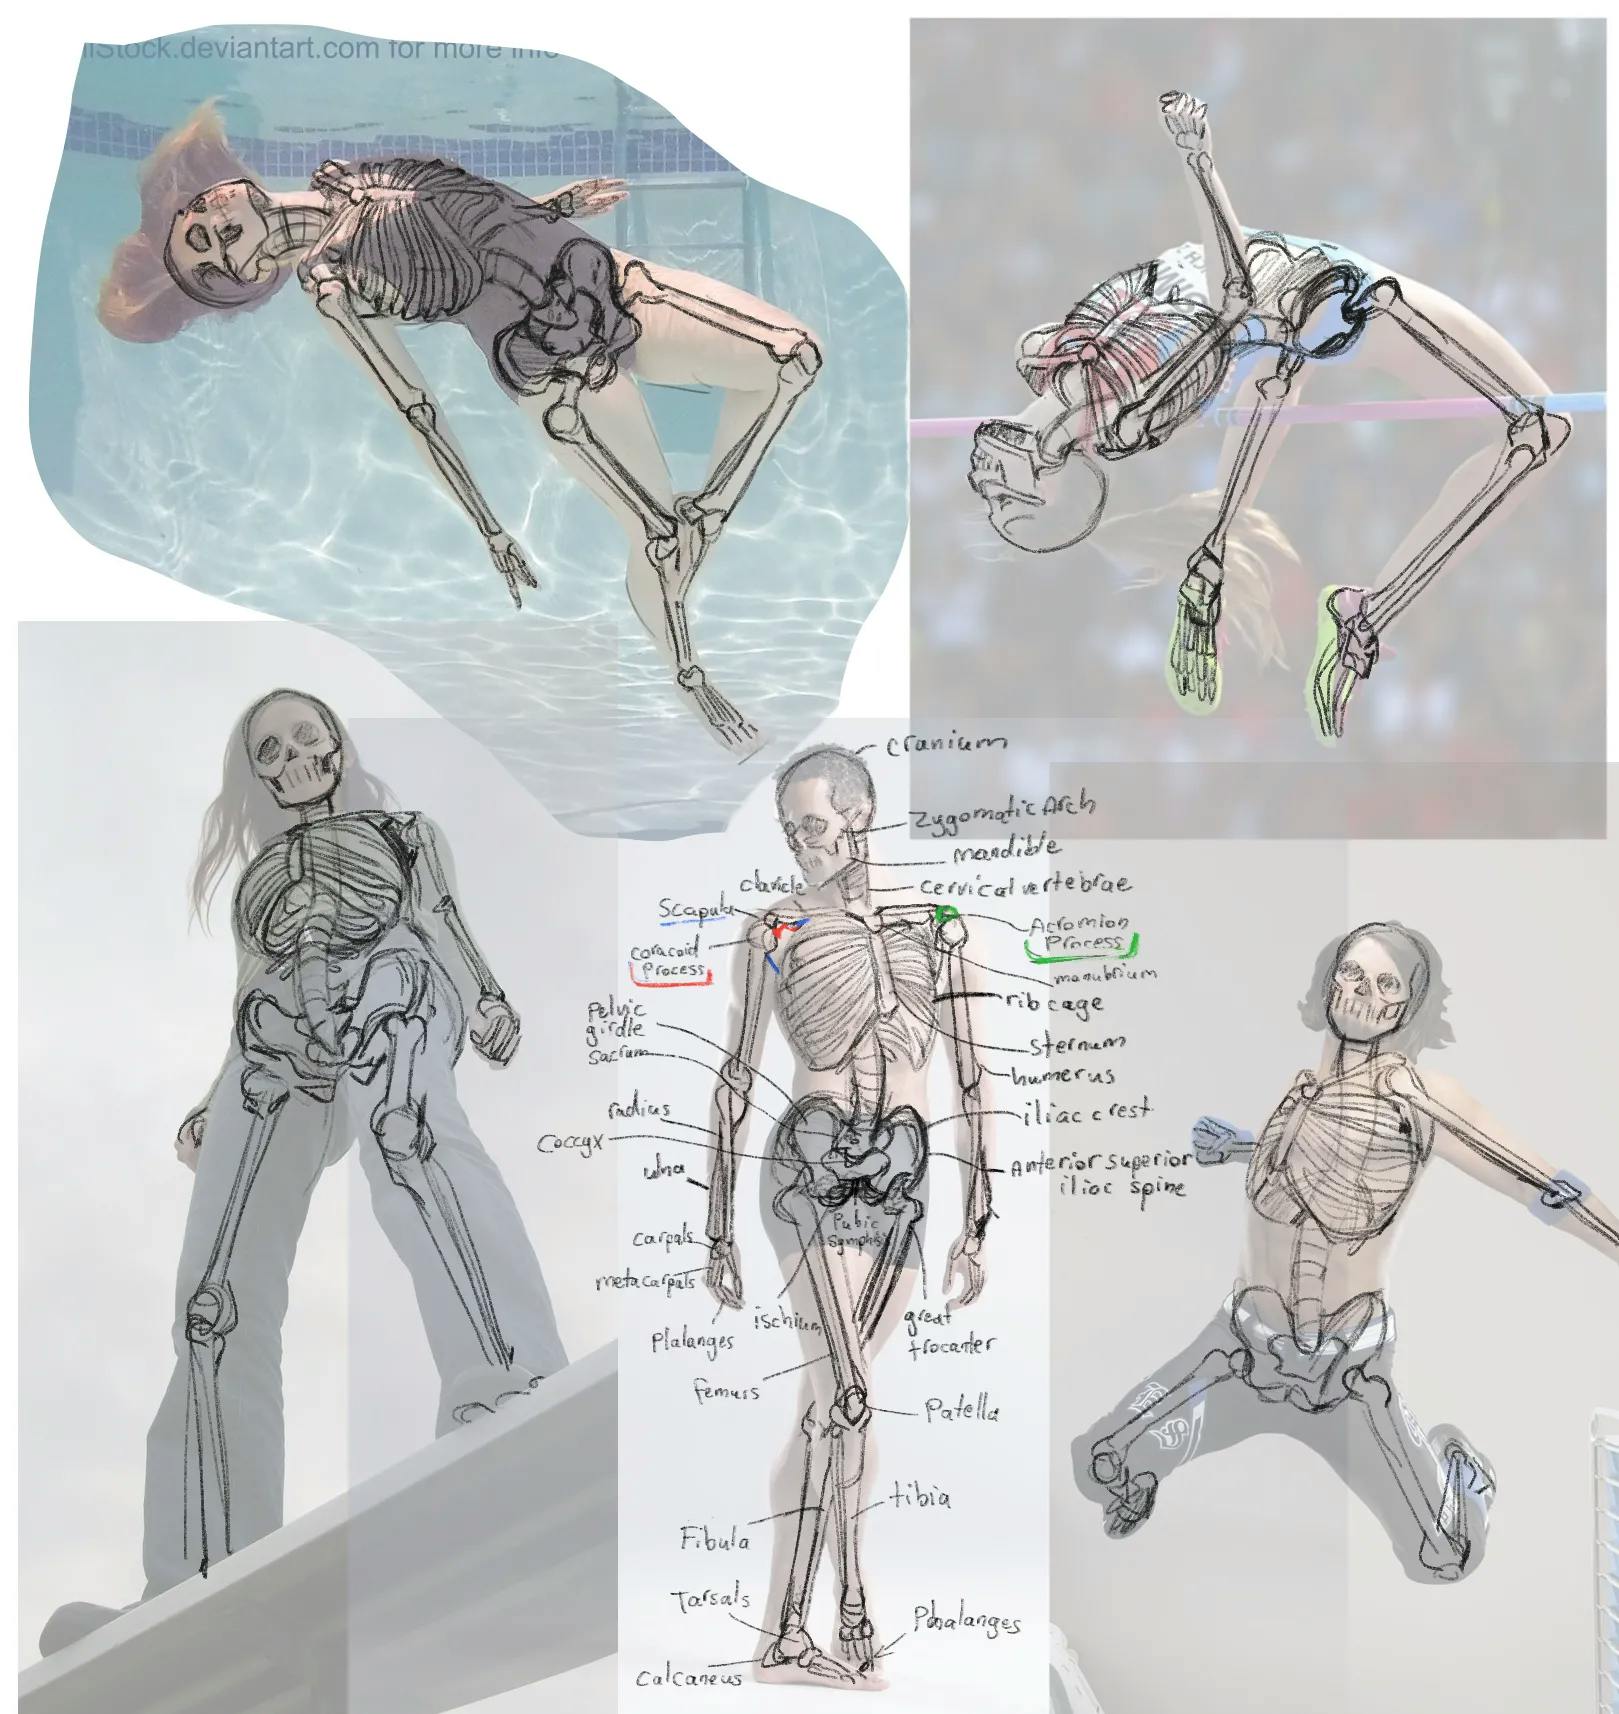
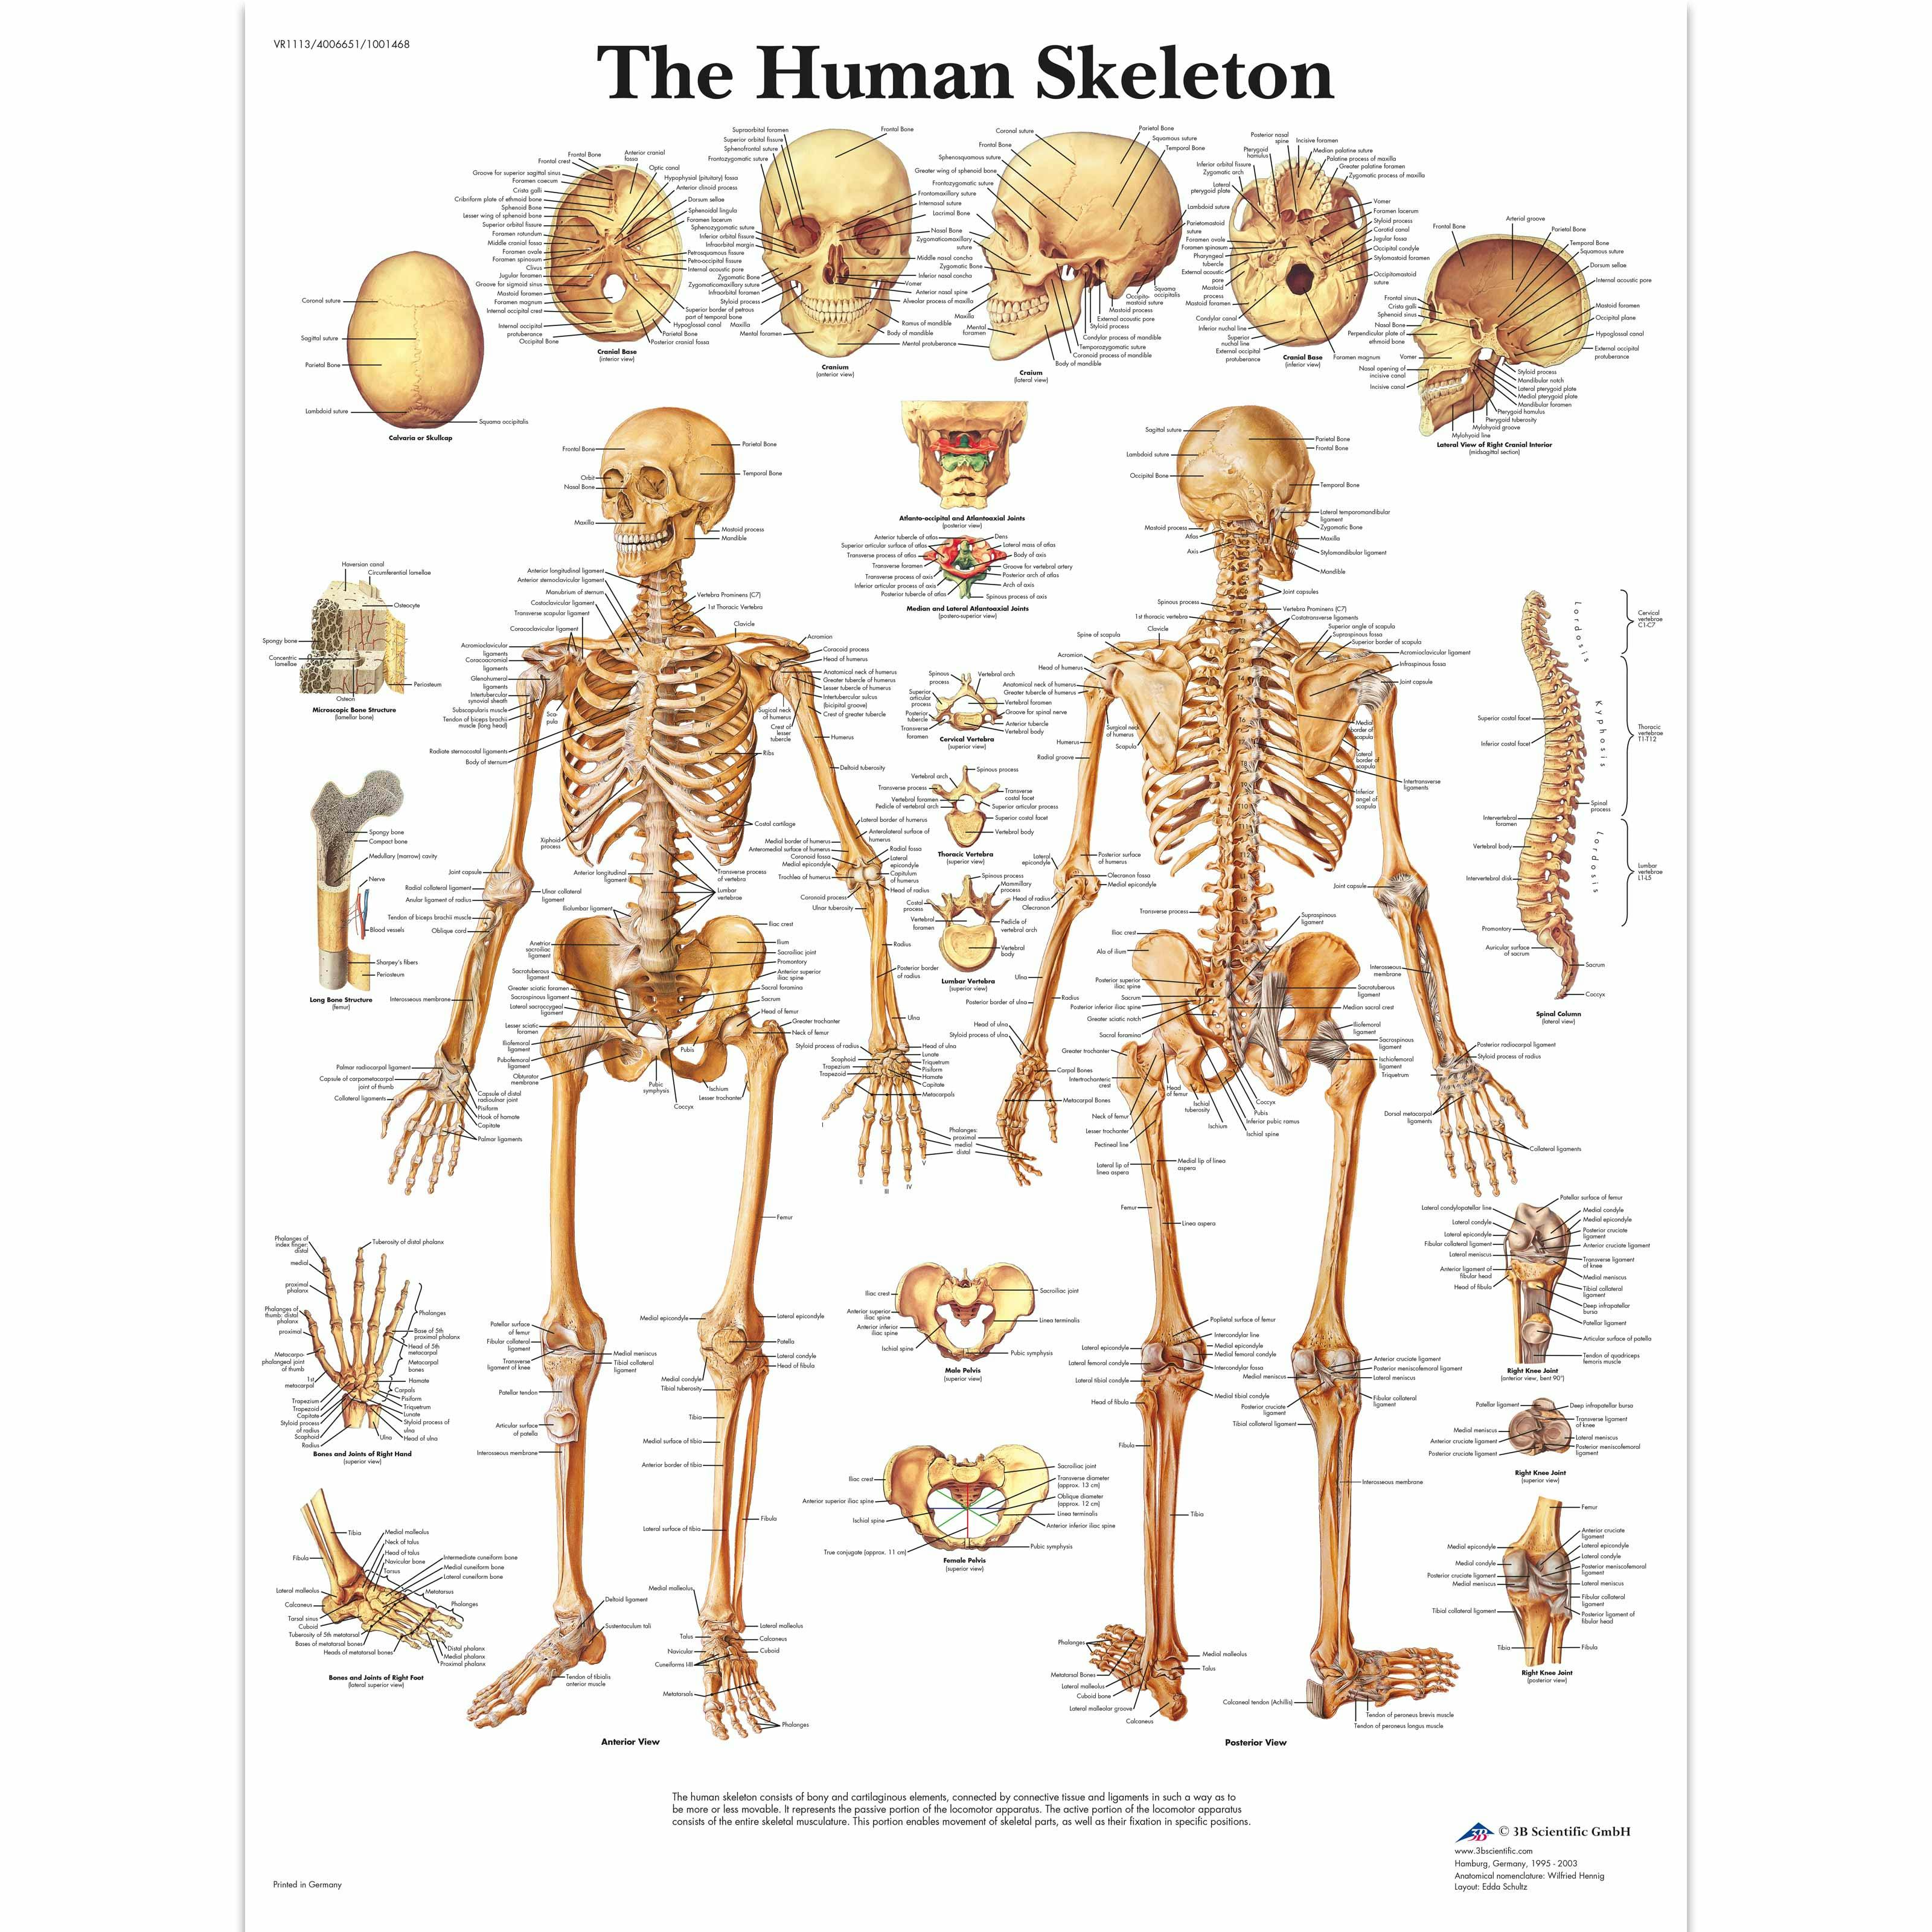
Ahmed Aldoori’s stick figure

The skeleton

Anatomy terms:

- Superior: In the direction of the head; upper direction
- Inferior: In the direction of the foot; lower direction
- Anterior: Front
- Posterior: Back
- Medial: Toward the center of the body
- Lateral: Toward the outside of the body
Here’s an overview of the main bones / skeleton terms that are useful for drawing:
1-1_skeleton_colored_labeled.jpeg
1-1_skeleton_colored_unlabeled.jpeg
1-1_skeleton_uncolored.jpeg
By Arucelli
You can use the 2nd and 3rd pictures to quiz yourself about the bones’ names and delimitations.
There are 7 cervical vertebrae, 12 thoracic vertebrae, and 5 lumbar vertebrae. (Singular: vertebra)
To train yourself, draw skeletons on top of existing pictures of people. You can look up “pose reference photo” or similar terms on or .
Examples of people that have done it:
9.jpg
10.jpg
11.jpg
12.jpg
1.jpg
2.jpg
3.jpg
4.jpg
5.jpg
6.jpg
7.jpg
8.jpg
Examples of reference photos you can use:
6aa5c911d7935ac43e2b7f02dcdc8287.jpg
57a403c634947152e35d6dbe4d855909.jpg
5559a78b857e22c5b52c8d88369ca4d9.jpg
8622a5651ef9a9aa0877d9a8d4f7153d.jpg
a597099ef1f7e1ad4b30ca56699ffa89.jpg
b691f3646c6ed5826fadc0ad0be41ab8.jpg
VR1113UU_01_3200_3200_The-Human-Skeleton.jpg
A very realistic drawing of the skeleton, to help you figure out the details.
3D models to help you understand the skeleton better:

The muscles

I encourage you to learn about each individual muscle once you’re familiar enough with the general muscle groups and can pose a character under most angles and poses.

Anatomy:

- Muscles originate as tendon > muscle tissue > tendon
- "Belly" = the thickest point of the muscle
- "Heads" = The multiple divisions of a muscle, connecting to different insertion points.
- "bi-" = 2 heads. "tri-" = 3 heads. e.g: biceps or triceps.
Feet positions:
Bent forward (as if jumping): foot in a plantarflexed position

Video tutorial references:

Sinix’s Anatomy quick tips

Book tutorial references:


Fat

Share
 
Want to print your doc?
This is not the way.
Try clicking the ⋯ next to your doc name or using a keyboard shortcut (
CtrlP
) instead.