Skip to content
The Accelerometer’s Y-axis is controlling pitch-bending. The Accelerometer’s X-axis is controlling a wet/dry effect panning functionCurrently this only contains a reverb effect that increases as you tilt the handle to the player’s left side.The Accelerometer’s Z-axis is presently unused :(Digital Button 1 is used to switch through 4 presets:OffPitch-bent voxVocoderClean voxDigital Button 2 is used to activate a loop function and executes three different functions:First press activates Record for a duration up to 4.5 seconds and rewrites this into a bufferSecond press stops the recording and automatically loops the recording from the bufferThird press stops the loop.
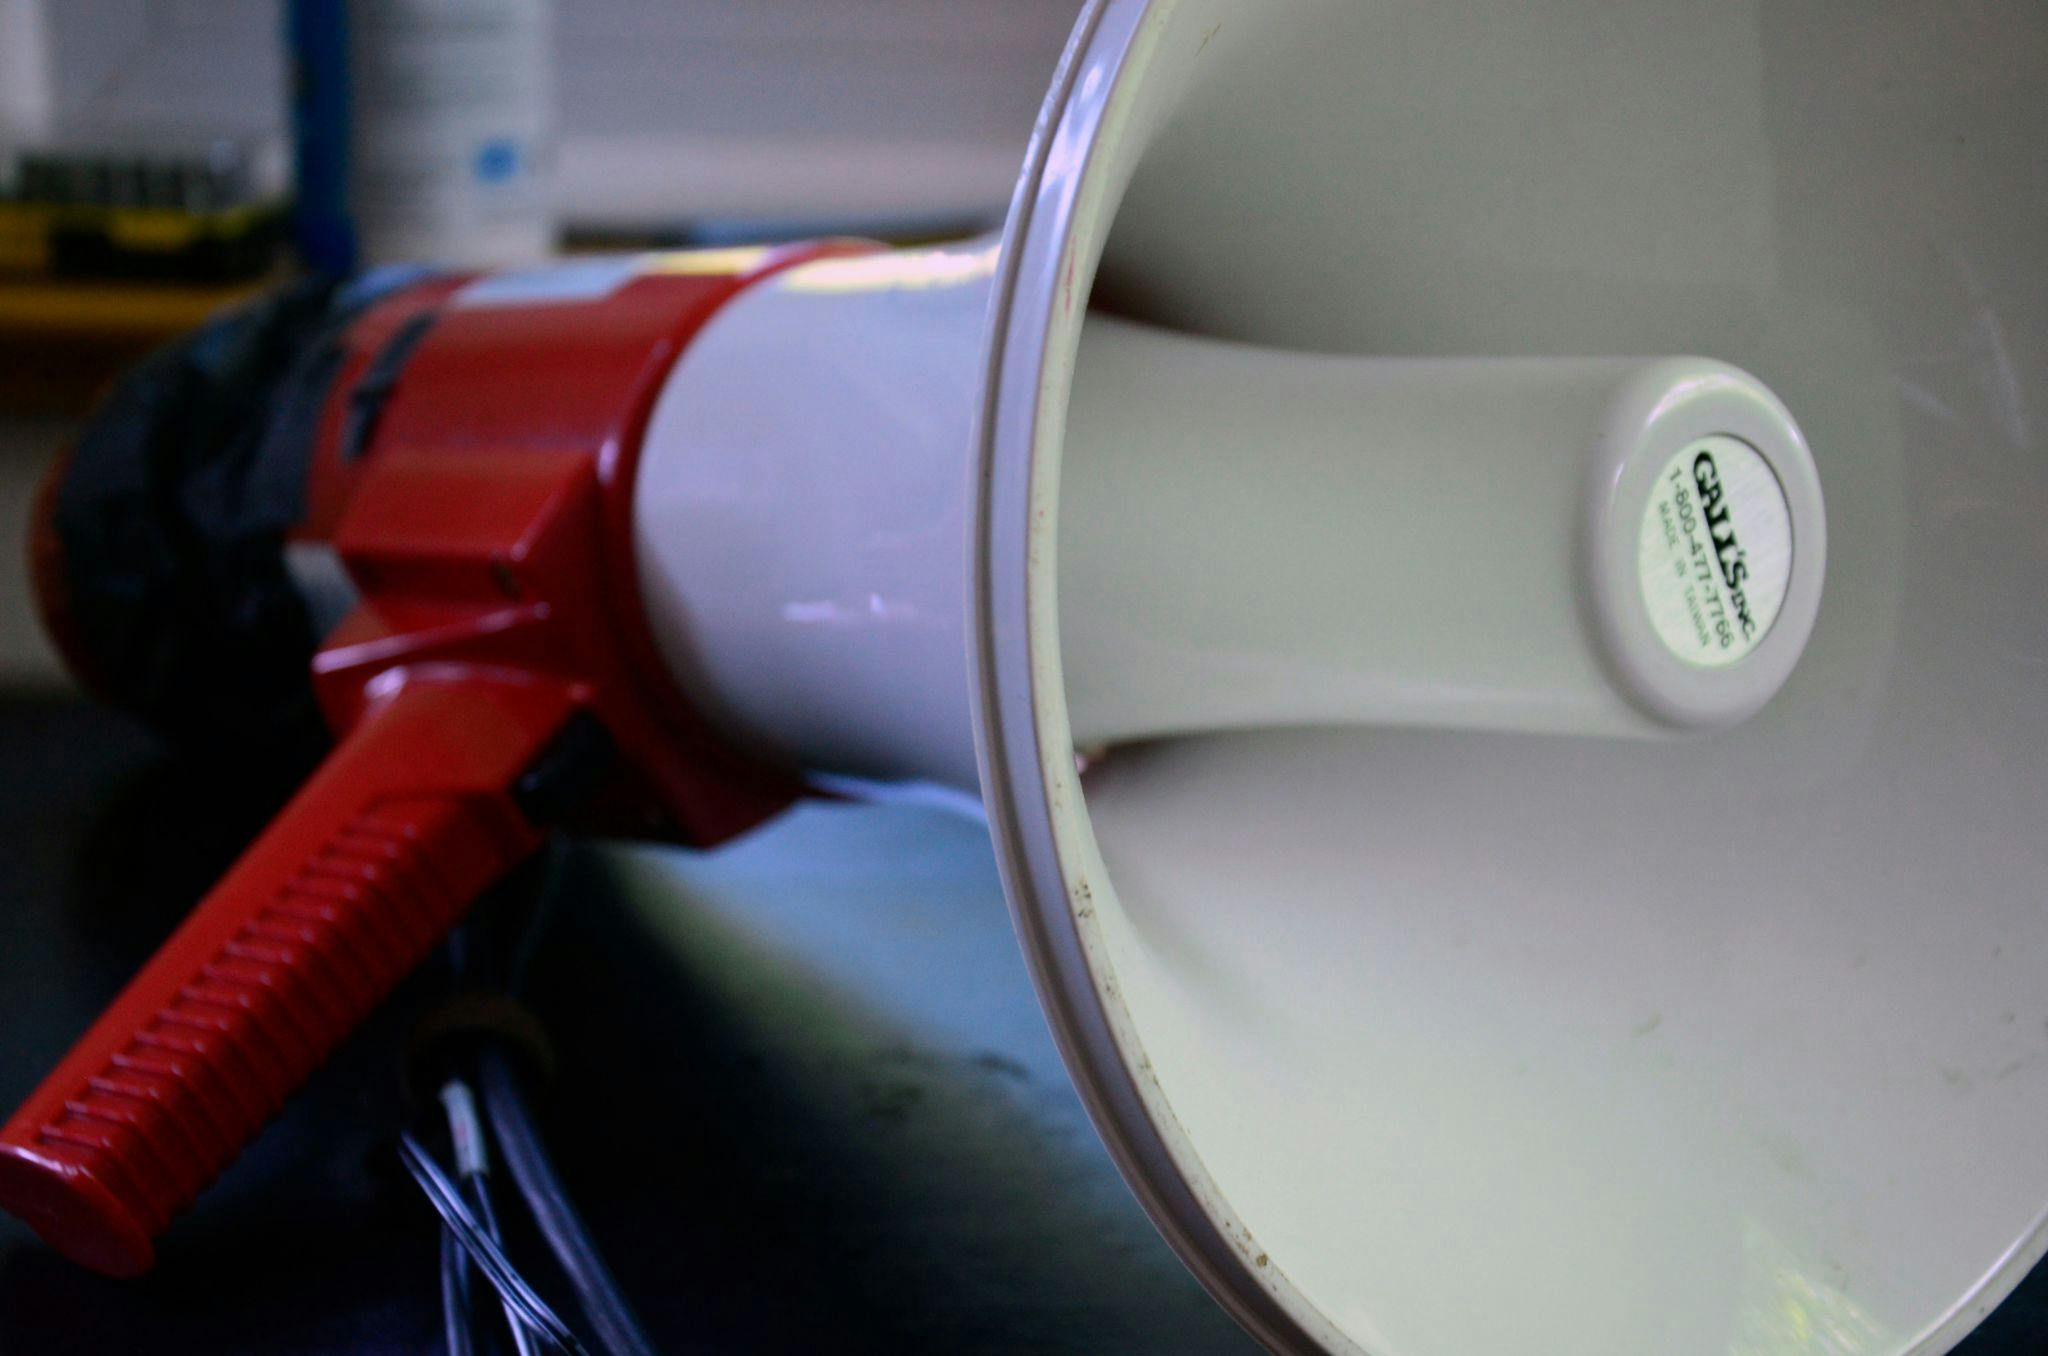
The Klaxophone
Instrument Summary
The Klaxophone is a hacked Megaphone that uses an Arduino Uno to process input from 2 digital buttons and an accelerometer all contained within its body. The data from the Arduino is then sent to Max/MSP via USB. The original Electret microphones from the Megaphone have been rerouted to an XLR cable that runs into an interface. Finally, a quarter inch cable has been soldered into the place where the electrets were originally connected on the megaphone’s IC.
Max then uses the data from the Arduino and the sound from the microphone to process the sound. It’s doing a variety of things to the input from the microphones:
As for power, the megaphone originally required 8 C-batteries to operate. I removed this compartment and wired the contacts to a small 12v wall-wart. While this maybe limits the mobility of the device, it doesn’t require me to find C-batteries.
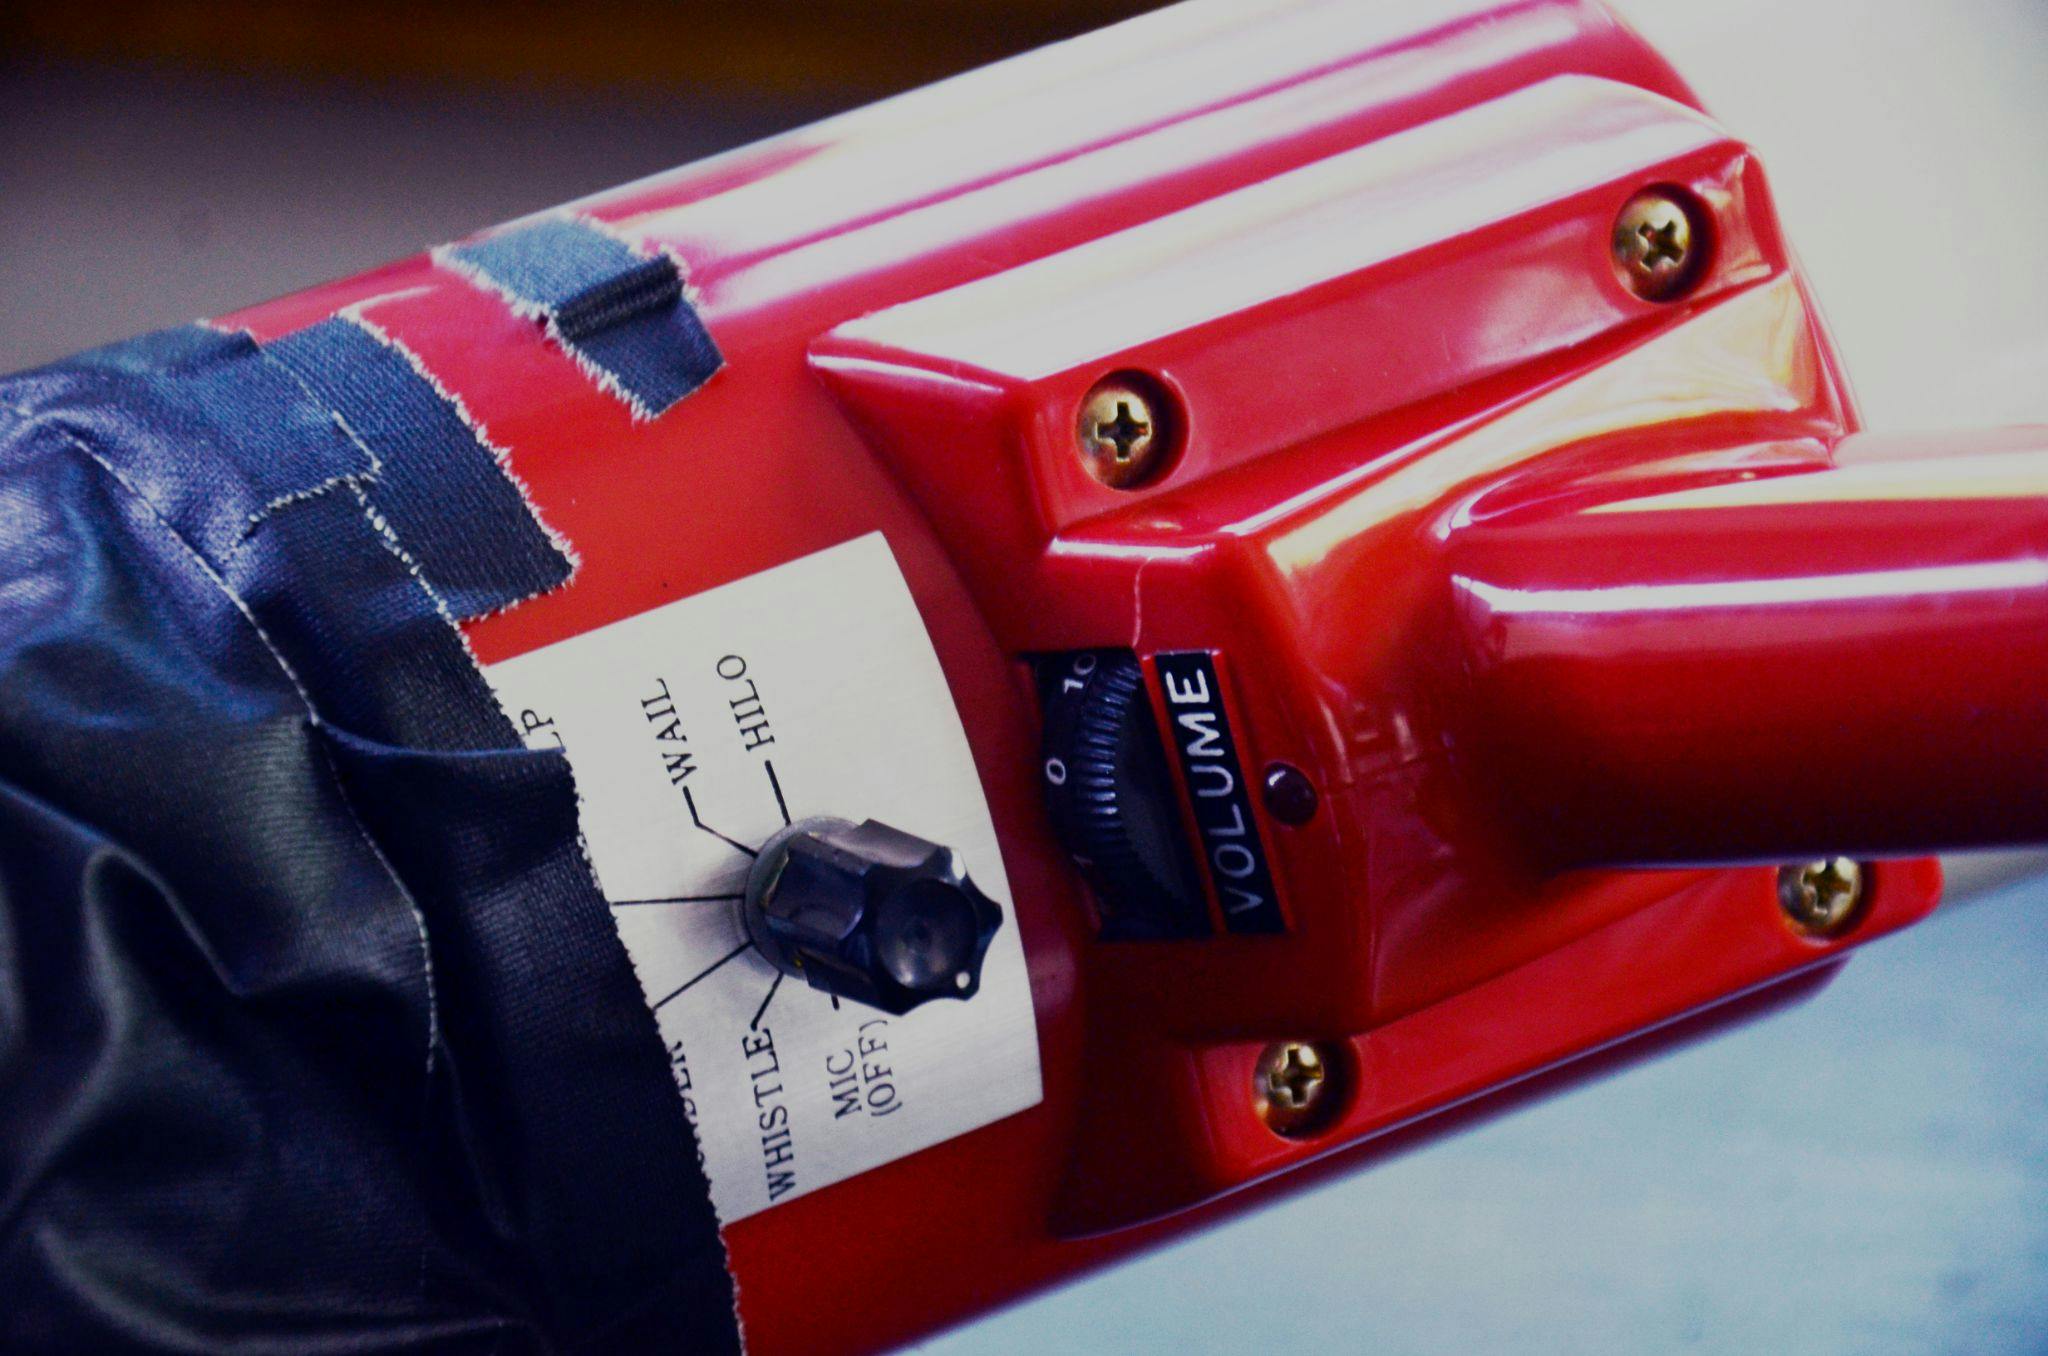
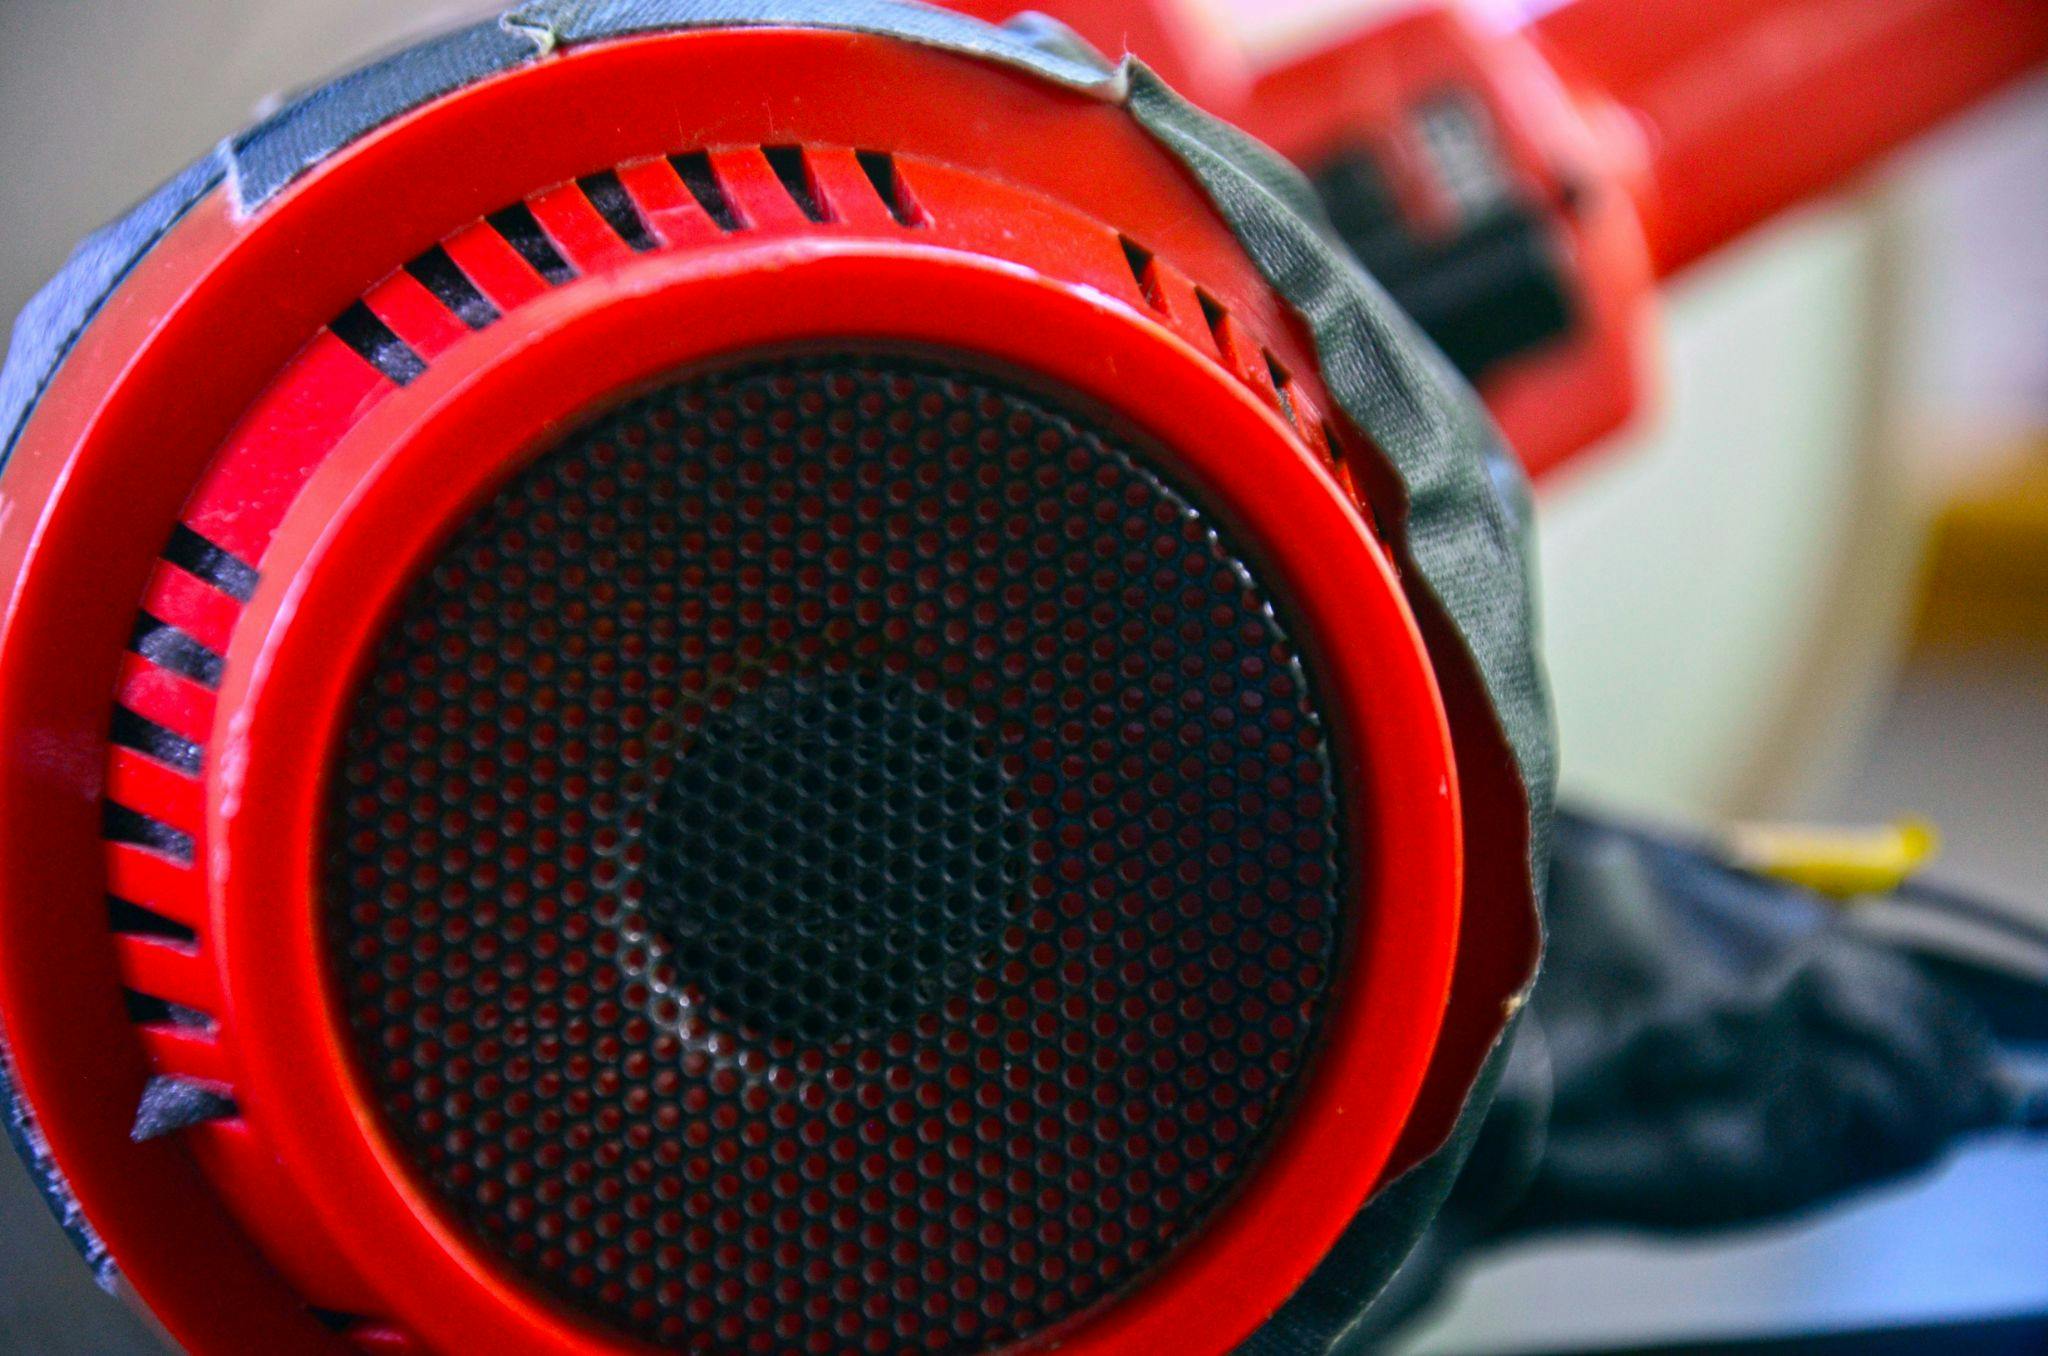
I kept most of the original functions of the megaphone as well. The trigger activates the speaker. The volume wheel behind the handle is the final gain stage to outputting signal from the megaphone speaker. Just behind the volume control is a knob that switches between various tones and this still functions as well. I was also able to put the original microphones back where they were - if anything I actually improved them with tape and foam insulation to help combat feedback.
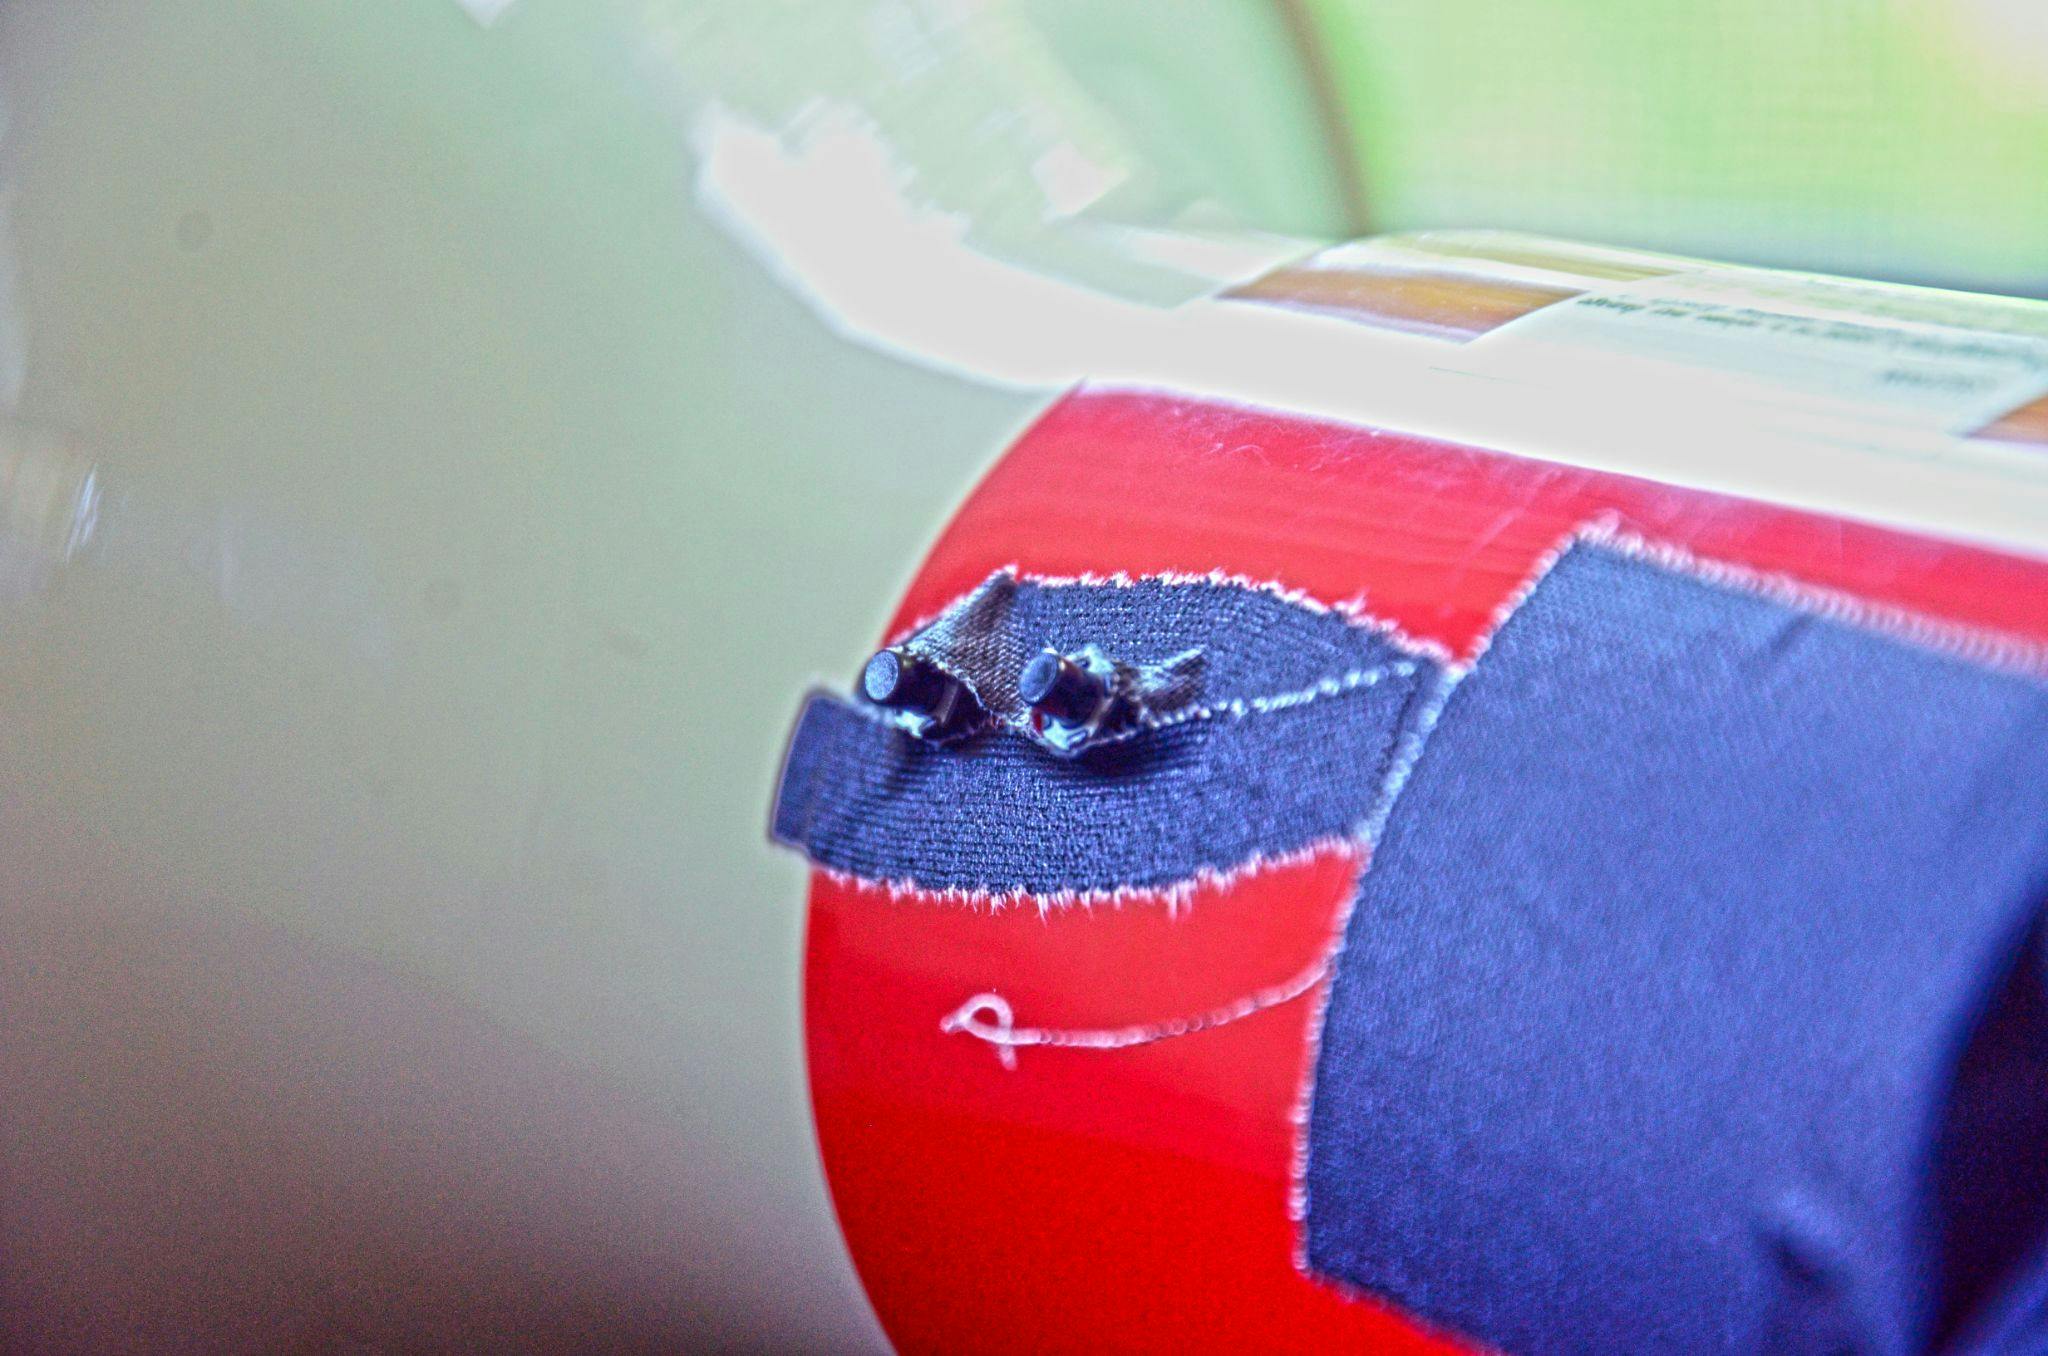
Finally, to achieve some structural integrity I used cardboard internally to hold the Arduino and the accelerometer. The two digital buttons on top are simply sitting on top holes I drilled into the plastic. They actually hold pretty well without the tape, but I felt the tap would quickly ensure they don’t move during usage.

Yes, that’s a bit of solder on near the edge of the cone...
The Name
The Klaxophone gets its name from the Klaxon - defined as “a type of an electromechanical horn or alerting device,” by Wikipedia - and “ophone” denoting an instrument and referring to the original megaphone that this was built from and continues to be.
Performing with the Klaxophone
Challenges
You might’ve noticed all of the Gaff tape covering this device. This almost wasn’t necessary, but when it was finally all put together the one tiny thing I didn’t account for was the rigidity of a USB type B cable end. Everything but this port fit with the microphone compartment attached. Seeing as this is a vital part of the instrument and with due date looming, I opted for one of the most valuable resources in the world and didn’t look back.
In terms of performing with this I was struck with the problem of this megaphone and what it represents. This device, originally named “Street Thunder” by the manufacturer, has a memory bank of tones that you can switch through with a potentiometer just behind the handle, near the volume knob. These stored tones are all very typical police/emergency siren songs. Given the current strife in the world, I found this triggering, disturbing, and incredibly ironic, as I had started working with this instrument before the protests started. I feel that there’s an opportunity or perhaps a necessity to make a relevant and striking performance with this, but at the current moment I don’t feel I have the capacity to explore this. I hope to keep trying over the summer of 2020.
Another challenge was gain structure.
Next Steps
There are quite a few things to improve upon this instrument.
It could use additional effects in the opposite pan direction with the X-axis effects. I do have hesitations though as the fidelity of the speaker is limited, so ensuring that the effects are efficacious is a concern.
The Z-axis is currently unused, so there is room there for further functionality, however, in terms of considering playing the Klaxaphone as an instrument, rotating the thing too far in any direction wouldn’t make sense as the speaker is directional and at some point the performer would end up pointing the speaker back at herself - but perhaps this could be a desirable effect? More thought on this is needed.
I feel that the loop function could be explored further for quicker implementation. If it had several buffers and could somehow access them in an easily controlled way, many interesting possibilities would arise.
The Code
Arduino Code
**Note that there are several lines commented out that are original to the code provided from Sparkfun - I left these for personal convenience but they aren’t necessary for the Klax-code.**
//This code is for the Klaxophone project by Anthony Groce 6-9-2020
//This is code for the Arduino Duo using the sparkfun ADXL337 Accelerometer and 2x digital buttons
// Make sure these two variables are correct for your setup
int scale = 3; // 3 (±3g) for ADXL337
boolean micro_is_5V = true; // Set to true if using a 5V microcontroller such as the Arduino Uno
//int xread; //variable to store scaled x
//int yread; //variable to store scaled y
//int zread; //variable to store scaled z
const int buttonPin = 2; // the number of the pushbutton pin
const int buttonPin2 = 4; // the number of the pushbutton pin
int buttonState = 0; // variable for reading the pushbutton status
int buttonState2 = 0;
void setup()
{
// Initialize serial communication at 115200 baud
Serial.begin(115200);
// initialize the pushbutton pin as an input:
pinMode(buttonPin, INPUT);
}
// Read, scale, and print accelerometer data
void loop()
{
// read the state of the pushbutton value:
buttonState = digitalRead(buttonPin);
buttonState2 = digitalRead(buttonPin2);
//float xread, yread, zread; // Scaled values for each axis
//if (micro_is_5V); // Microcontroller runs off 5V
// Get raw accelerometer data for each axis
int rawX = analogRead(A0);
//xread = mapf(rawX, 0, 675, -scale, scale);
//int a1 = xread >> 3;
//int a2 = xread & 7;
int a1 = rawX >> 3;
int a2 = rawX & 7;
int rawY = analogRead(A1);
//yread = mapf(rawY, 0, 675, -scale, scale);
//int b1 = yread >> 3;
//int b2 = yread & 7;
int b1 = rawY >> 3;
int b2 = rawY & 7;
int rawZ = analogRead(A2);
//zread = mapf(rawZ, 0, 675, -scale, scale);
//int c1 = zread >> 3;
//int c2 = zread & 7;
int c1 = rawZ >> 3;
int c2 = rawZ & 7;
Serial.write(255); //clear the sensor input
Serial.write(a1); //first part of xread
Serial.write(a2); //second part of xread
Serial.write(b1); //first part of yread
Serial.write(b2); //second part of yread
Serial.write(c1); //first part of zread
Serial.write(c2); //second part of zread
// check if the pushbutton is pressed. If it is, the buttonState is HIGH:
if (buttonState == HIGH) {
Serial.write(1);
} else {
Serial.write(0);
}
if (buttonState2 == HIGH) {
Serial.write(1);
} else {
Serial.write(0);
}
delay(20); // Minimum delay of 2 milliseconds between sensor reads (500 Hz)
}
Max/MSP Code
<pre><code>
----------begin_max5_patcher----------
9745.3oc48s1aijjbfetmeE0IX3O3smxYDQ9bgOCauFvmguEvmm0F12NKFvV
hsZtKEKcjT8L8X3929EQVjTTjYQlEqrnD7zpU2TrJwrhHiLd+3+7ad2Men4m
lt5lpec0uu5cu6+7ad26huk7FuayO+tadXxOc67Iqh21M217vCSWr9l22ds0
S+o0w2+u6o0qaVTAUea0uq496mOsZ6sr3oGlsX9z0weeXyaN6t3uUyG9ieKA
18t0lmVu8dUad2Gmr91OMaw8+vxo2tt8Y05C0Tv48JqI.JRqbuuB.SnVEP.B
7a3CVGX420npUuuB4+s5OHef+Wey2H+y6GH.+iSW+Wd2xuT8vreJeH0zaHEr
DUSjxBZR6zFm25YfxZz0FMQj1qHiGPmd7.0mV7zpo2kOTp6MTR7SNZ7VkWaQ
OnLf.NJGTC1fwvPoN.VOQuuxf0VL3XfGofIPVXDf3aaVrdYy7UU+KS+7zkeX
60mOawzaadZQ7lvrwGTuwGnroidsGbNdWVAXPvGLryTAgc+QaX7gV1y46urX
f0ylutZ4r6+z5722wRsuqCuR66Qnd9zO1CfFJ0lKR0Zl0kS1XMZj73UBn+6m
8wONcIekpebxWpV2TMuo4w2W8gmVW0dxuZ1hpaeZY7VhvyvNOn78FkwnjZfY
9QNcvGBdqlQNAplwHAm04Yt8fF86XAV7iC+ll6lVsZxCONmQGebYyC+5uew2
u36VO8wOMYQ0usoY4zuewe92u3+fgmm9vzp+0USWt5WWU8a+W+teGnT32u3t
oSV9Ga9zhkSmdm76lDG5yFG55ONjwIJKir3yWZ9UjQPWXMeZy5sFVHpbvSHE
QSsyve4XYn.3AqbnDcWHJ8CQMCx9.kZmziGmrbxCSWOc4OLcwjOLe59v2Kg5
seNsu05u73zVP9lOLYw82T8GNg3UJ.0LsiEcDyOk+SPnhbdFYYXYqdLvmD8N
V8BLxnU92KBMrX5Oxv2QDVyalbW7oLa7SGLbF.NPCtLwAFeDGfkEGvGPT0IQ
.XJDfpmHfOx330WBFfOoTqMpm+iHukBiAJ3VQMiulKN.CgdhCVM69ESletiB
gZj.mR4zh3XOJm68rR0hlmrbXQfbfkV+9JsYPHgSnSctmCvvEnKsCC0NEqPF
yti04PYEYrfmo9r.ZUJxYLVkyF2ka0vhk85B7EGfb2N1xebxBbU963cnDIdl
c72m4dOuWx1LgHxj99.4BBlInXJB9kNjQUdugs0f26gAs2+vzUqlb+ziPG+Y
PkQkK5v0Wd.mF5YaHqUjUasjE0NqVfSfEJ1B8JQZnmU9xOVG+Ek.x9zu0ewj
BmWVPGnBV4gHpfuNpzr9WLqAROFnhdcrvZG2SELxP3Wvj.L0u15itYXLNUzA
xX0sSlOsRIZeU8sPcEjVLoMECC803HB0dDwxpjSFFeoEOtnfQQ5vcK+RtRGL
82DCvXYMA8ZsIv.GaFlGgNDNnYdknFM.qxfB0jgFfzgUymc2zkYq9WnfZGet
cbUsWEXKRcLMNaBZPG0Jz2hOHSPi.XbhlRjs1x+wo.MYUZljfYO.shPEKNX8
F.OdQ3GV6MFbxWs.r+HnN4VbLKyO1r7gIq2+LWJuSxpG4XbDQjK9EiMXTXsC
ADBDDDRGQMpM9q6ROnzWTi50G03MPM+sCX9HN13RzwpTGTtZ9kjGLFuFD6MF
LtoK8rmO6wJUcknVeZdoTBLm2WRdoIwAdMU6E2coLrJ1fyXY5CGMF3f0ydnC
FNoT7za5oH1Vysd+EgD.wguL6C98QhE7ZYBAxLJ5apxGCTVIorDiZh.P4HTw
rVMhg0Igb1ZEyH.4P9PNURHOHBTXcGM..rxBJPXAdMA7drkiEEvMl5.nTh8y
rMnr40g2p63tPQAbDpMFkVYAQgAV4wQBv6R84oy4mkJnBqnjn.cBTfoCaJzm
zAau+3+u+nFmEqM1fSEBfQIQ.gQMtwQPn3x4oKYbSZLiIElwzSLyrEsBB17s
7i8GmHjFdKxmeXKObNmlU3zNLqv6mKoQyU0kzIwBLsvwTFiiGo2dnIadFl95
ZpK+.hk4jZYlFnN3HuMLlZJ9I9obZ9zHc3QJ5TJPu47wYOWv5GqNBU.Diezd
EZbJRiQCJz9q44Bc3ZdtPC5TwJFBGG1zAdvnm1Uocu91Ug9PMZYKmXFD7gDX
CxgOCcbLkupFcpMu9HmNxxfQ.4zEK0GmOacEoECO6icmZ5Rs857w7JIRgEvT
KQIwiVGYYijIVXqmFObBxKXEaGTOvI30FmvJf3Ydc.xbfXIRtfYrvIQuSDQI
8iLAJoR6IQB9.V6AuDfHlxfQFJAIbc4j7Fv8U5fu15rJsyqzjwXg2Ft16RbK
7UgK6XfaNYrRHvImfZiYR1AKA82bEbcNq.CwhYrZIeU8LJQbcN3tlDJ3a.Bk
tPOFrVBfTPbFn0yJwDFWREKUEoSrJU9DJtRRn3HEqBhk2U7xgFca5WwV3VKQ
TyoYCdCrHm17CjFkfpI45W0Oy+S9jP8Ocs4MTeMKRyEXFmN1Nlfriya70rlW
rAsdxgdmWhShyTSL.6XaZbhQMCIgG4muOjen0PTOpmMR4Dbd+2vFwYn.eN.f
XZr6Hrl4NXCpnsc5w6XPOMwEgwyD2jXh2.l3hpqoItdMKgXufhP9Qx0OmoJN
vp+26wQ3hxxW7Bppij94fUin13Al+WPhX.ojDOvDFTV91SFCf4ZyXHMlvwXB
xErLqROvBJ0vf4LbhrwBT4GuDnrgHijbNzHH.J3IsEjfCZXYHVF3MjxYTHKc
TO3DQbcrTkxmPnjbCNGKwNvBoDZNRolrjTZ8vOvpwLuzRhLRKfXTRKs6W1z7
YFcHpJU82D0ZBx1.8txV+RklZIwMrfRPTxljr4UpcDIe+o8XWr4Sb0jOO8te
feN4OveXx50KmwxHaKJv2sCGwXsIqlc65mVLS1o90LVdC4tnz+74M+38ya9v
j4qm9viM6cXXiIAKVeayR4IdFK6c+qJHxoKtaGfDe7t4gU6.31aY05IK2.sI
tiGZtaZqvc4Y7lsucyxY2OiQdymt390eZ+e60yt8Os+Gv16b2SOH5bt8pO9o
Iqldpe8Gmw6Ic.f++dZx7Yq+RhGOIMLVsd4TodZZ+vaoWaIXKpkNnWUQ9dZT
LzUFVeYL0s5PMdXRQkxqRC0h3tDowGLpd9a8du1wea17+1jZ8XxjGHDrE09P
.qAuijvkyVO4IRhGbHjvkJQ4fNaYY58yyqDJzIOTAYqK.aU+M8WinSS5HIh8
AjNNq5XrfaTX8+W1KnuuIPw4TCH44FzcLvONoPgPBzg+kRpCfp3a9If+jGAz
Czk78ylfmKCqqkMAVOdTVkFDfVAZ9cUFmS4JP7v6WBIiJ7ZkQxonDRh.Xg2A
qyoUfTrid19Mw+Yhq1jTvxxZD4.xhWExD5pSlXs0NWfBVj7jT4BfjDML2Rm1
PZx4UFvg1QyzwVYo5MxTM6Imc+WSCSNqun9gUy1QfrvUwAKAI14F6ae4rdeo
Y0RLoyQQv4JKnsNeIskuNPSGBqTBaIbLP.8SXKDfhSAjBA75KsEBWcWySVWs
GMDKo.YIIJTLMYLXidZC2rJIU.5oga9hZ3V5XdeMsbiEjWQgPk7+B1n8aXuu
iu2fjnXJp.EoVxrFkiTdwk81Xoi9lWfBVZ1Ihu6eAoiT8buYEn3Kt7jzGcdy
JOoqBc4xI.Rh.FC4IcEPqniCiMzlrk03U8OvUNrlMpPyfHyPDzRX6.JTqkX3
5YSQXdjj2rq+YnJNT17X+.xtpyidBjnSTbl0ZlYzwBJY0xiApo1Kle38fgYB
Jg5u3PL+X0r7t7A29WOvNitVd9YH1wfGafYrGPPx65DgdAumzf3Uc1tTSvnU
LANJVXZBC.h6W.pAm8p1tbhslqCaDSIoBFXLo5IZv5txnAcsPQf7K7Roqprc
bhebBM2+CQxVOZZNfUW9llSK7xGzCr1w1.a4LqjCxZ9v1QymC3mOuiOEEOeL
JpEZ5CFvTTOyCPvV6.k0pBjlIBPcrTU0079tViLFg4M.EvcbcVLi8.zMks.V
SwCf.KKomDmtw66Vks.ImPGD+yV7wlu1qbVC5pDkBmMowmOa0dIOdluHmLdJ
8wGv4pYiKUBUjgUHiHX349Wqw165uLerYw5ELOx309aWNSBzblTRDs+GxGmb
Want to print your doc?
This is not the way.
This is not the way.

Try clicking the ··· in the right corner or using a keyboard shortcut (
CtrlP
) instead.